AP Simulation
Introduction to AP Simulation
The process of simulating an Access Point's (AP) behavior in a network environment is known as an AP simulation. Without the requirement for actual hardware, it simulates the functions and behaviors of a physical access point (AP), enabling testing and validation of network topologies, applications, and deployments.
Benefits of AP Simulation
There are multiple reasons why an AP simulation is necessary:
- Testing: It lowers the possibility of mistakes or disruptions by enabling testing of network configurations and applications in a controlled environment prior to deployment.
- Validation: Network configurations can be tested under a variety of scenarios for scalability, performance, and security without affecting the live environment.
- Cost-Effectiveness: By removing the need to buy actual hardware, simulating APs reduces expenses related to acquisition, upkeep, and space needs.
- Convenience: Users can simply recreate complex network scenarios and modify parameters with the simulations' flexibility and convenience.
How to Setup AP simulation
-
First download the test utility on your PC.
-
Go to the test utility through the terminal with the command cd and give the path of the test utility folder
-
Then enter a command in the terminal. Give command and enter.
code . -
Enter then Visual Studio Code will open.
-
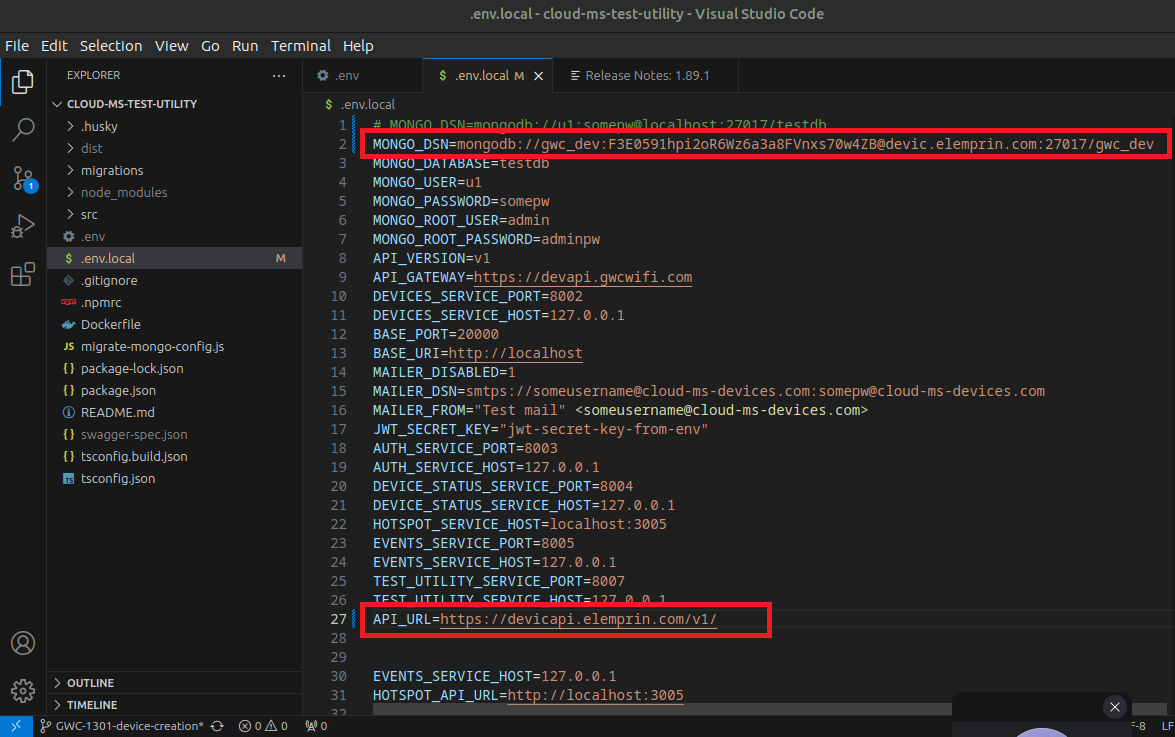
Then make the given changes in the image in the .env and .env local files given in it. API URL is given here for example https://devicapi.elemprin.com/vi/ Enter your API URL in its place. (Edit in the .env and .env local files if not Visual Studio Code)
Address-infoHere enter the address of the server
-
Then save the .env and .env local files.
-
Next, run the given command in the terminal.
npm i --f -
Then install the Device. After installing the device, it has to be registered manually.
-
After that, to use the internet, the SSID and Captive Portal have to be connected with the device, and that Captive Portal has to be connected with the SSID. In this way, it has to be done manually.
-
And the simulation is made to avoid having to do this process manually.
-
For that, go to the terminal of your server and enter the command there.
-
Utility:- Runs the file by testing utility.js in the package file in the utility.
-
No of devices:- Enter the number of devices to add, for example, Device:=1. The entered number will be registered in the system first. Once registered, the devices will be assigned to the organization.
-
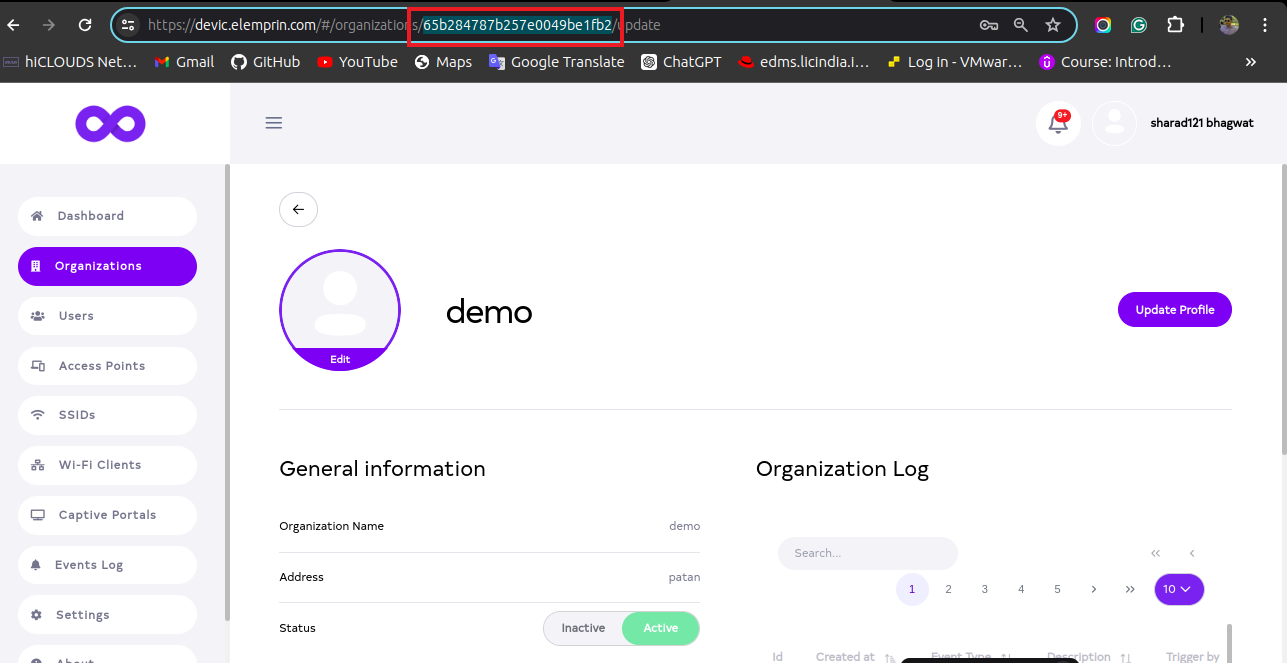
Organization ID:- Copy the ID of the organization to be added. The device will be registered with the organization. Paste the ID shown in the image into the organization ID field here. To obtain the ID, go to the organization, click the edit button next to the organization name, and copy the ID shown in the resulting window.
-
No of SSID:- Number of SSIDs to add. For Example:- SSID=1. SSID is generated after the organization is registered.
-
No of Assigned SSID:- Number of assigned SSID to add. For Example:- Assign SSID=1. After the captive portal is created, it will be assigned to the captive portal SSID. After the SSID is assigned, it is assigned to the SSID device.
-
No of Assign CP:- Number of captive portals to add. For Example:- Assign CP=1. Captive portal will be created after SSID becomes proper.
npm run test-utility noOfDevice=1 organizationId=62d2983b3c886000327c8d39 noOfSSID=1 noOfAssignedSSID=1 noOfCP=1 noOfAssignedCP=1
-
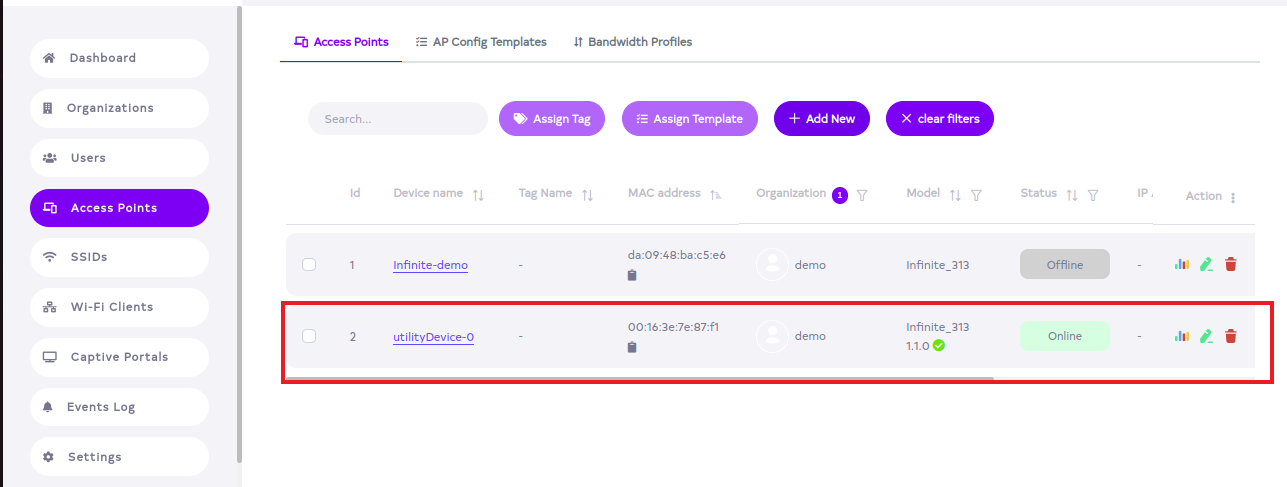
After giving the command,the terminal will send a keepalive request.
-
After that, the server will show that the device is connected and online.
-
Until clicking ctrl+c, the keepalive request will be sent to the terminal and the device will remain online until then.
-
Pressing Ctrl+C will stop the keepalive request and the device will go offline.
-
Running the npm run test-utility command will trigger a keepalive request, assign the AP, and make the device show as online.