External Authentication
Explained of External Authentication
External Authentication refers to the process of verifying the identity of users accessing a system or application by relying on an external source for authentication. This method allows users to log in using credentials from another trusted service provider.
Why do we required an External Authentication
External Authentication offers several benefits:
- Enhanced Security: Leveraging authentication from trusted sources strengthens security measures.
- User Convenience: Users can use existing credentials from familiar platforms, reducing the need to remember multiple passwords.
- Centralized Management: Organizations can centrally manage user access and permissions.
- Scalability: As user bases grow, external authentication systems can handle increased loads effectively.
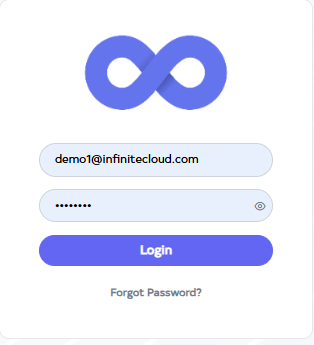
How to Create External Authentication
-
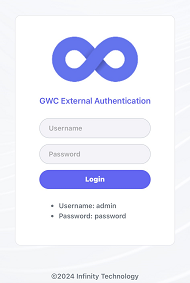
Go to Cloud platform and go there fill the details and then click on login button
-
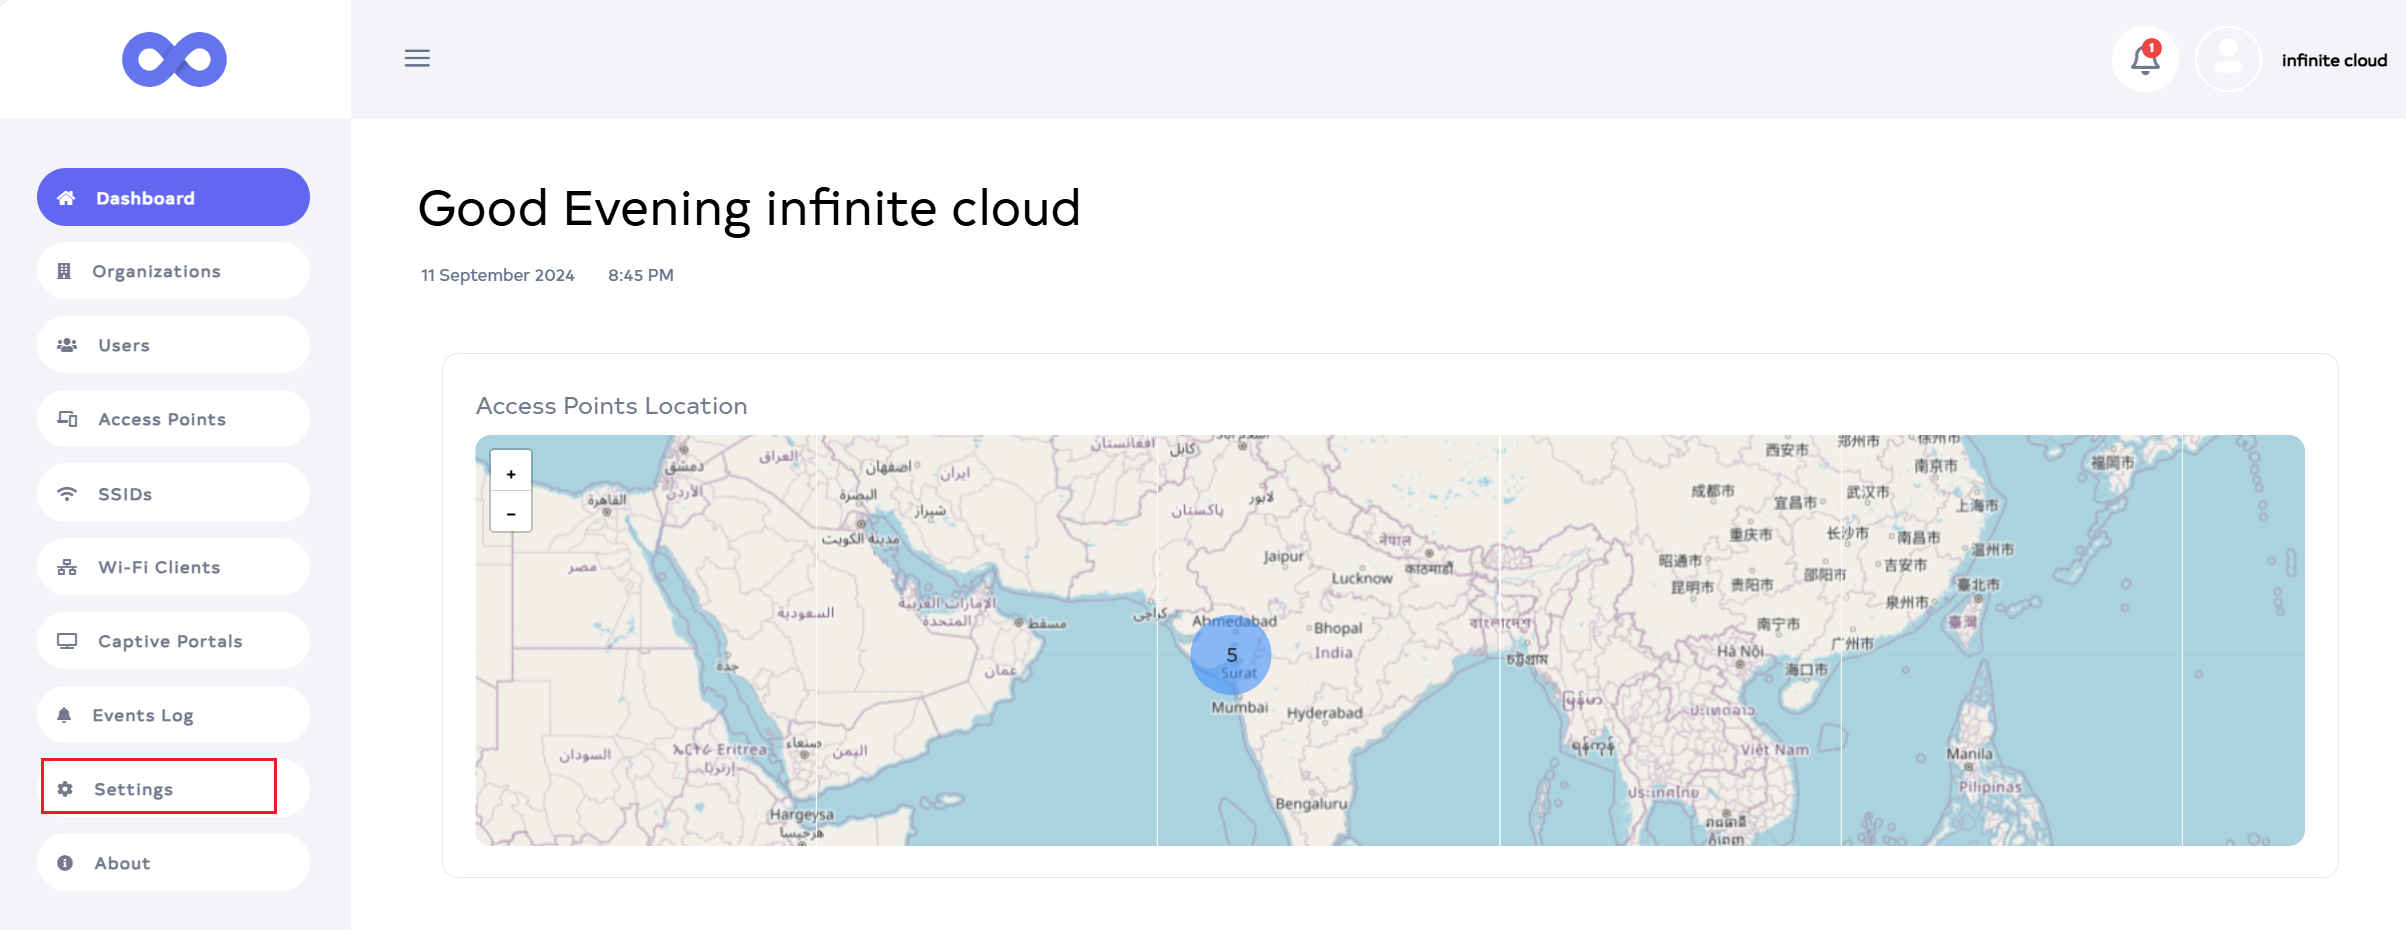
Upon logging in, access the Dashboard and proceed to the Settings menu.
-
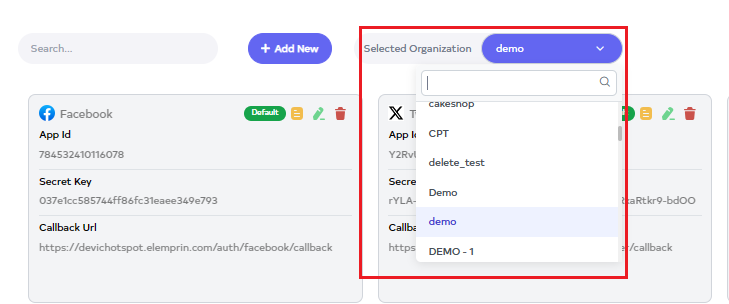
Navigate to the Settings menu and select your organization there first.
-
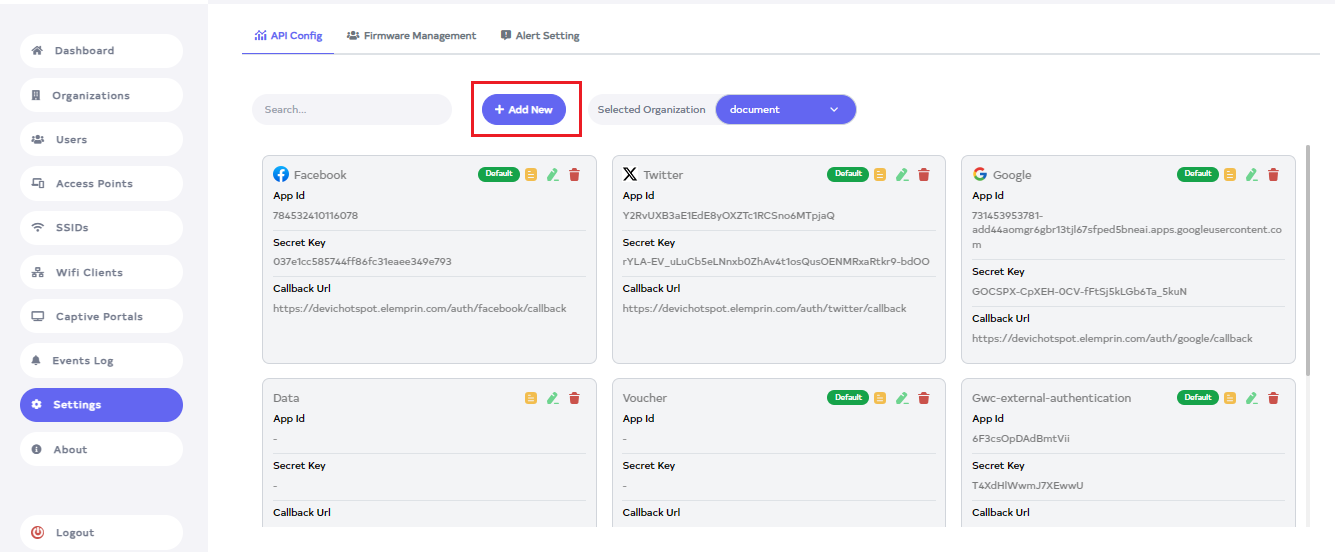
click on the button that Add New.
-
Clicking on the Add New button will open a window where you can input the necessary details.
-
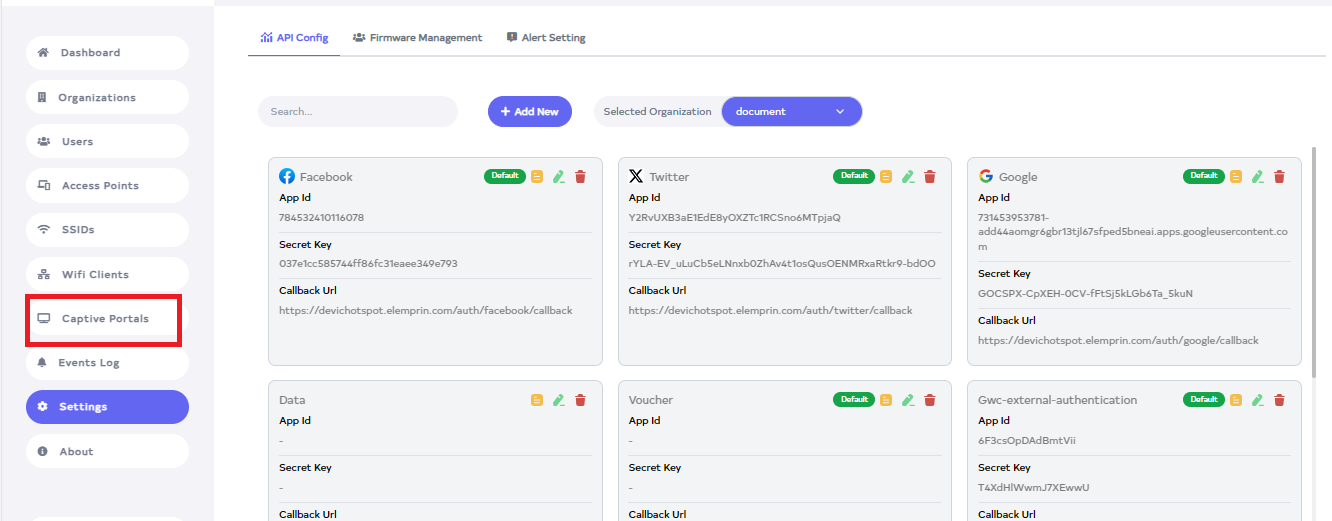
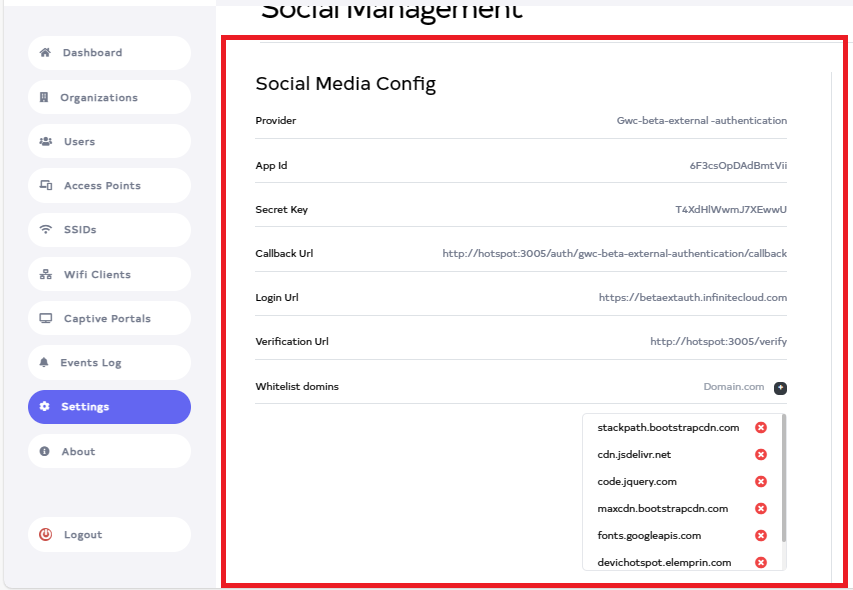
Provider: - Enter Provider For example Gwc-beta-exernal-authentication.
-
Organization- Select Organization for example: demo.
-
App id: - Enter the application key. For example 6F3csOpDAdBmtVii.
-
Secret Key: - Enter the secret key. For example T4XdHlWwmJ7XEwwU.
-
Callback Url: - Enter the config URL in the Callback URL. For example < APPLICATION_URL >/auth/gwc-authentication/callback.
-
Login Url: - Enter the login url. Login URL/externalAuth must be entered. For example < APPLICATION_URL >/externalAuth.
-
Verification Url: - Enter the verification URL. config URL and verify URL are required. For example < APPLICATION_URL >/verifyUrl.
-
Whitelist domains: - Add domains. Domain needs to be added. For example:
1.stackpath.bootstrapcdn.com.
2. cdn.jsdelivr.net.
3. code.jquery.com.
4. maxcdn.bootstrapcdn.com.
5. fonts.googleapis.com.
6. devichotspot.elemprin.com.
7. betaextauth.infiniteclouds.com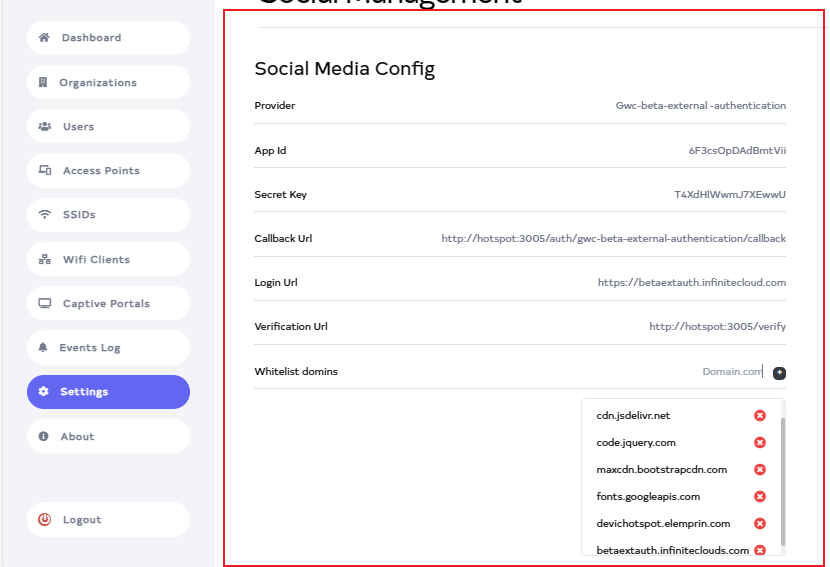
-
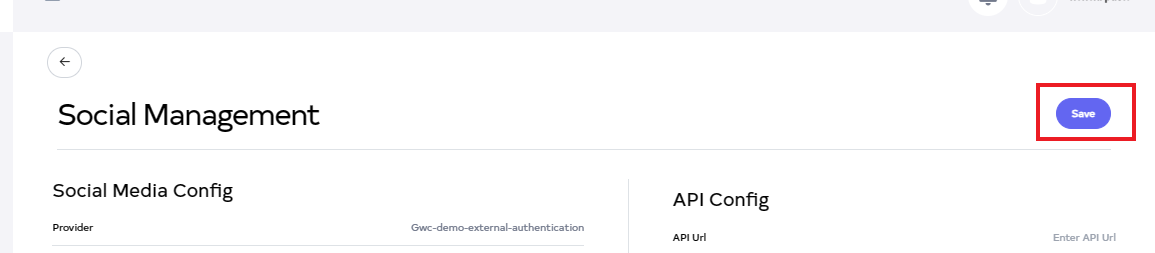
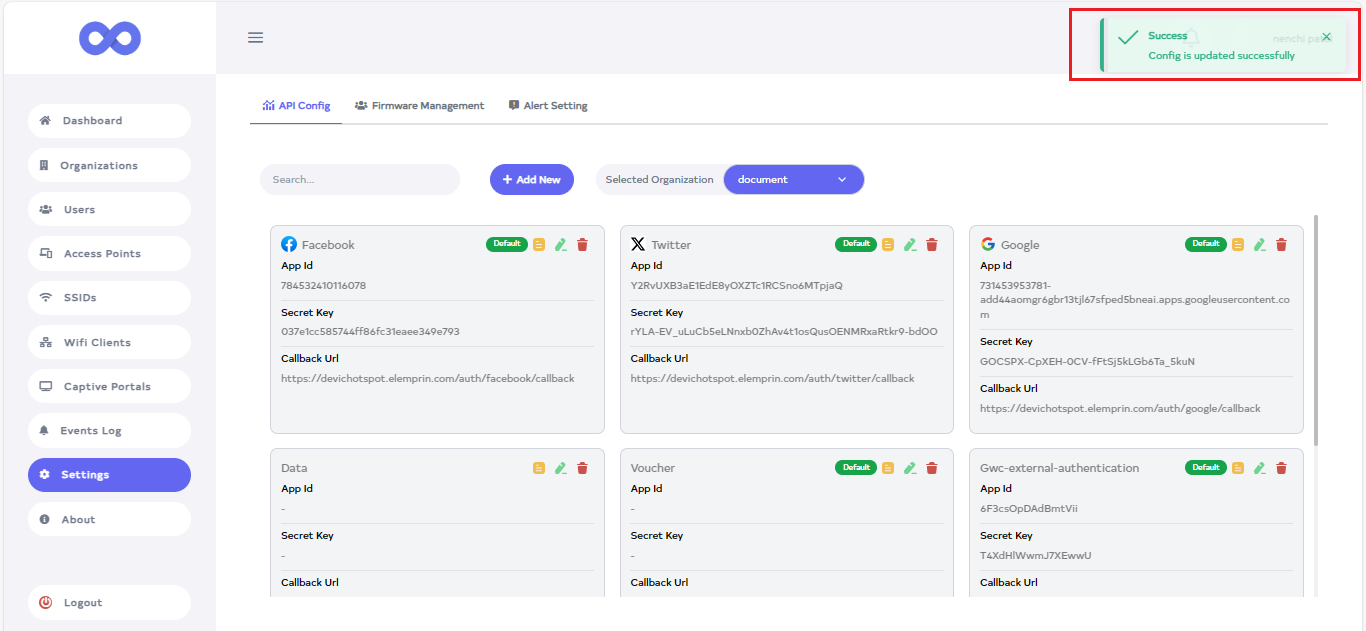
And then, simply click on the Save button.
-
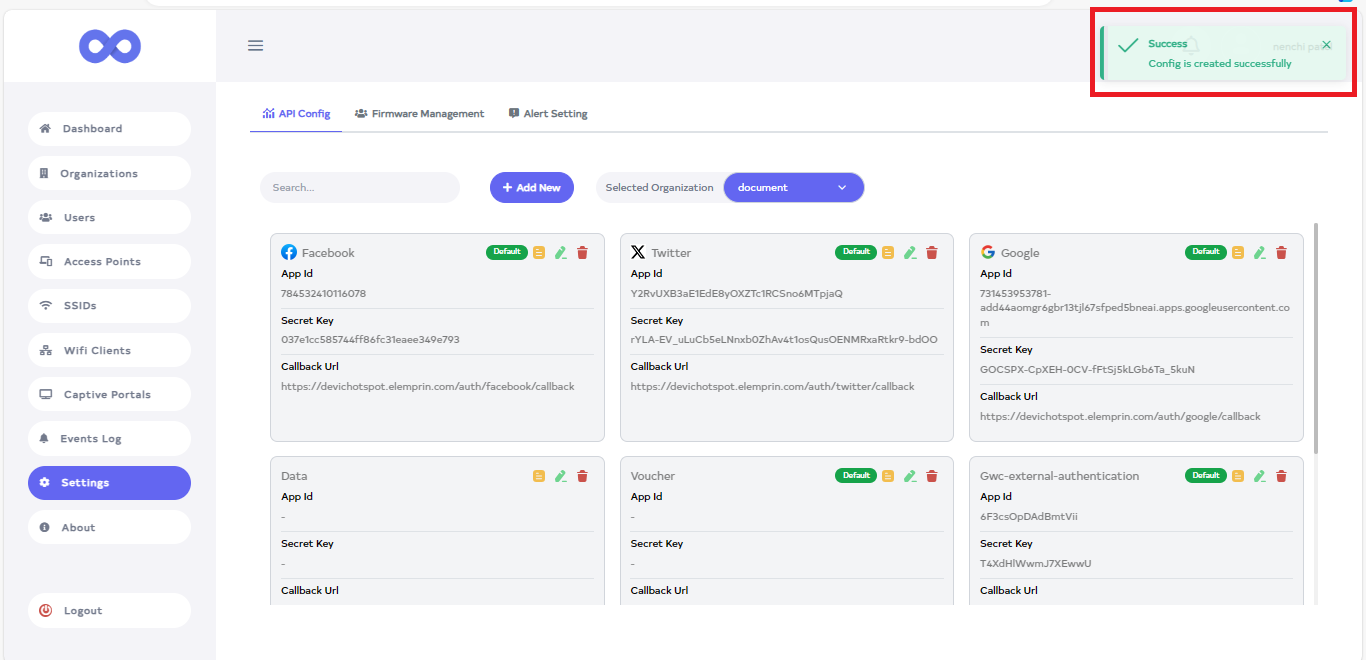
After the External authentication Section is saved successfully, a success message will display Config is created successfully.
How to configure External Authentication
-
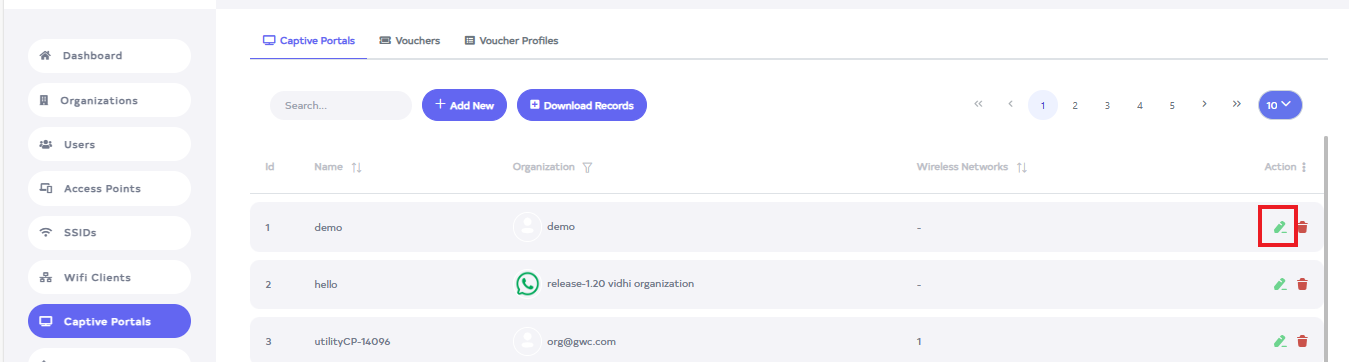
Go to the Captive portal menu.
external-authentication-warningBefore that, it is necessary to keep in mind that your external authentication and the organization of your device must be the same.
-
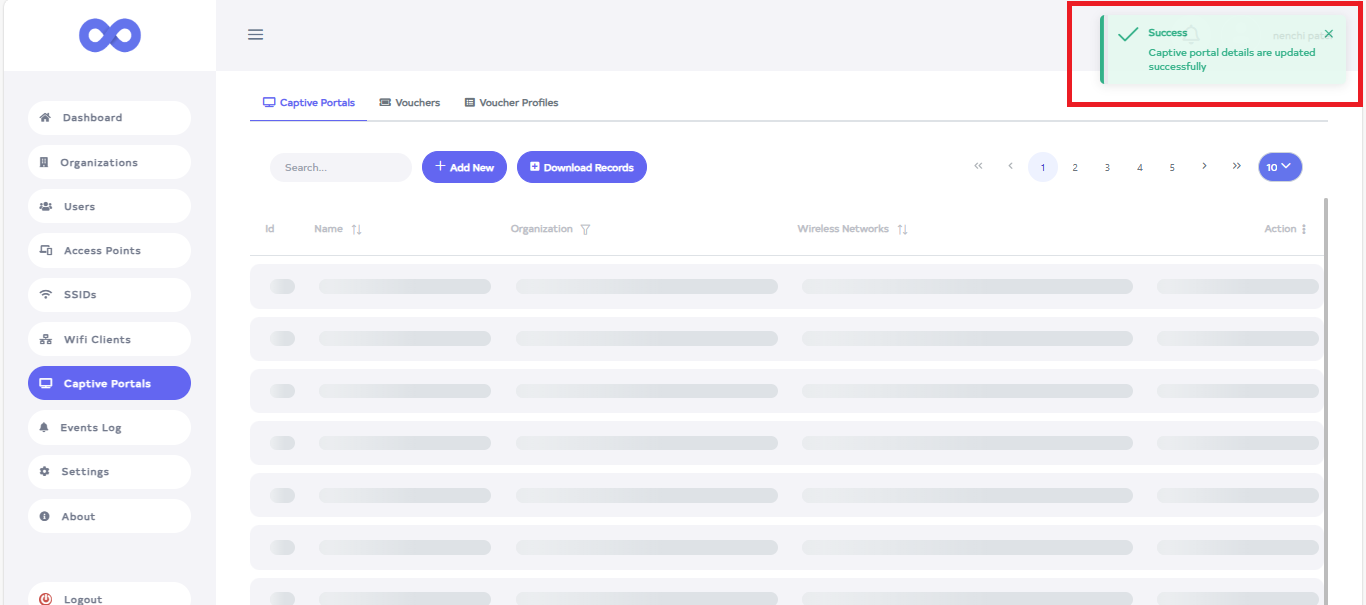
After going to the Captive portal click on device's Edit button.
-
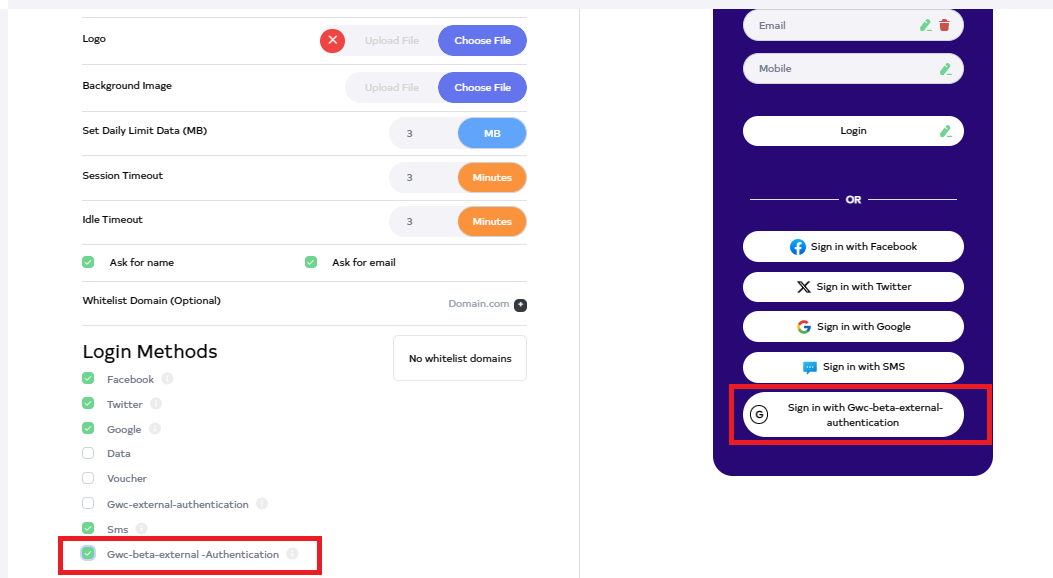
After clicking, scroll down to find the Login method. From there, you can add a new method, which will then be displayed on the screen.
-
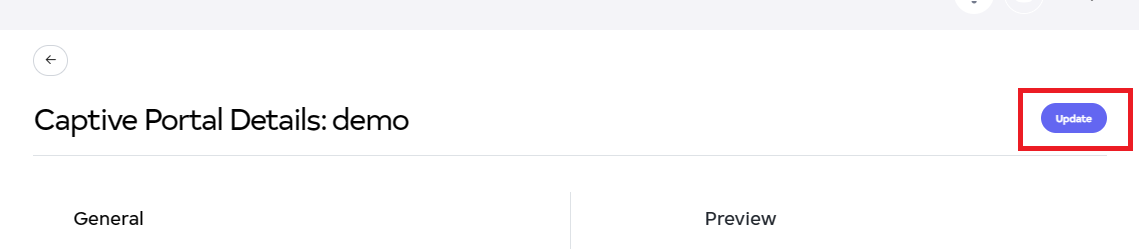
After clicking on the update button.
-
After the External authentication Section is updated successfully, a success message will display Captive portal details are updated successfully.
How to Connect External Authentication in Android
-
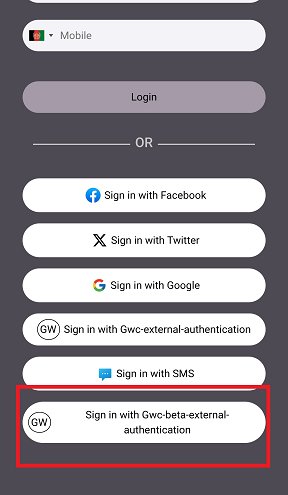
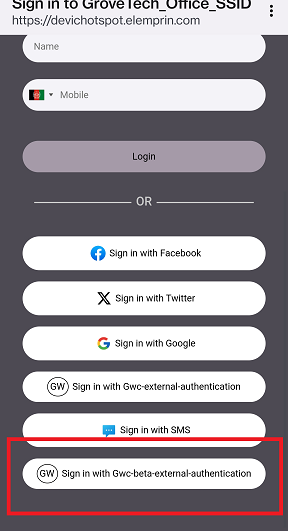
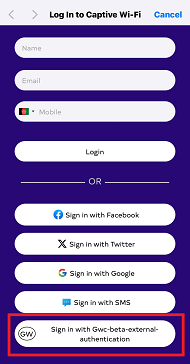
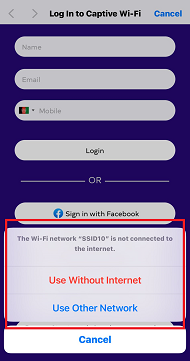
Start by connecting to the SSID on the device, then proceed to click on sign in with Gwc-beta-external-authentication.
-
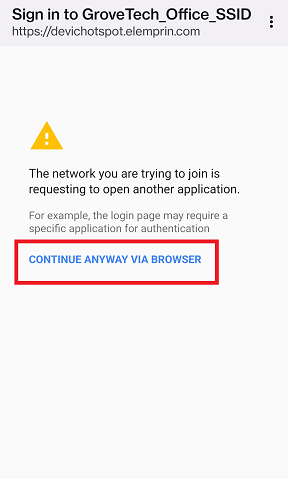
Clicking will open a window. Then, click on Continue anyway via the browser.
-
Next, the page will redirect to the server. click on Gwc-beta-external-authentication.
-
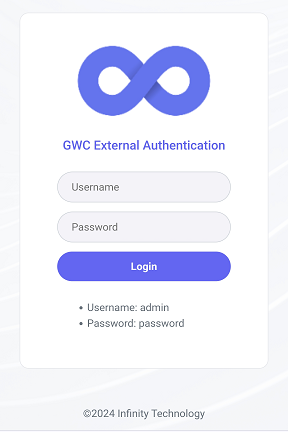
Fill in your username and password, and then select the login option.
-
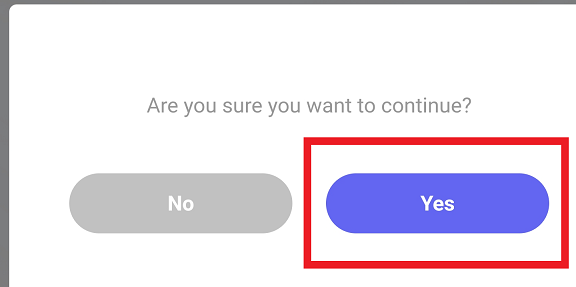
A confirmation message will follow. Please click on the yes option over there.
-
After that, a window will open for connecting.

-
After that it will be redirected to the browser.
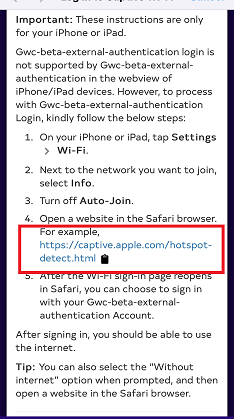
How to Connect External Authentication in iPhone
-
Start by connecting to the SSID on the device, then proceed to click on sign in with Gwc-beta-external-authentication.
-
Open a window where will find a link. Copy that link and open it in another browser. And after copying it close the popup here by clicking cancel button.
-
After clicking on the cancel button. A window will appear, prompting permission to use the network.
-
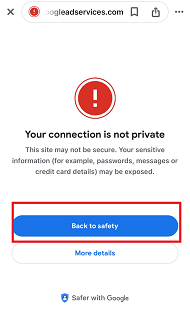
Then it will show that the connection is not private and click on back to safety.
-
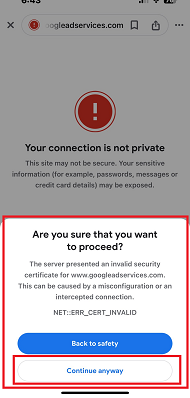
A confirmation message will appear, Are you sure that you want to proceed. Click on Continue anyway.
-
Fill in your username and password, and then select the login option.
-
A confirmation message will follow. Please click on the yes option over there
-
After that, a window will appear for connecting.
-
After that it will be redirected to the browser.
How to Edit External Authentication
-
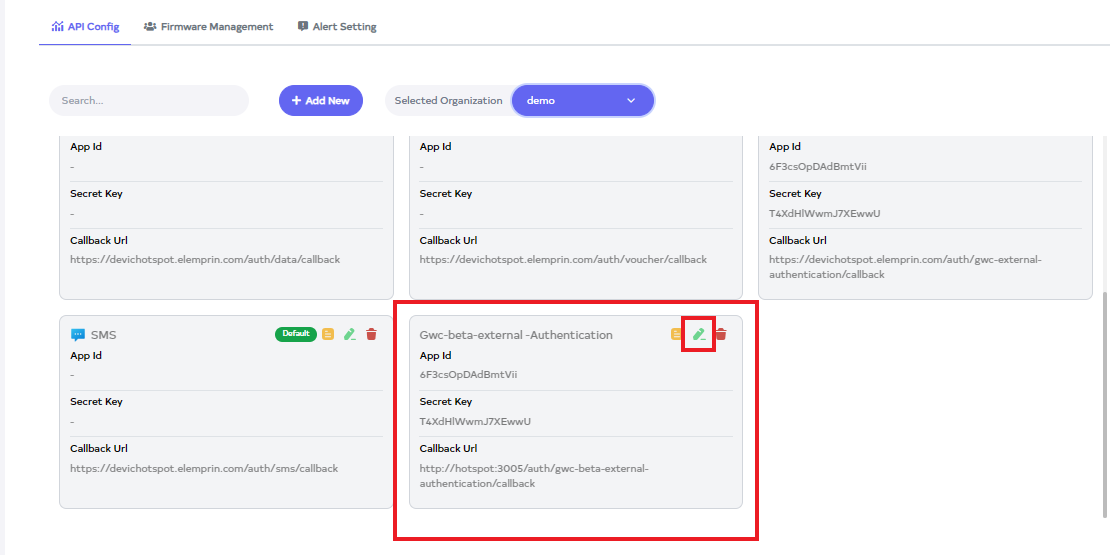
Go to the API Config you want to edit.
-
Click on the Edit Located on the right side of the API Config.
-
After clicking, the following can be changed Provider, App ID, Secret Key, Callback Url, Login Url, Verify Url, and Whitelist domain.
-
After clicking on the Update button.

-
After the External authentication Section is updated successfully, a success message will display Confing is updated successfully.
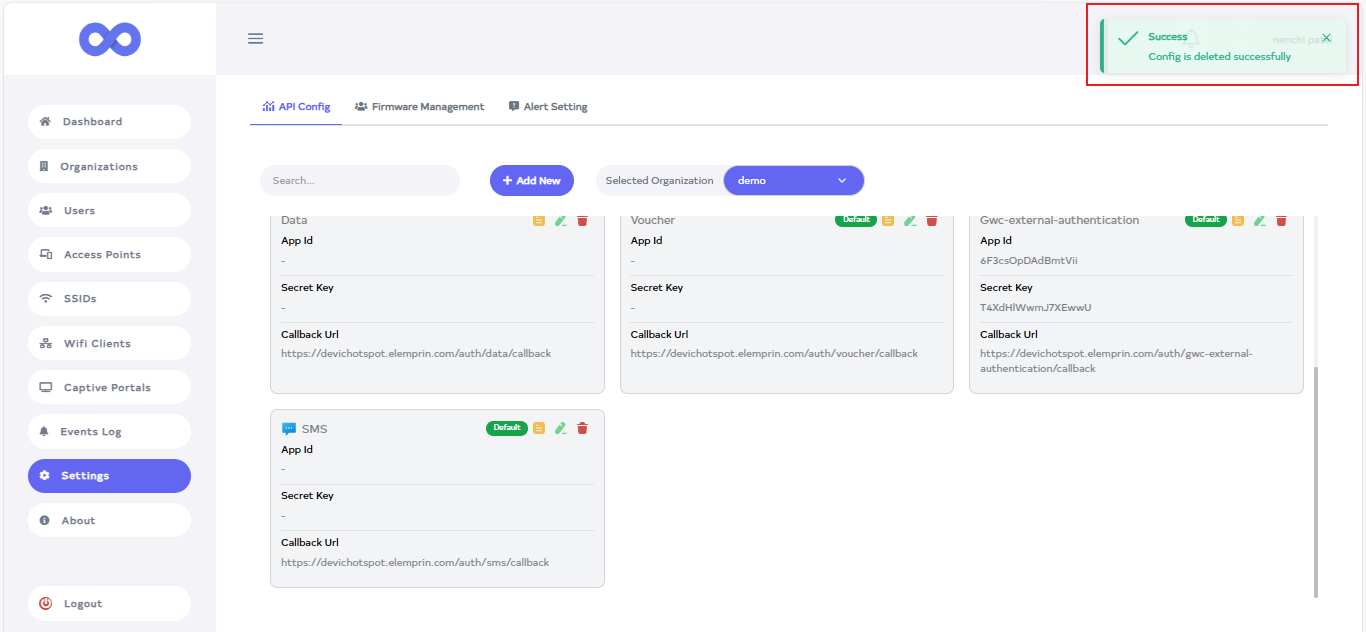
How to delete External Authentication
-
Click on the delete located on the right side.

-
After clicking, a confirmation message will appear. Click on the Delete button.
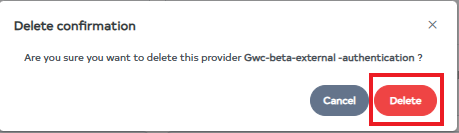
-
After the External authentication is deleted successfully, a success message will display Config is deleted successfully.