Hotspot
What is a Hotspot
A hotspot is a physical location where people can wirelessly access the internet using Wi-Fi technology. It typically involves setting up a wireless network that allows users to connect their devices and access online services within a specific area.
Why do we need a Hotspot
Hotspots are essential for providing internet connectivity in public spaces like cafes, airports, hotels, and libraries where people require access to online resources on their smartphones, laptops, or tablets. They facilitate convenient internet access for individuals on the go or in areas where traditional wired internet connections may not be available or practical.
How to create a Captive Portals
-
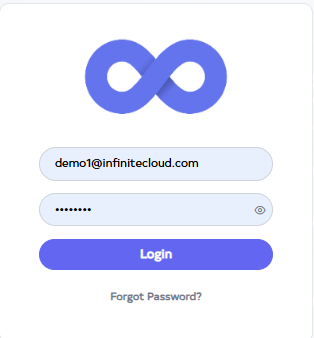
Go to Cloud platform and go there fill the details and then click on login button
-
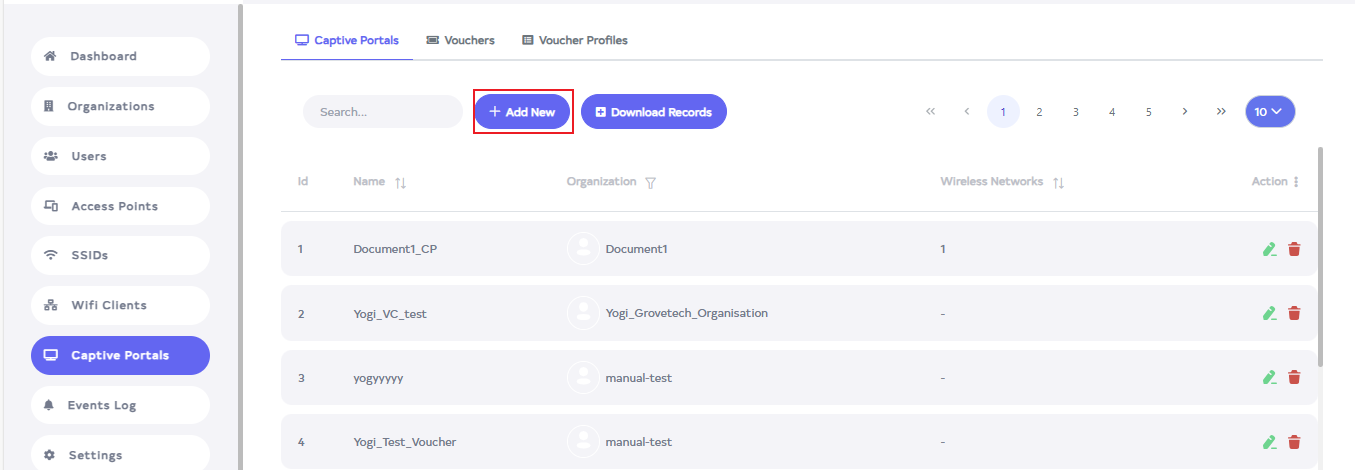
Upon login, the Dashboard will be displayed by default. Then, go to the Captive Portals menu.

-
After going to the Captive Portals menu, click on the Add New button.
-
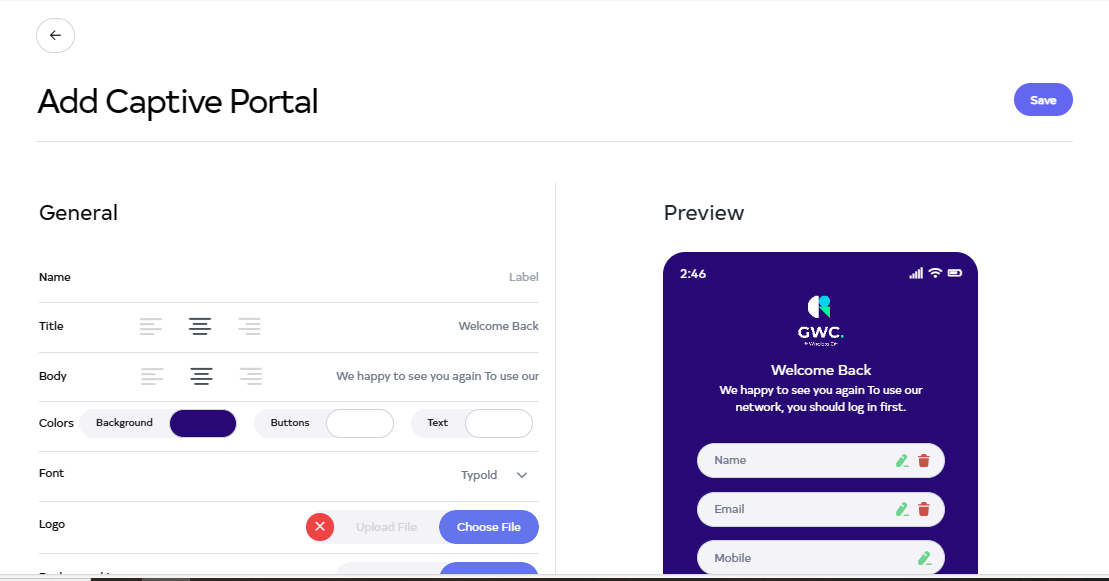
After clicking on the Add New button, a window will open.
-
Fill the details.
-
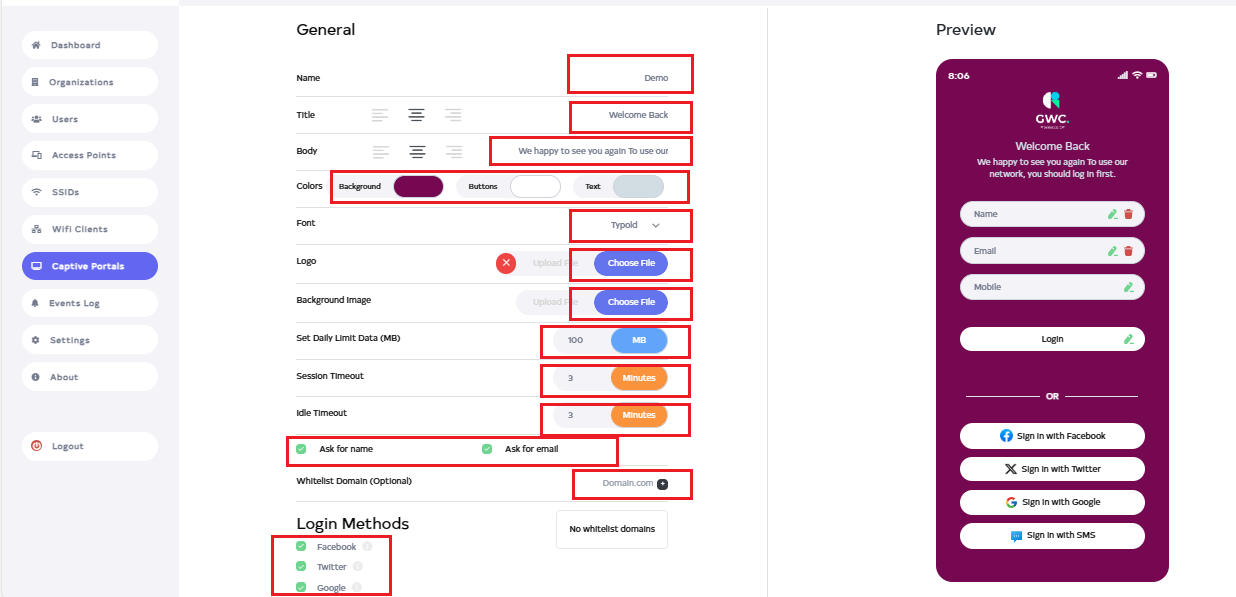
Name:- Enter the Name for Ex:Demo.
-
Title:- The Title is set by default but can be changed if needed. Additionally, there are 3 options for positioning the title center, left or right.
-
Body:- The Body is set by default but can be changed if needed. Additionally, there are 3 options for positioning the title center, left or right.

-
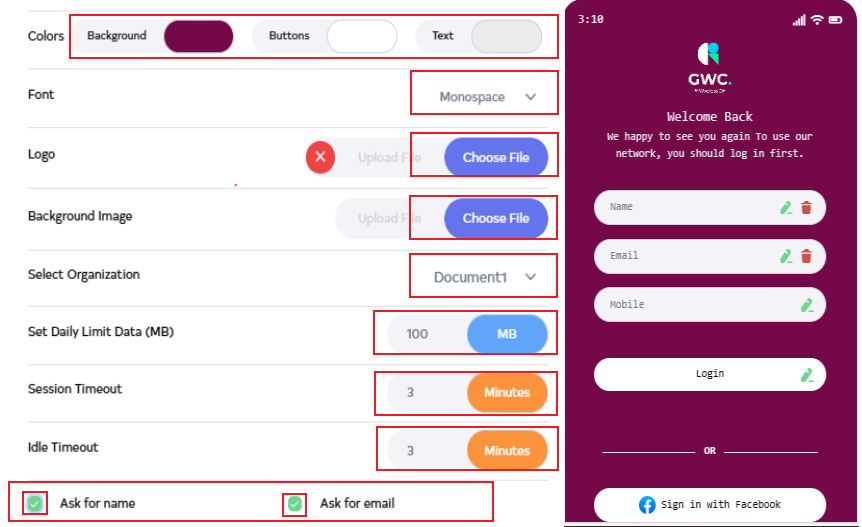
Colors:- 1. Background:- To change the Background color, click on colors and change the background color from there.
2. Buttons:- To change the color of the login button, click on the button's color.
3. Text:- To change the color of the body and title text, click on the text color option here. -
Font:- Navigate to and choose Font for Ex:Monospace.
-
Logo:- To change the Logo, select the file by clicking on Choose File.
-
Background Image:- To have an image in the Background, click on Choose File and select the image from there.
-
Select Organization:- Navigate to and select Organization for Ex:Document1.
-
Set Daily Limit Data (MB):- Enter the amount of MB data to use in the user Set Daily Limit Data (MB). For example 100 MB. If we give a 100 MB ni limit then the user will use 100 MB data then data will stop automatically. Data will not be available.
-
Session Timeout:- Enter the Session Timeout. For Ex:3 Minutes. The session will be out after the number of minutes they enter the Session Timeout.
-
Idle Timeout:- Enter the Idle Timeout. For Ex:3 Minutes. Idle Timeout refers to the period of time after which the mobile will disconnect from WiFi if there is no activity during the specified time.
-
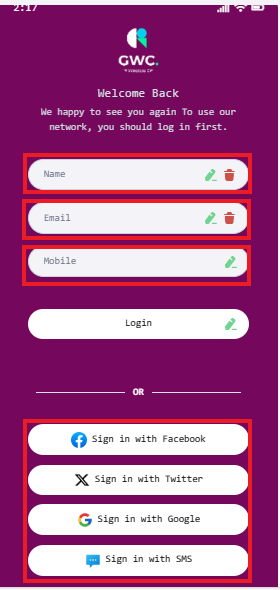
Ask for name:- Want to keep the name or not? Click the green checkbox on the side to remove the name if it's not needed.
-
Ask for email:- Want to keep the email or not? Click the green checkbox on the side to remove the name if it's not needed.
-
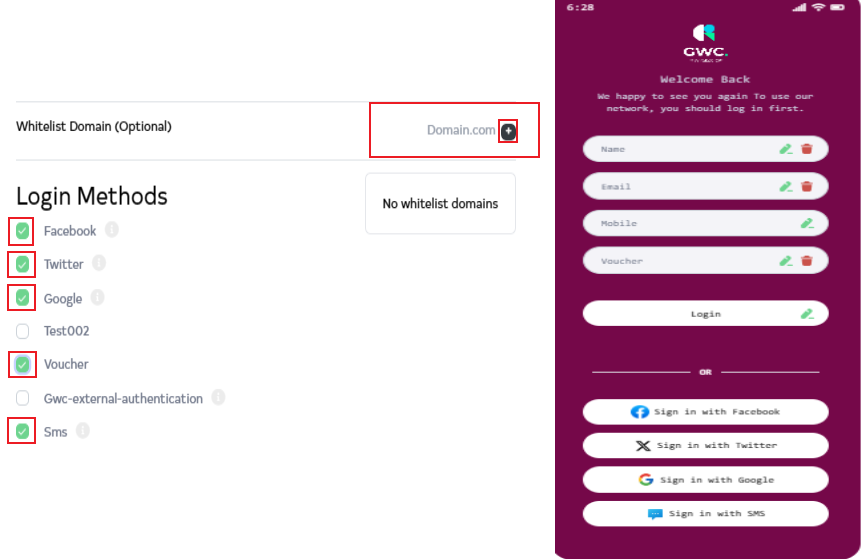
Whitelist Domain (Optional):- Enter the Whitelist Domain (Optional) and click the **+**icon. Enter the domain to be added in the Whitelist Domain field, then click the + icon next to it to add the domain.
-
Login Methods:- In the Login Methods area, click your preferred login method.
For Example:--
- Facebook:- Click on the check box to log in from Facebook so that the method will be added.
- Twitter:- Click on the check box to log in from Twitter so that the method will be added.
- Google:- Click on the check box to log in from Google so that the method will be added.
- Voucher:- Click on the check box and the Voucher method will be added. There you have to enter the Voucher number and log in.
- Sms:- Click on the check box and the Sms method will be added.
-
-
-
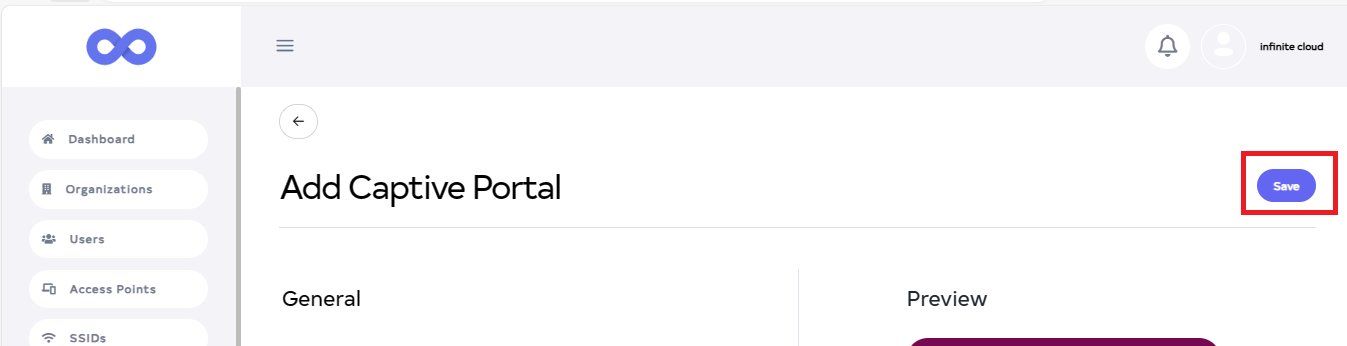
Next, click the Save button on the located right side.
-
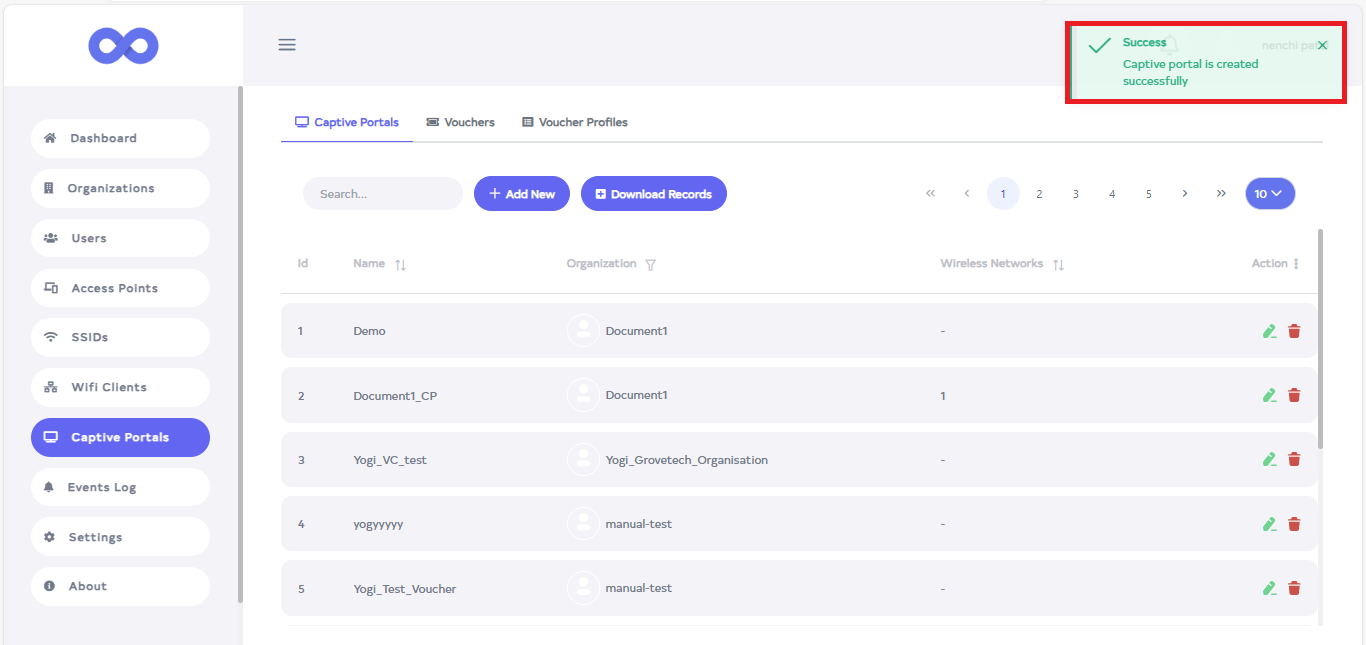
After the Captive portals Section is saved successfully, a success message will display Captive portal is created successfully.
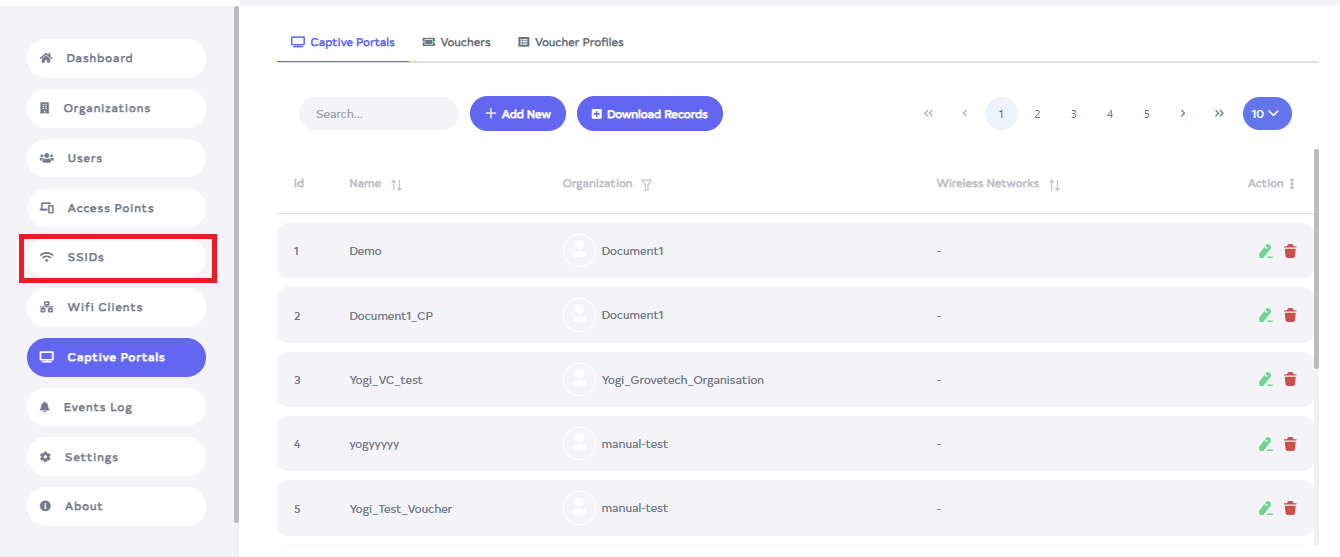
How to configure Hotspot
-
Next, go to the SSIDs menu.
-
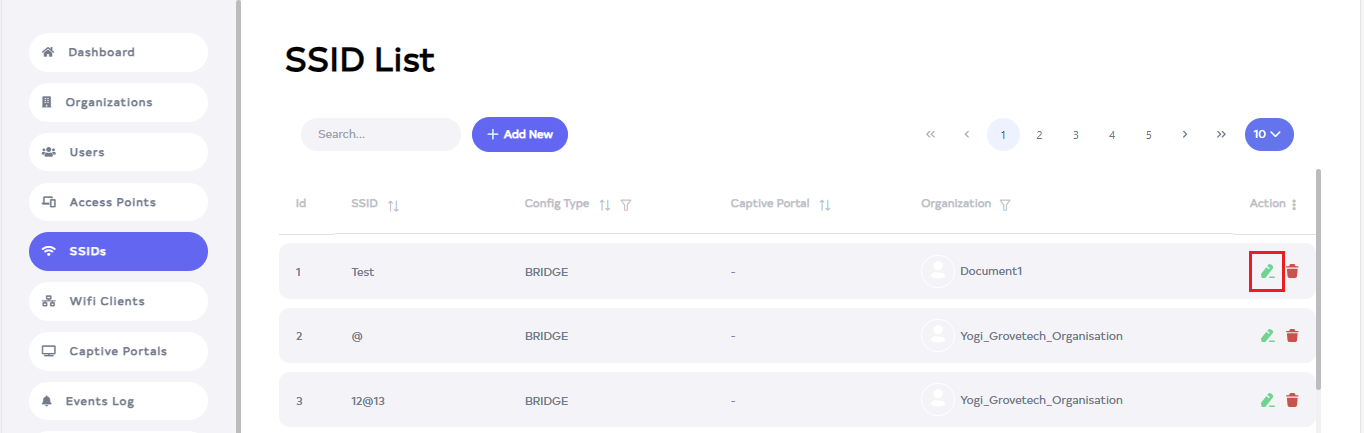
After navigating to the SSIDs menu, click the Edit button for the SSID to connect to.
-
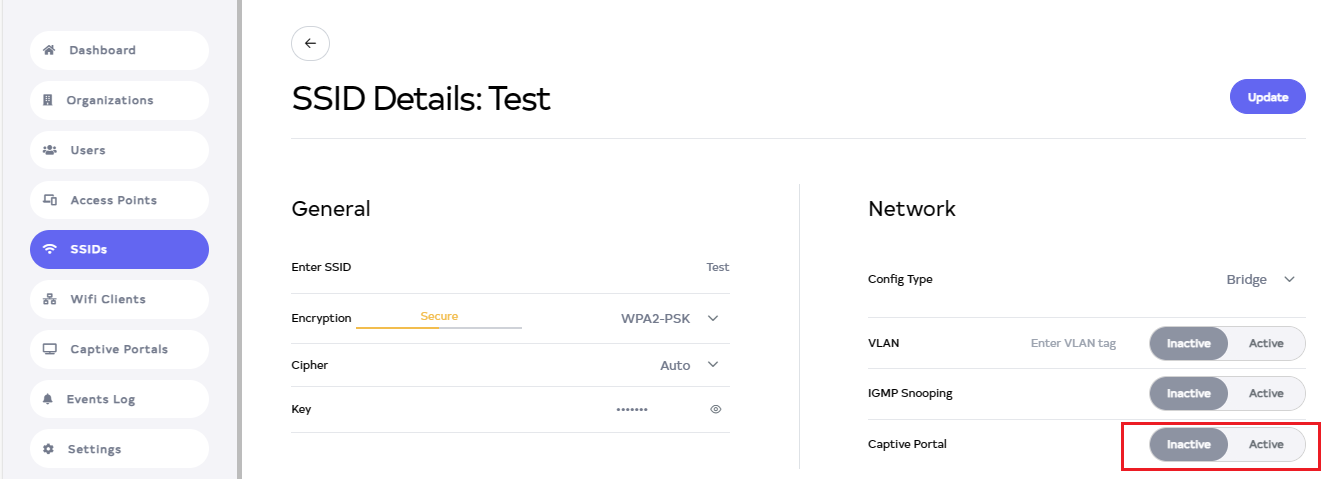
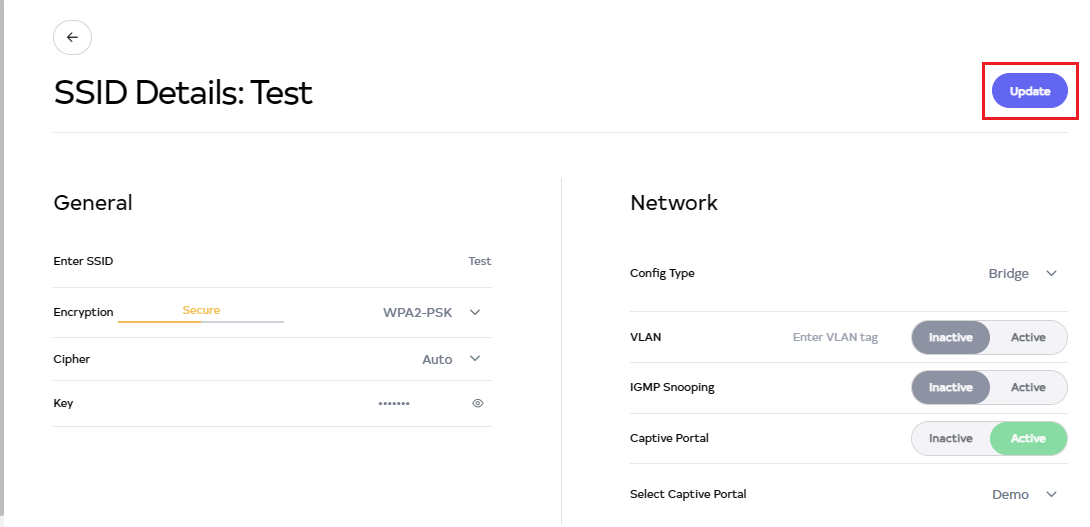
There, click on the Active button of the Captive Portal.
-
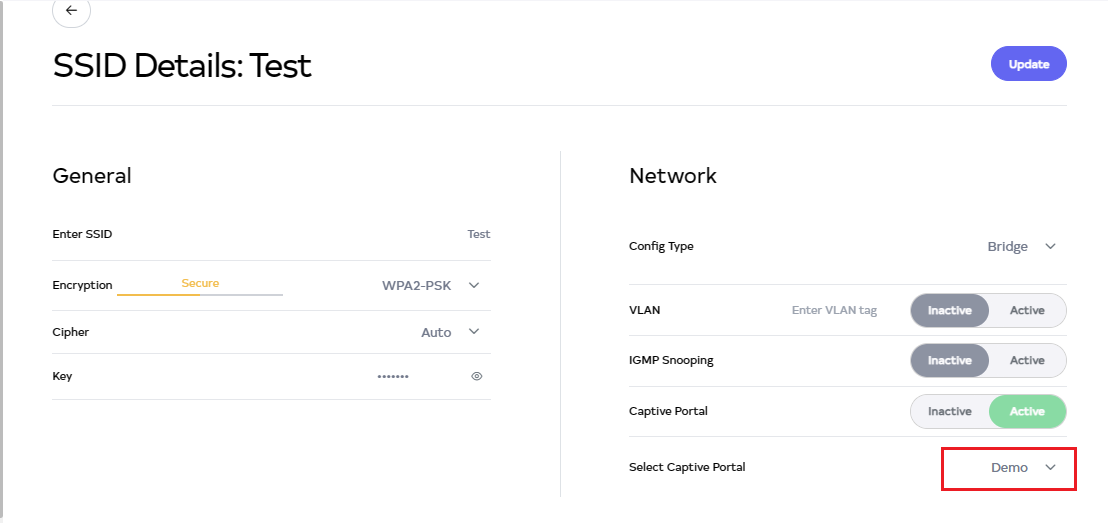
Then navigate and Select Captive Portal.
-
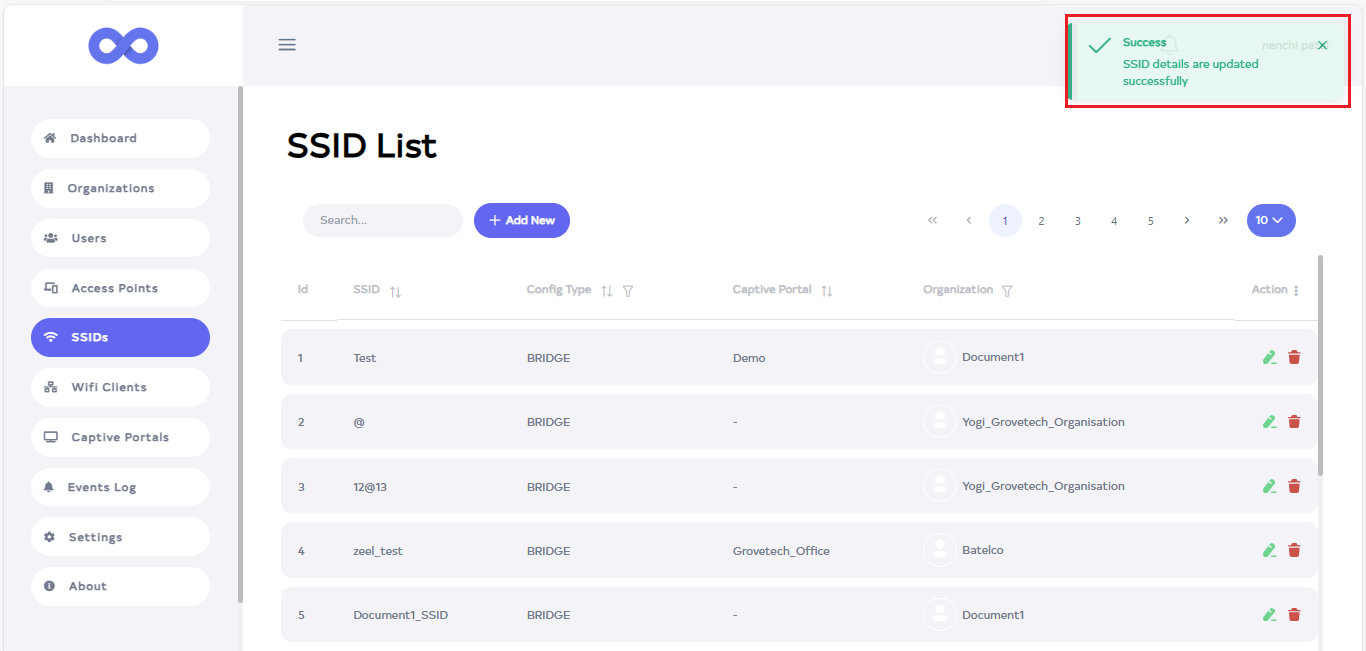
Click on the Update button.
-
After the SSID Section is updated successfully, a success message will display SSID details are updated successfully.
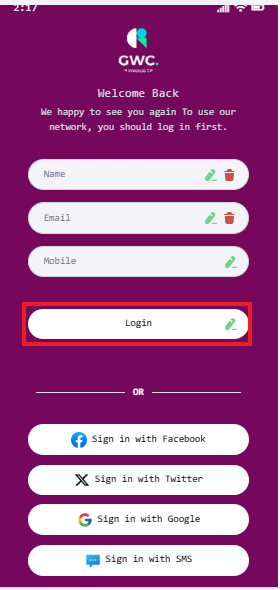
How to use Hotspot to client
-
Open the WIFI. After opening WIFI it will search.
-
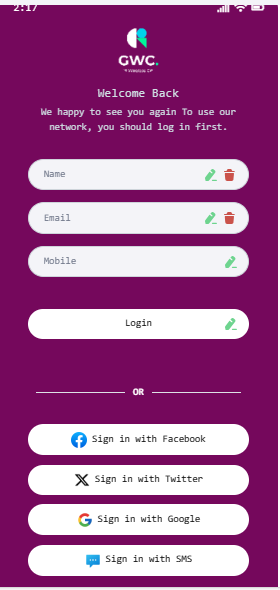
Then there will be SSID show. Click on it. For **Ex:- here Captive Portal is added in SSID test so log in from it.
-
Click on it and a page will open. Fill in the details there and Login.
-
Login by entering Name, Email, and Mobile or alternatively, log in using the username and password of Facebook, Google, Twitter, or SMS.
-
Click on the Login button.
How to Edit Captive Portals
-
Go to the Captive Portals want to Edit button.
-
Click on the Edit button located on the right side of the Captive Portals.

-
In the Captive Portals, they can change Name, Title, Body, Colors, Font, Logo, Background Image, Set Daily Limit Data (MB), Session Timeout, Idle Timeout, Ask for name, Ask for email, Whitelist Domain (Optional), and Login Methods.
-
Then click on the Update button.

-
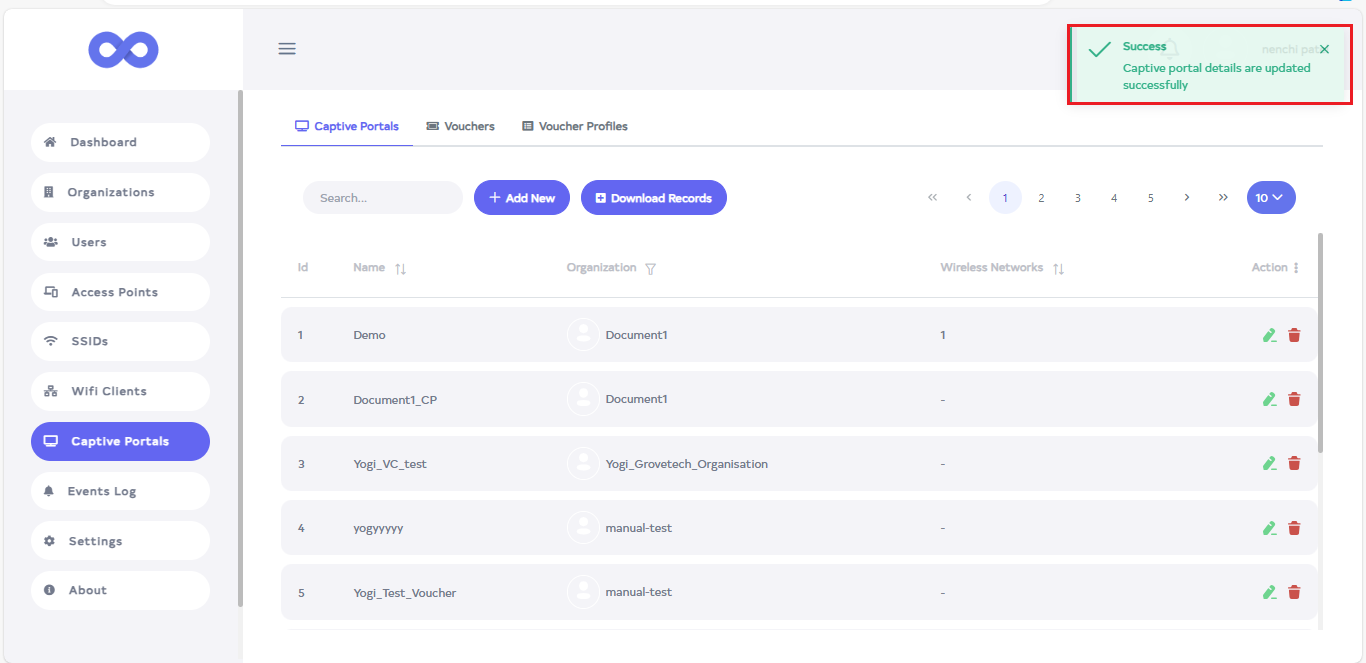
After the Captive portals is updated successfully, a success message will display Captive Portal details are updated successfully.
How to Delete Captive Portals
-
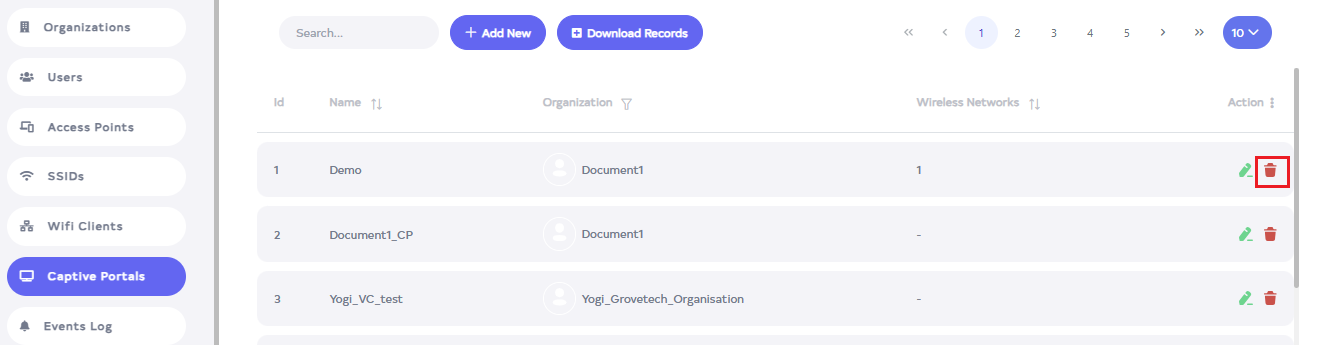
Click on the delete located on the right side.
-
After clicking, a confirmation message will appear. Click on the Delete button.

-
After the Captive portal is deleted successfully, a success message will display Captive Portal is deleted successfully.
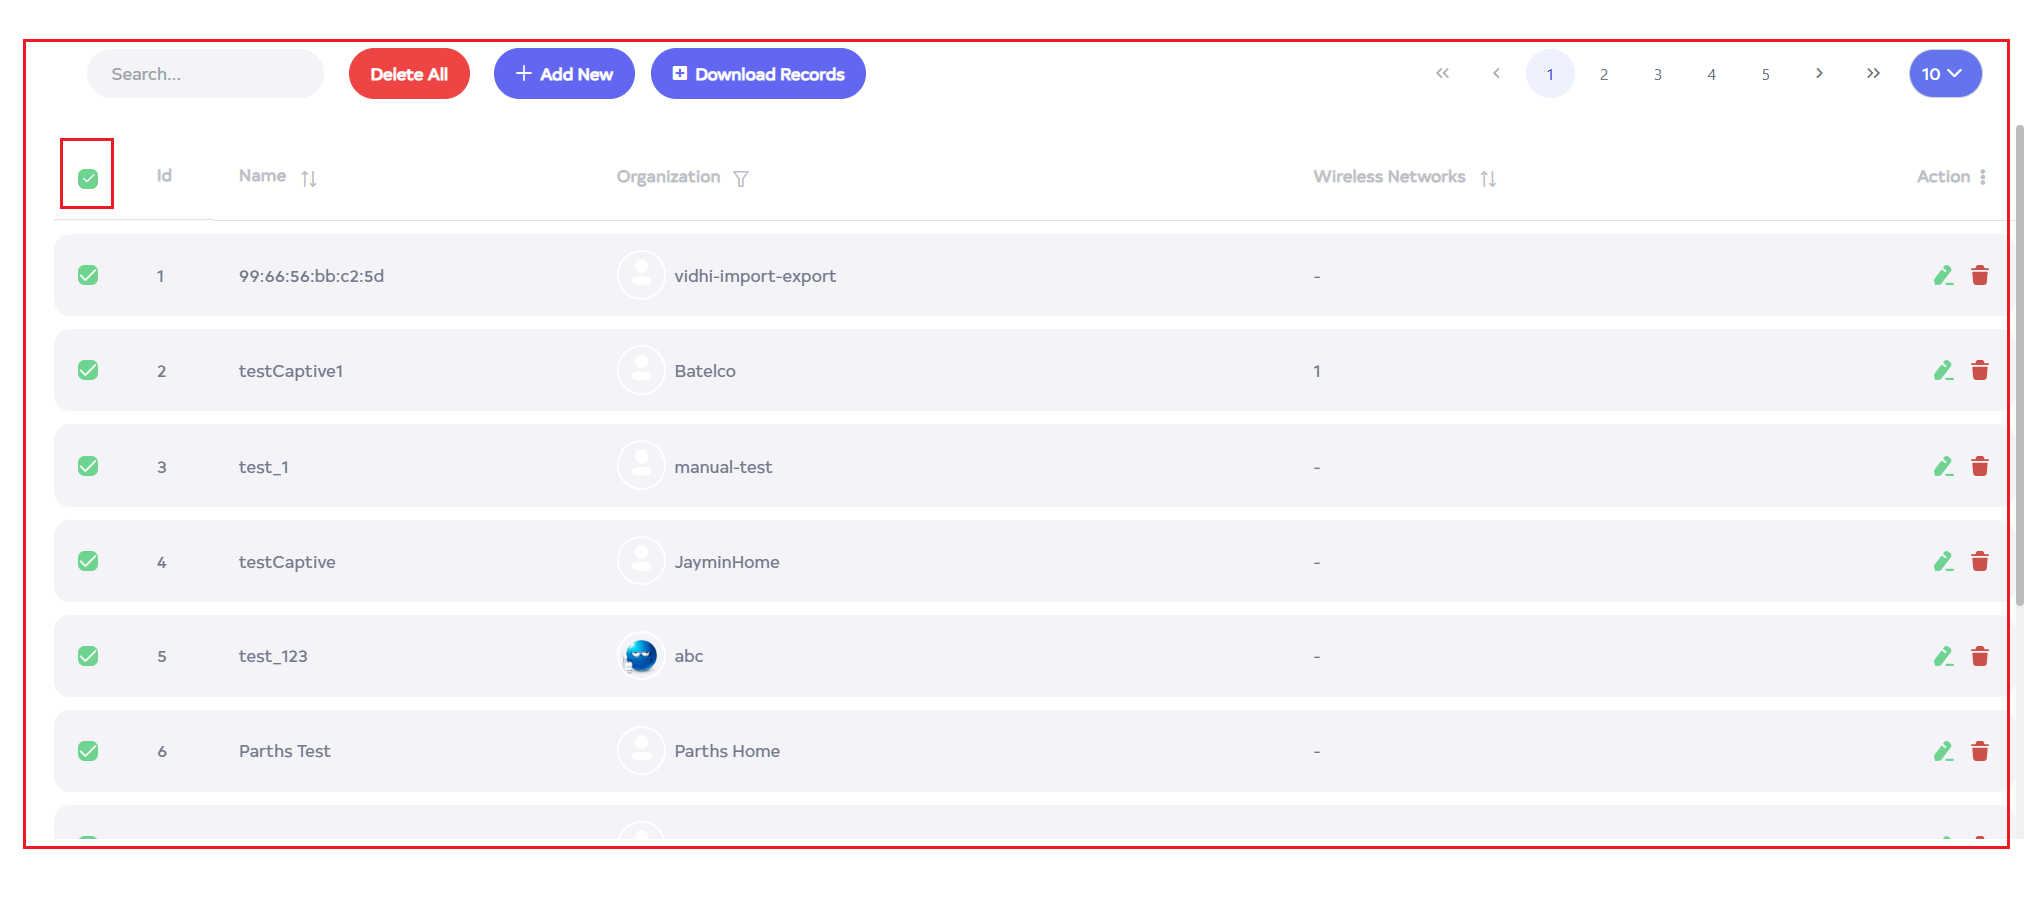
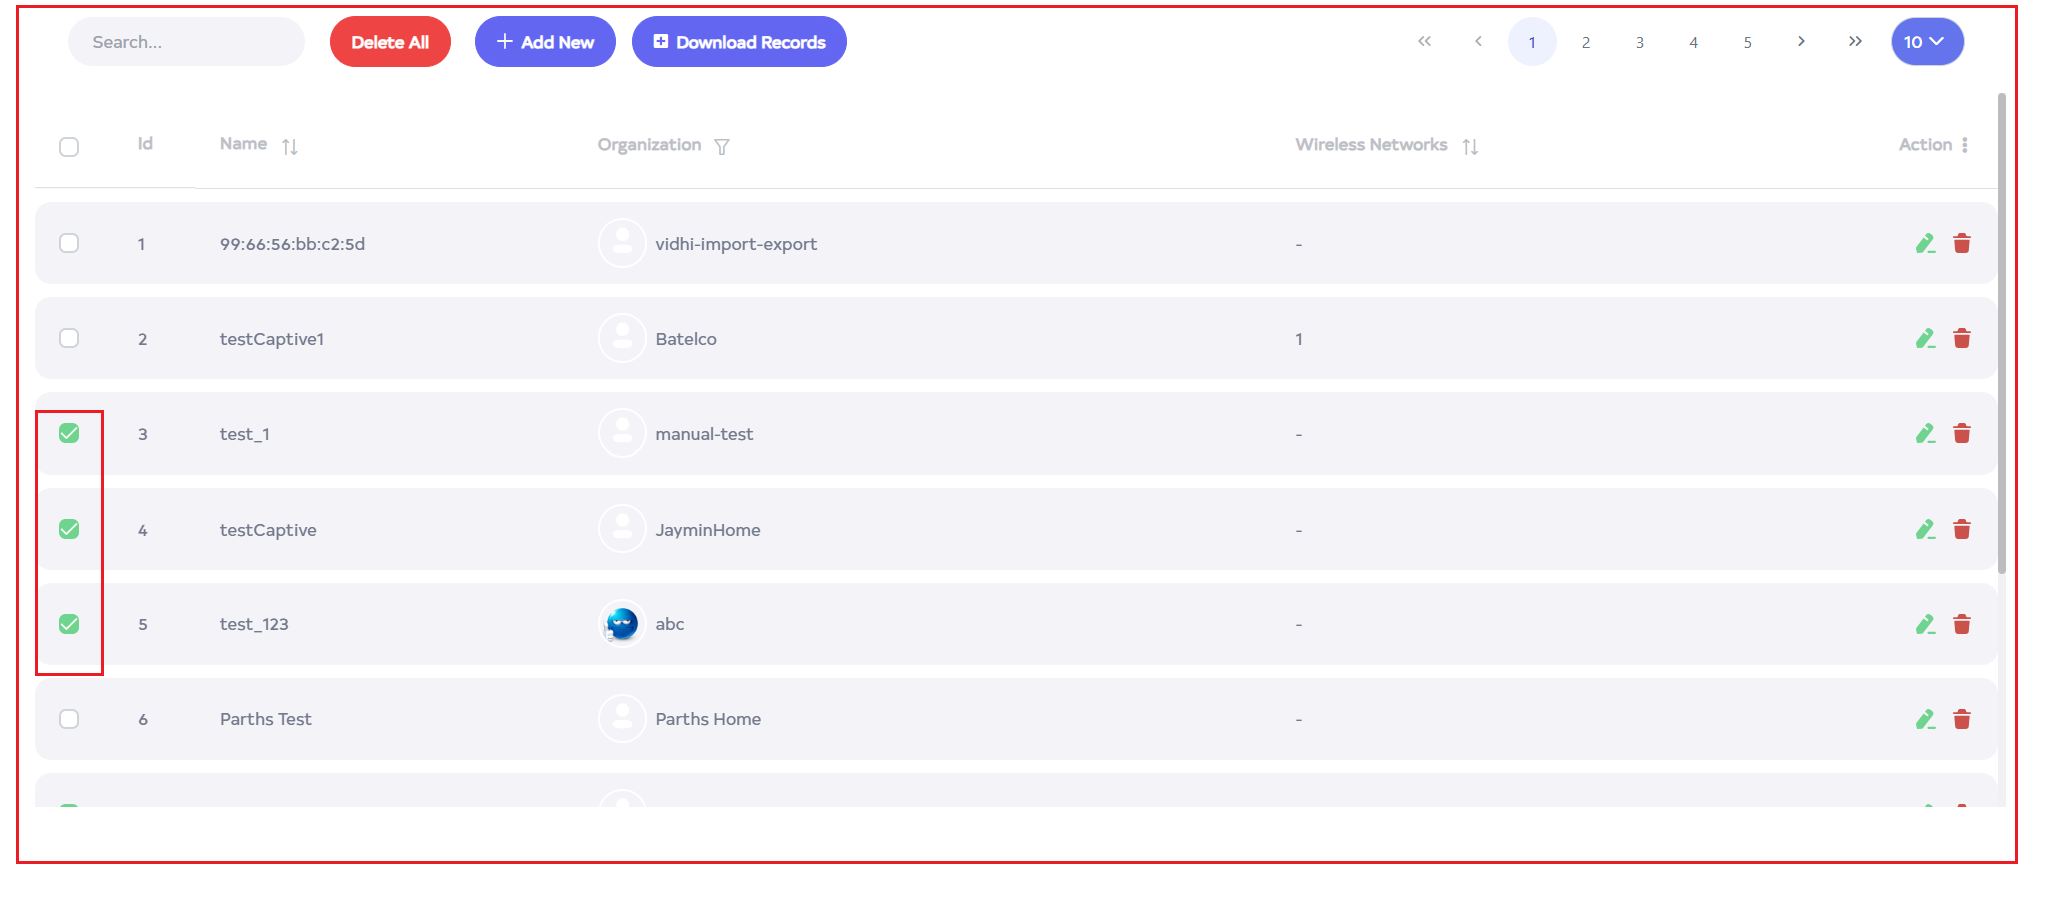
To delete multiple records, select the desired records by using the checkboxes and delete the selected records. To delete all Captive Portal ID in bulk, use select-All checkbox next to the "ID" column header to select all entries and click the "Delete All" button to execute the bulk deletion process.