Interface
What is an Interface
A user interface acts as a contractual arrangement that specifies how different software elements should interact with each other. It defines a set of methods that a class must implement, ensuring consistency and interoperability between different parts of the system.
Importance of Interface
Interfaces are essential to maintain modularity, extensibility, and code reusability in software development. By defining clear boundaries and expectations of how components communicate, interfaces facilitate collaboration between developers and enable the integration of different modules into compatible systems.
How to Configure an Interface
-
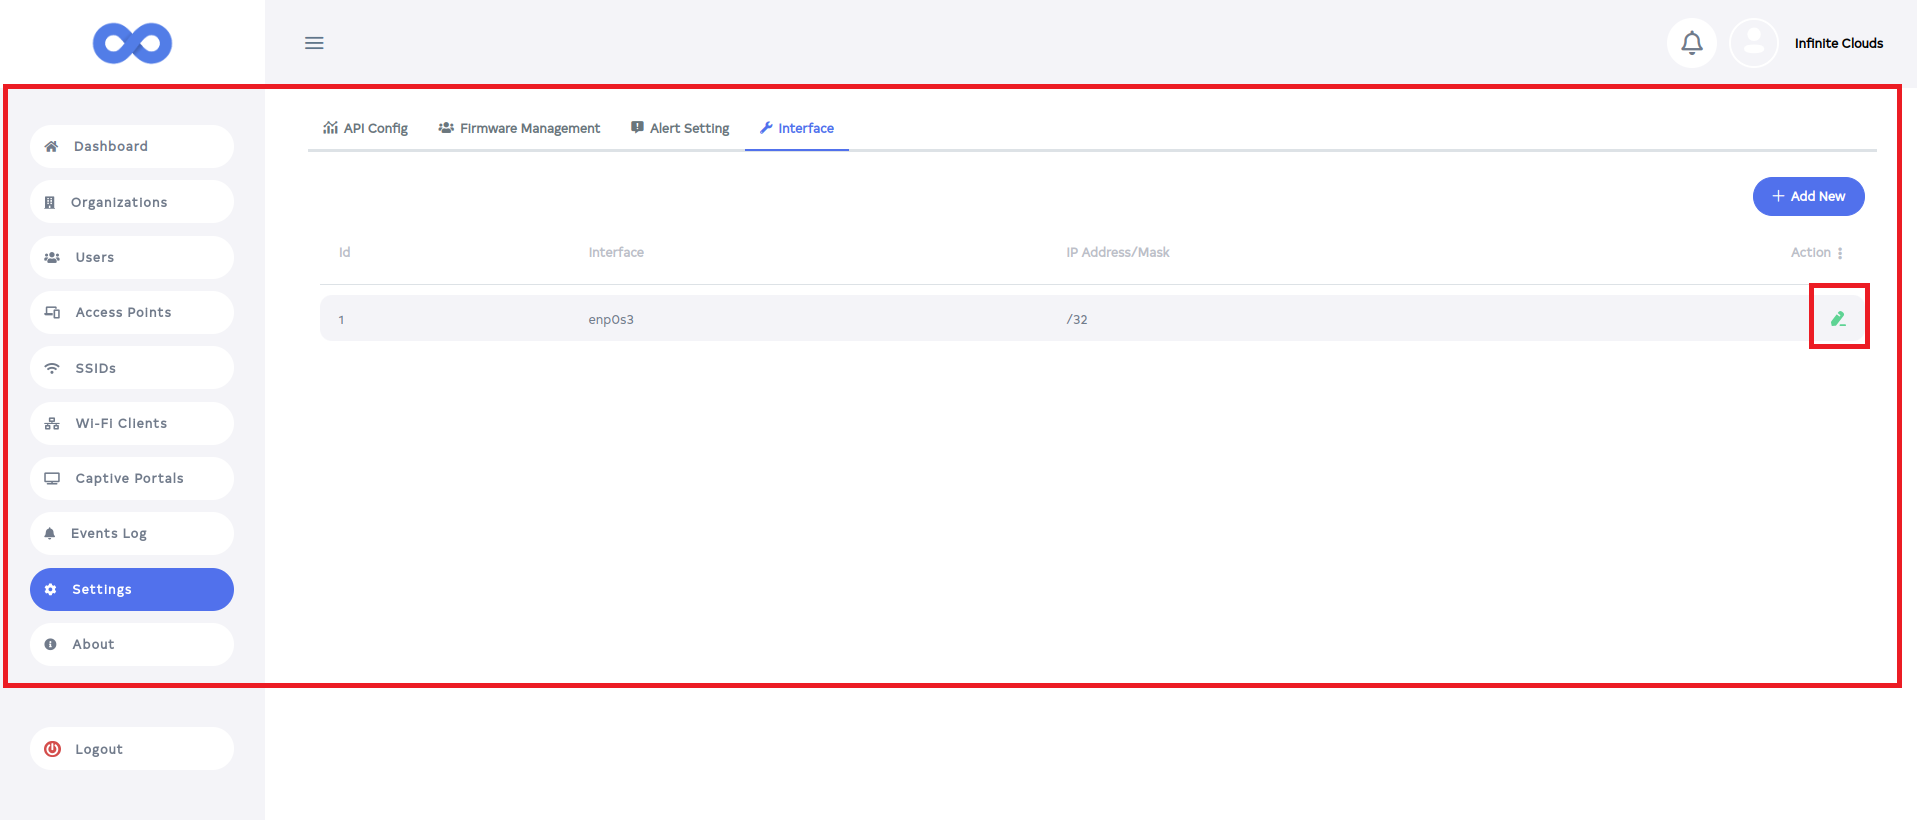
Open the Dashboard and go to the Settings menu.
-
Within the Settings menu, select the Interface tab. By default, the interface settings will be displayed. Click on the Edit button.
-
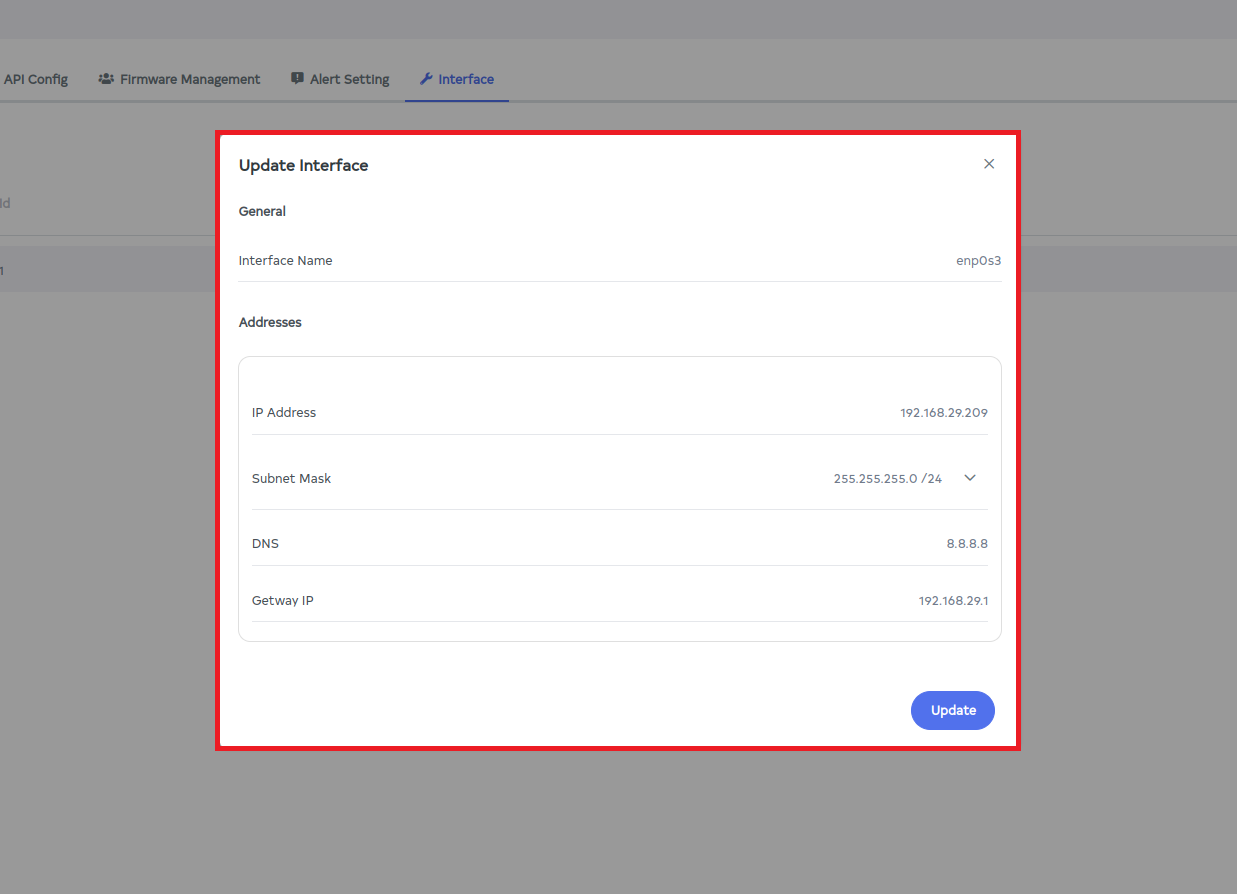
After clicking Edit, a new window will open displaying the Interface Name, IP Address, Subnet Mask, and Gateway IP. The default interface name is derived from the Ubuntu Server settings. Enter the desired IP Address, Subnet Mask, and Gateway IP as shown in the image, then click on the Update button.
subnetmask-infoThe range of the IP address will match the IP address and subnet mask. It is not possible to provide any IP address or subnet mask manually; the IP address and subnet mask within the given range will be used.
-
After clicking on the update button, the user will see a Successfully No message in the terminal.
-
All processes running on the previous IP will terminate, and the application will operate under the newly assigned IP address. Verify the application’s functionality at the new IP.
-
Run the command given here to bring up the application as explained further.
npm run start:on-premise-controller -
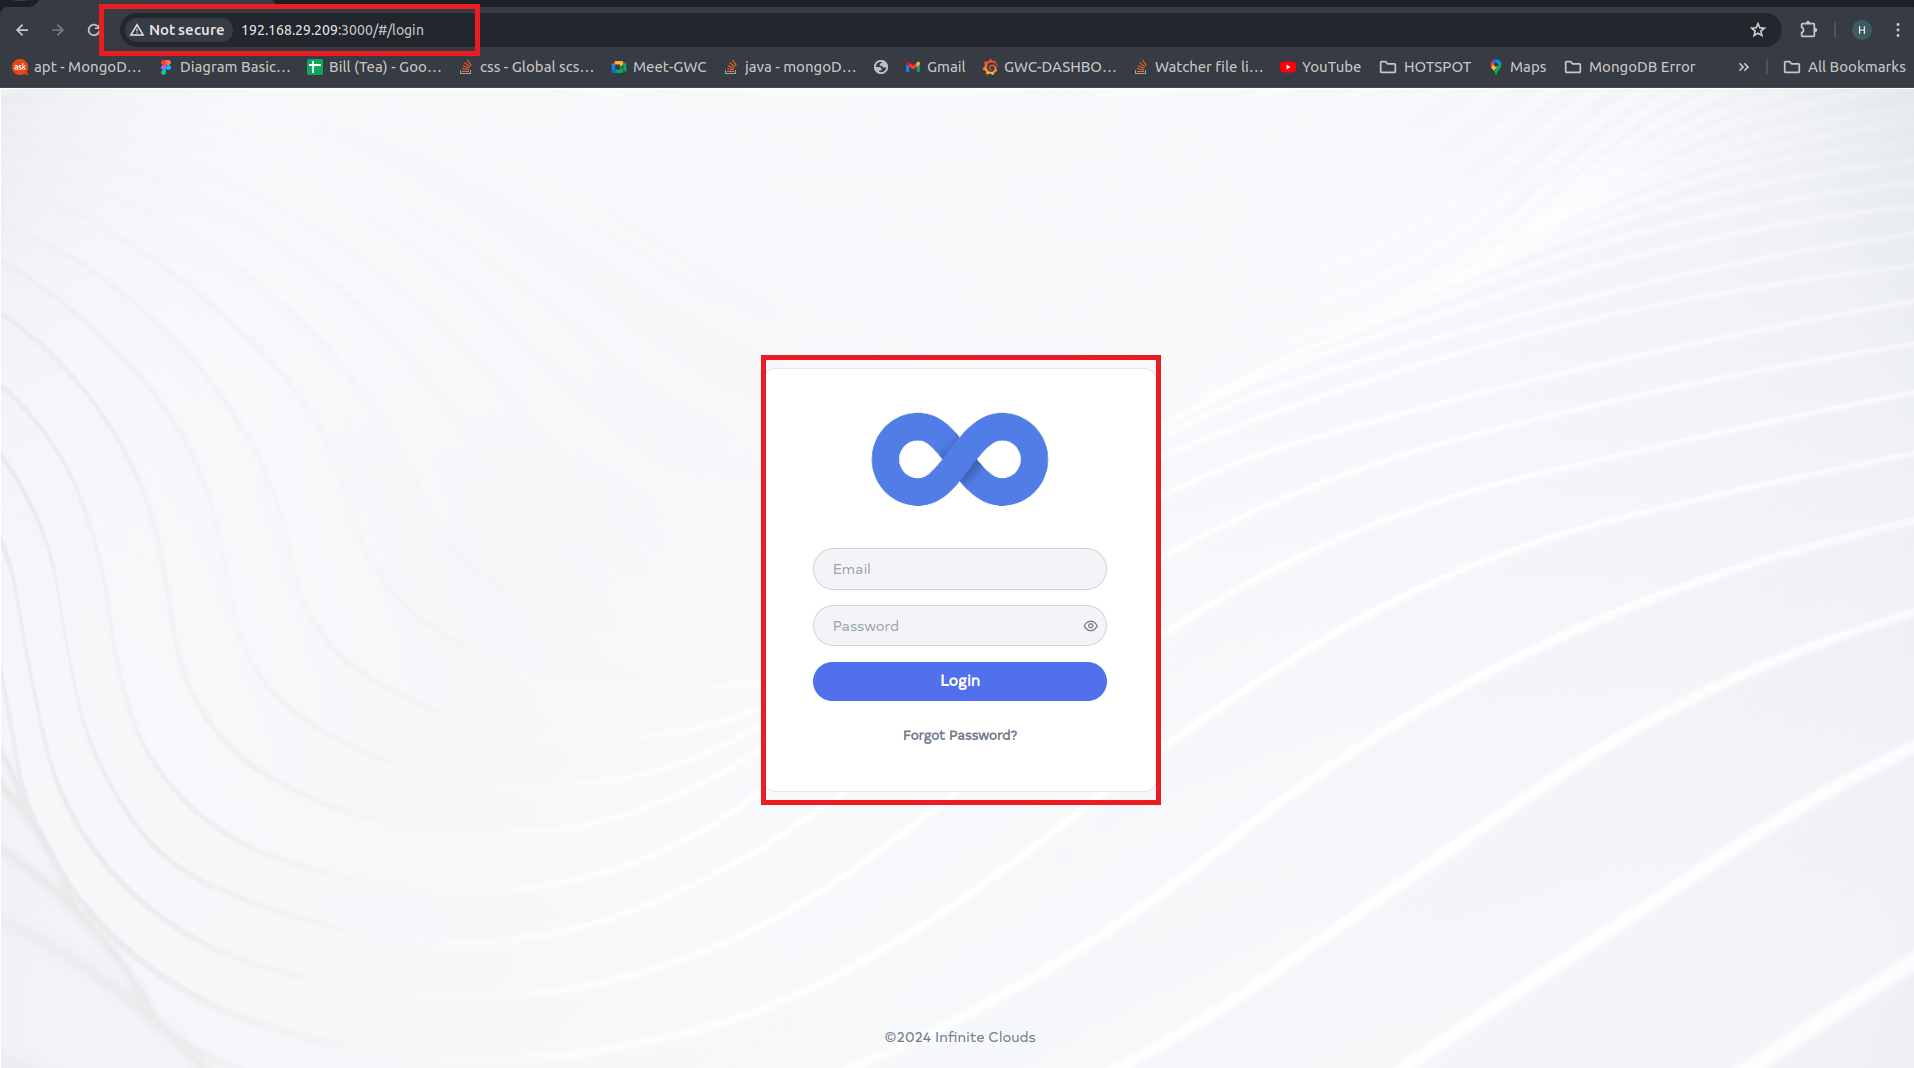
After running the command user can see in the image that it has moved to another IP address.
-
Login by entering the username and password and clicking on the login button.
-
If the license is expired, an error message will be displayed upon clicking Login. If this message appears, it indicates that the license has expired. Please contact the support team for assistance.

How to see the Warning Message of Save Interface
-
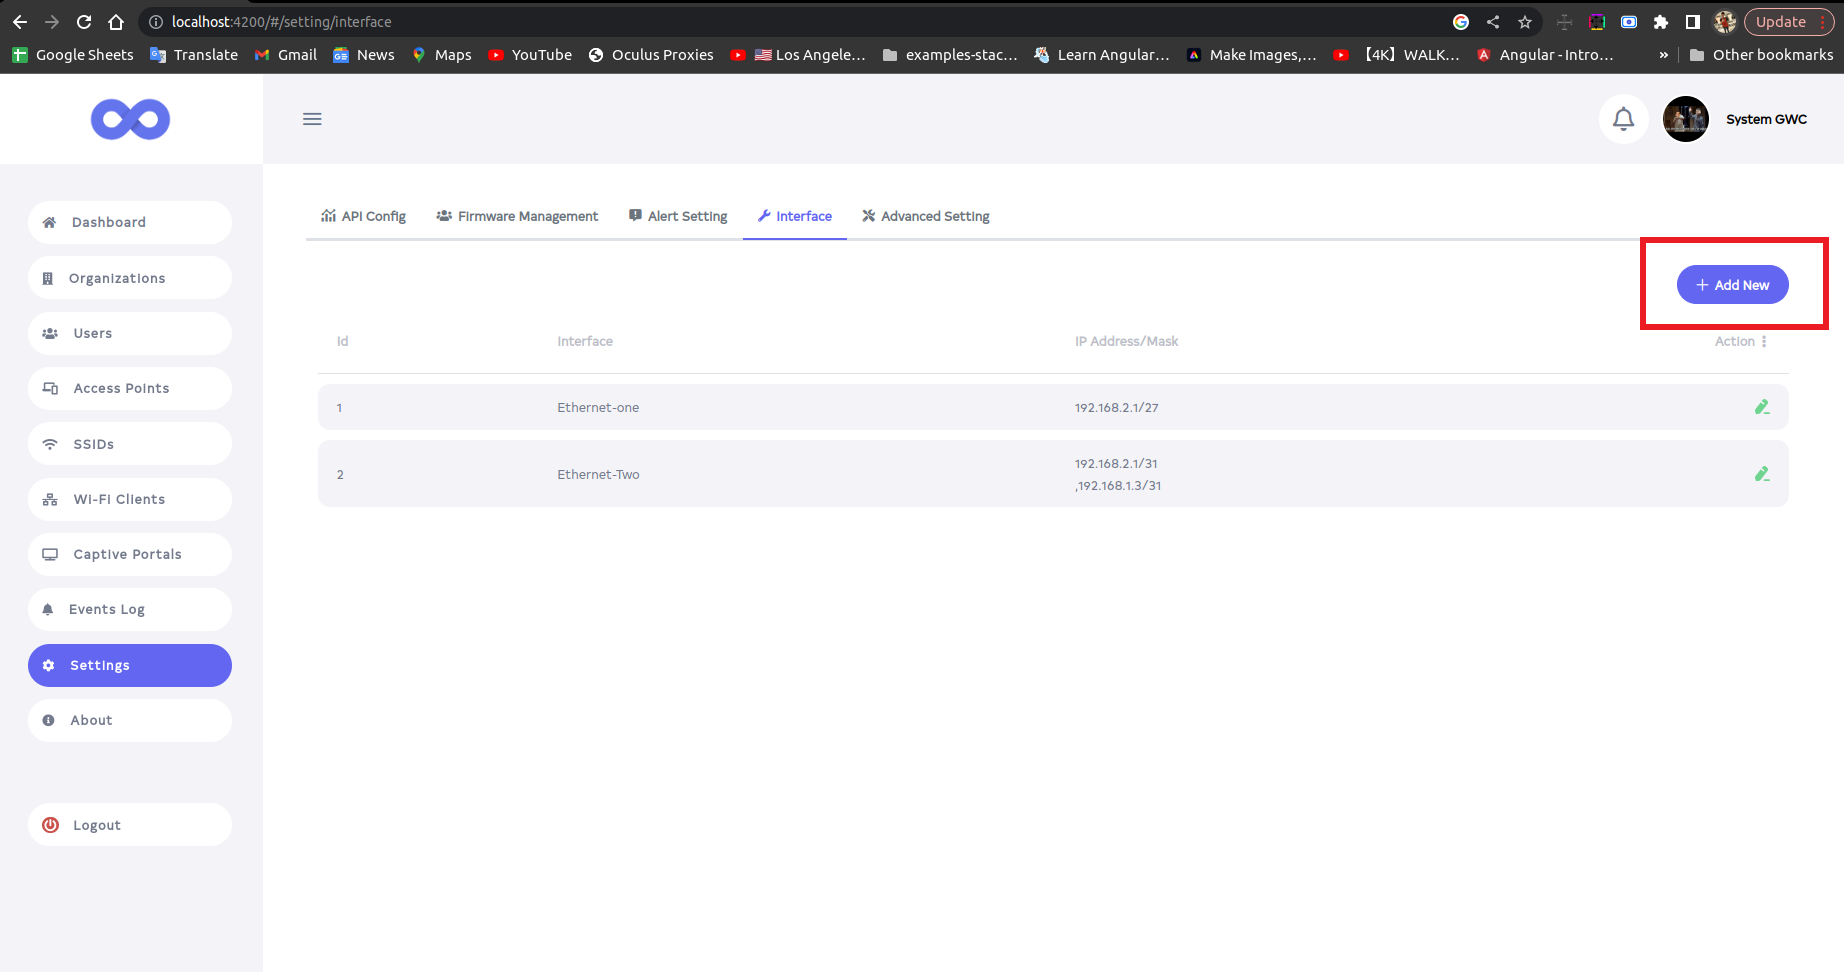
Navigate to the Settings menu and select the Interface tab. Click on the Add New button.
-
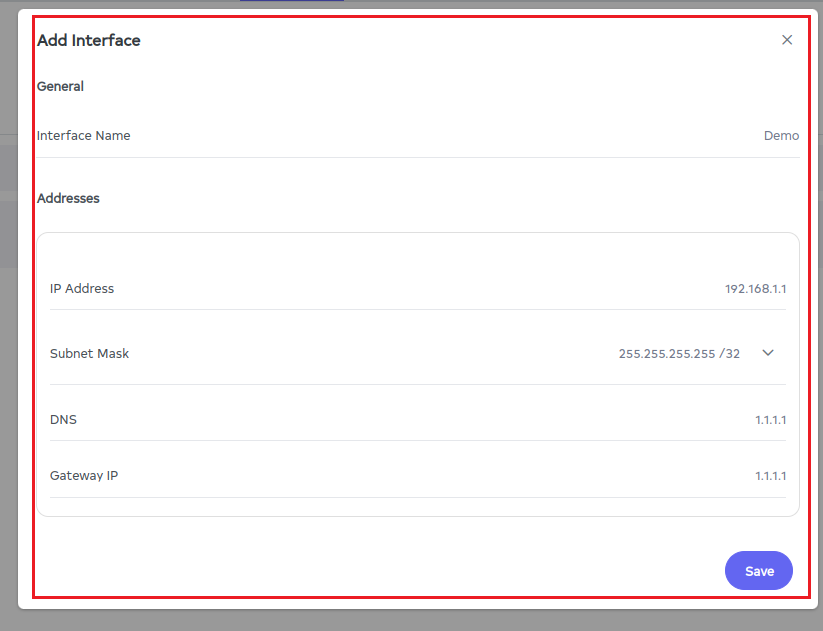
Fill in the Interface Details
-
In the new window, input the following information:
- Interface Name:- Enter a name for the interface. For example Demo.
- Ip address:- Enter the IP address for example 192.168.1.1.
- Subnet mask:- Add a subnet mask within the specified range. Fot example 255.255.255.255/32.
- DNS:- Enter DNS. for example 1.1.1.1.
- Gateway IP:- Enter Gateway IP. For example 1.1.1.1.
-
And click on the save button.
-
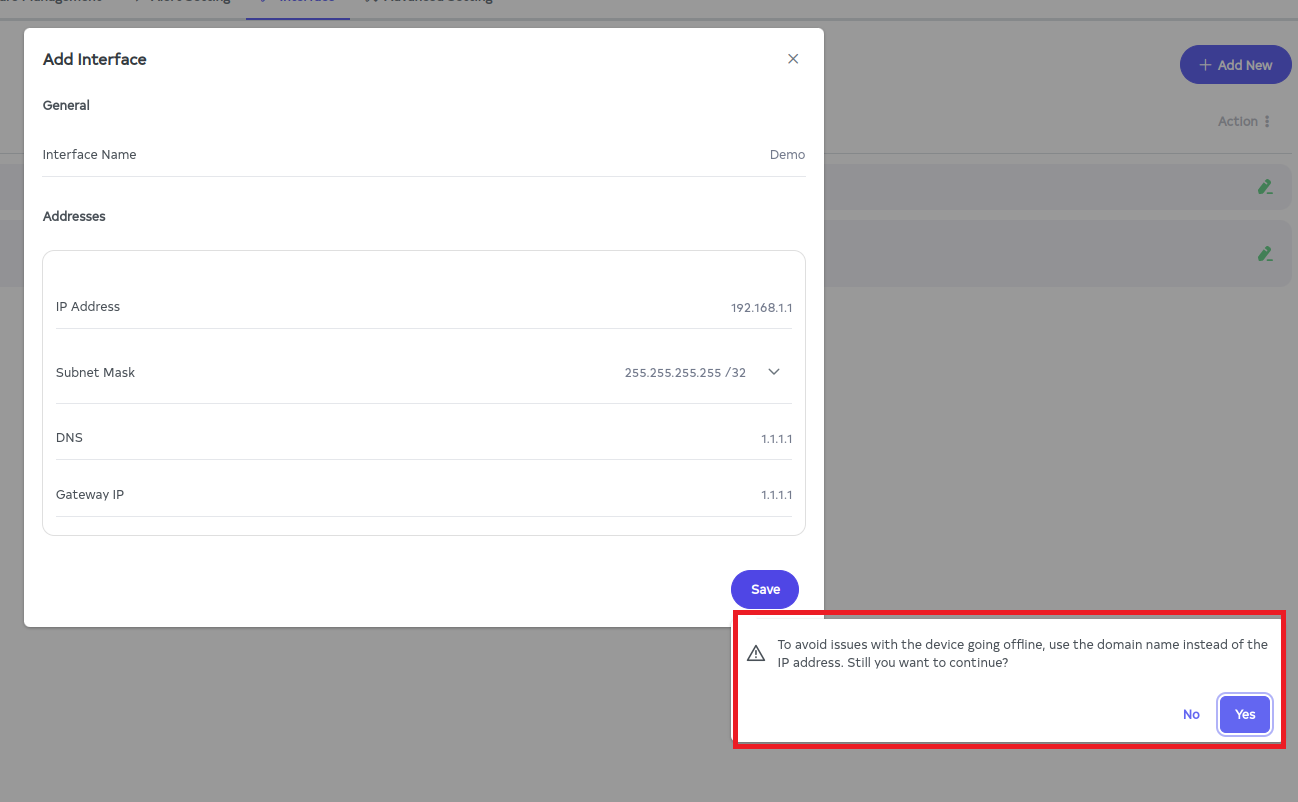
Clicking the Save button will display a message like this To avoid issues with the device going offline, use the domain name instead of the IP address. Still you want to continue? Click on the Yes button there.
-
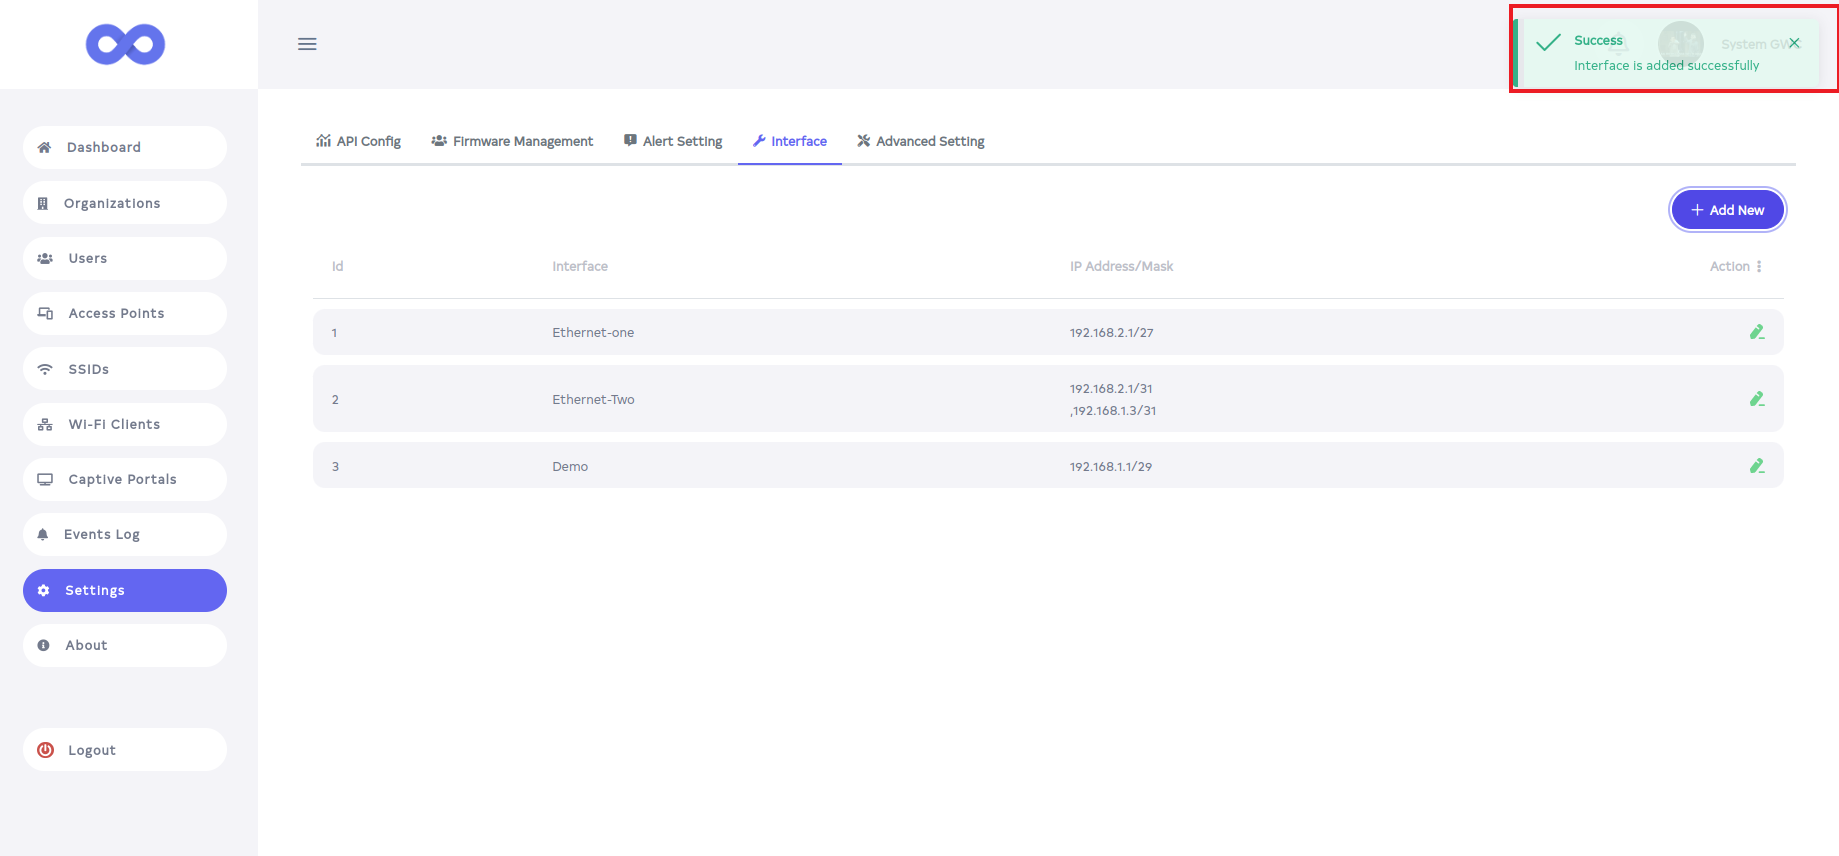
Click on the Yes button then user will get the Interface is added successfully message on the screen.
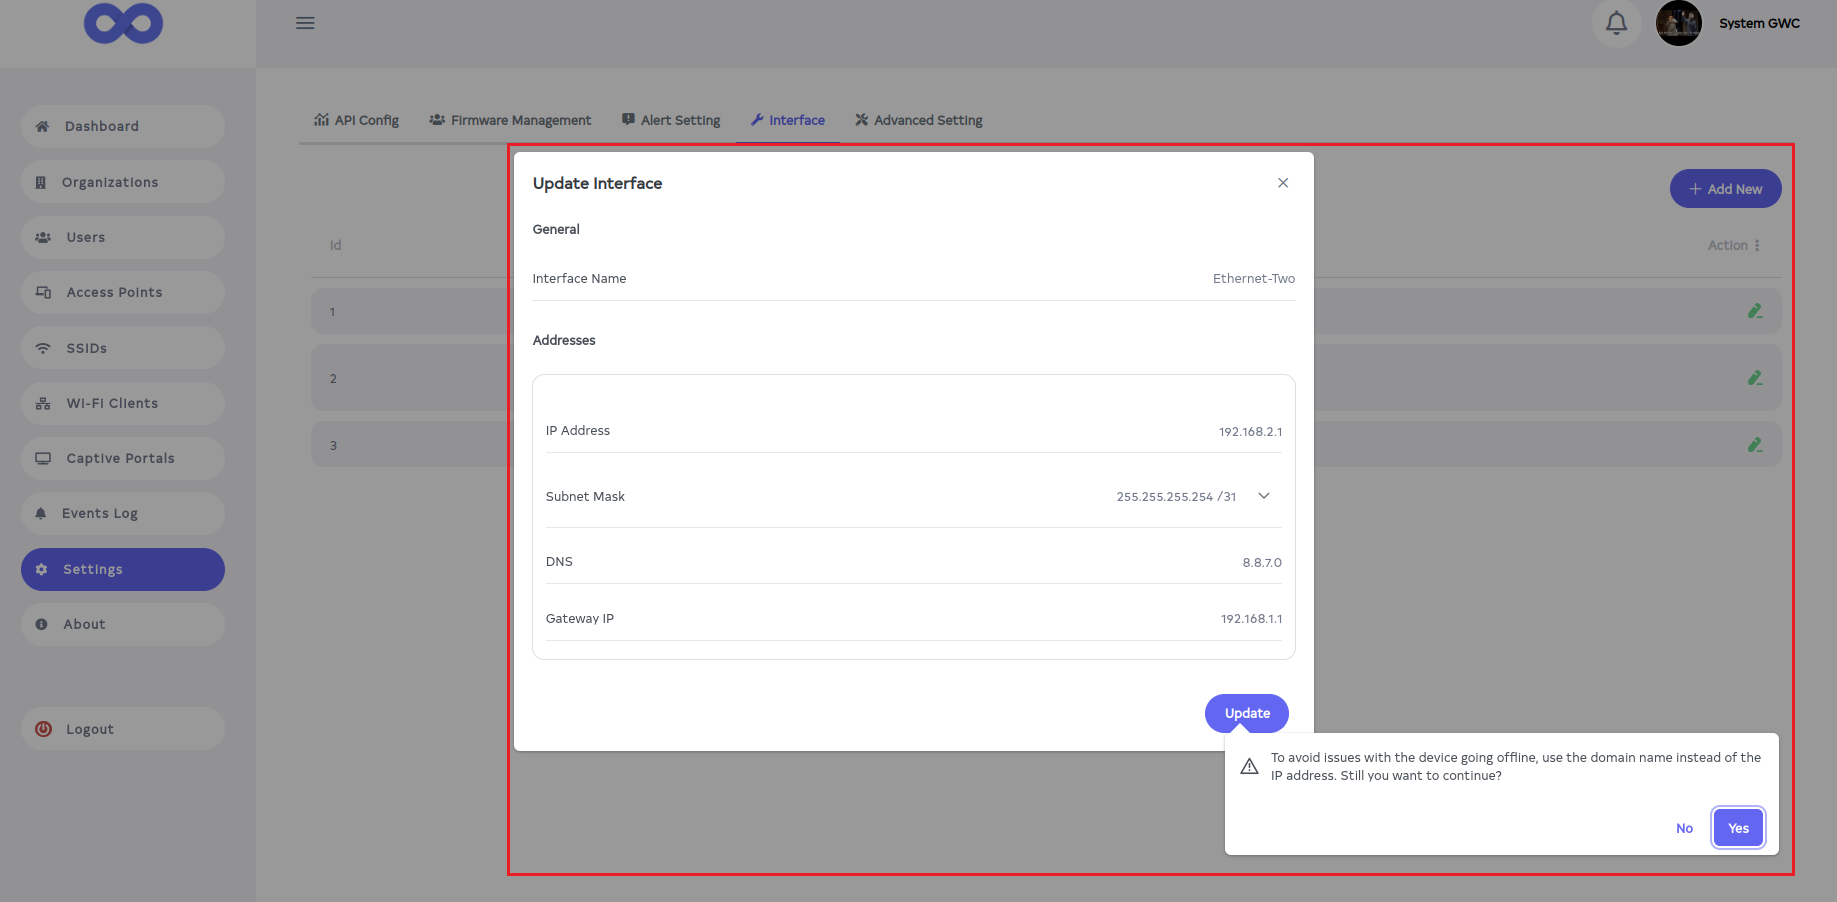
How to see the Warning Message of Update Interface
-
Click the Edit button for the desired interface. Note that the Interface Name cannot be changed however, the IP Address, Subnet Mask, DNS, and Gateway IP can be updated. Click the Update button to save the changes.
-
clicking on the Update button, will see a message on the screen To avoid issues with the device going office, use the domain name instead of the IP address. Still you want to continue. Click on the Yes button there.