Port Forwarding
Explanation of Port Forwarding
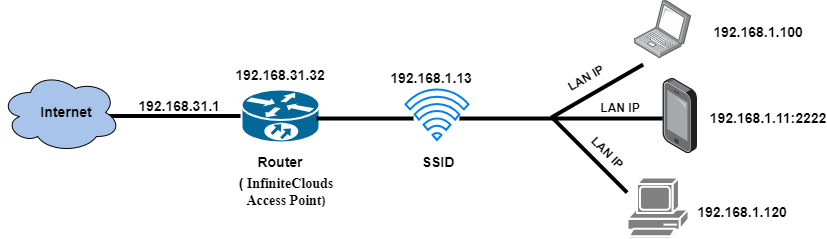
Port forwarding is a method used to allow external devices to access services on a private network. This Infinite Clouds product documentation explains how port forwarding is done, and it includes a diagram for easy understanding.
How to config a Port Forwarding
-
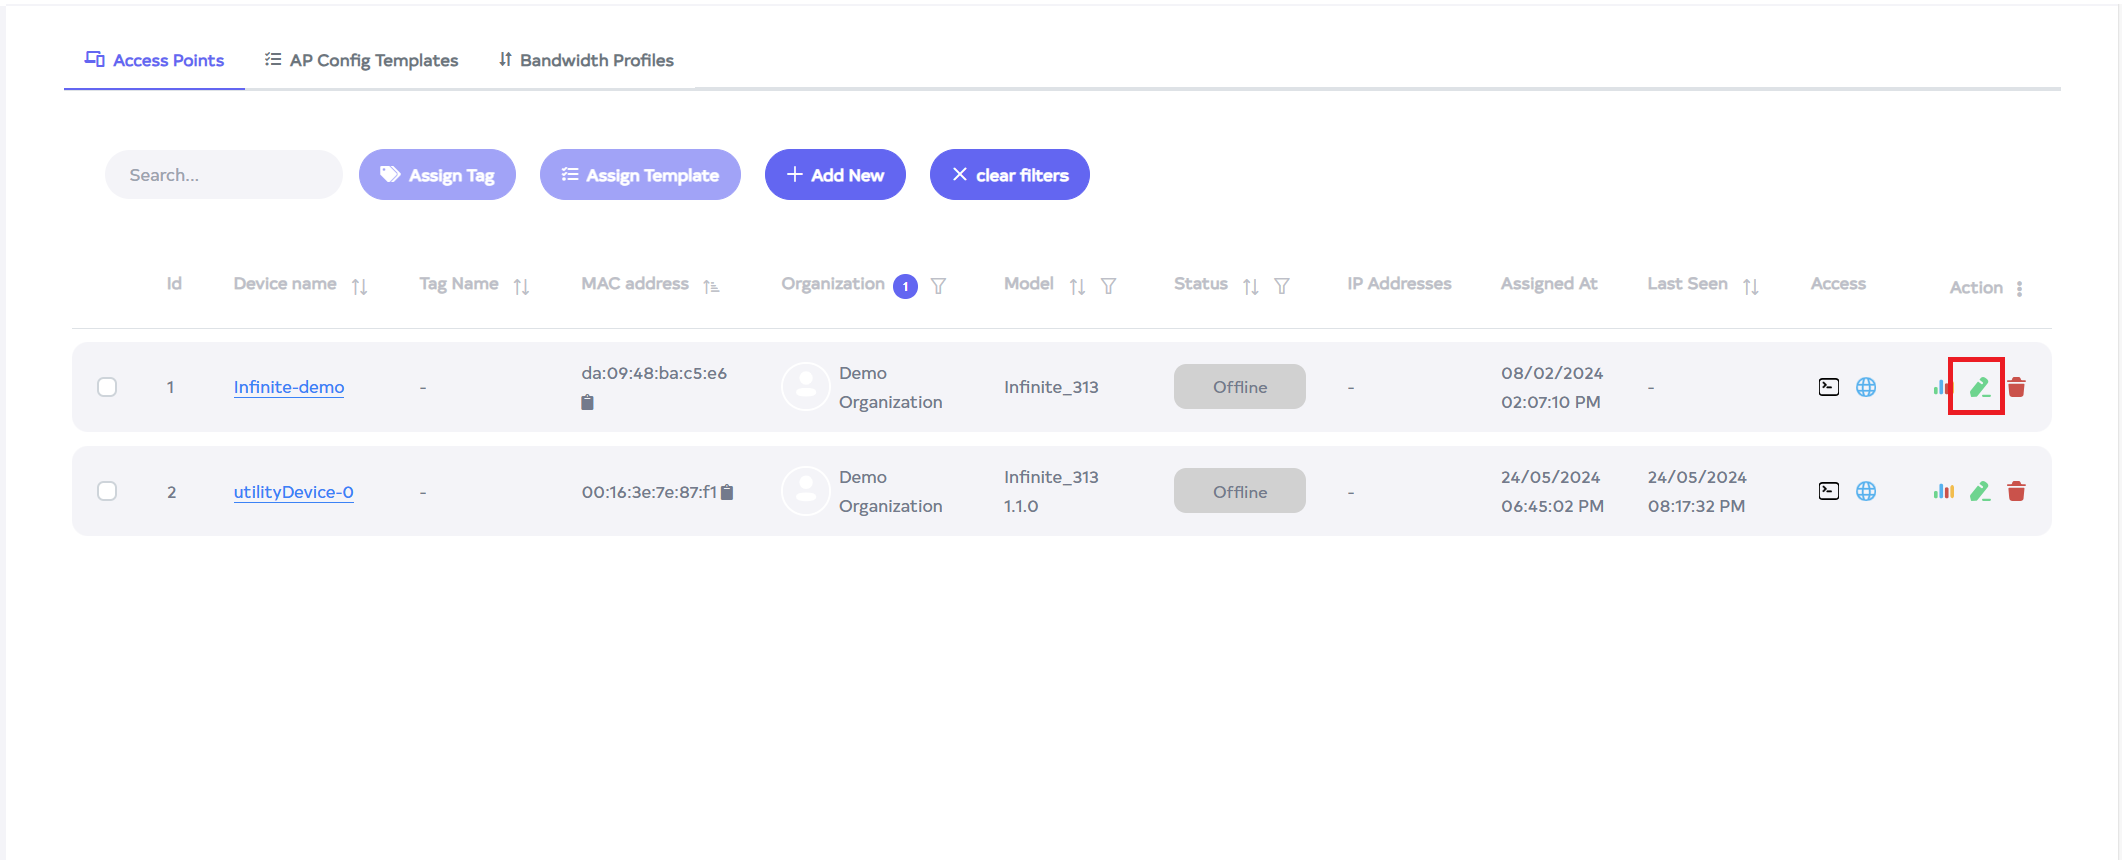
Go to the Access Point menu. If you go to the Access Point menu, a new window will open as shown in the image where the grid will show the Access Point. Click on the edit button to the right of it.
-
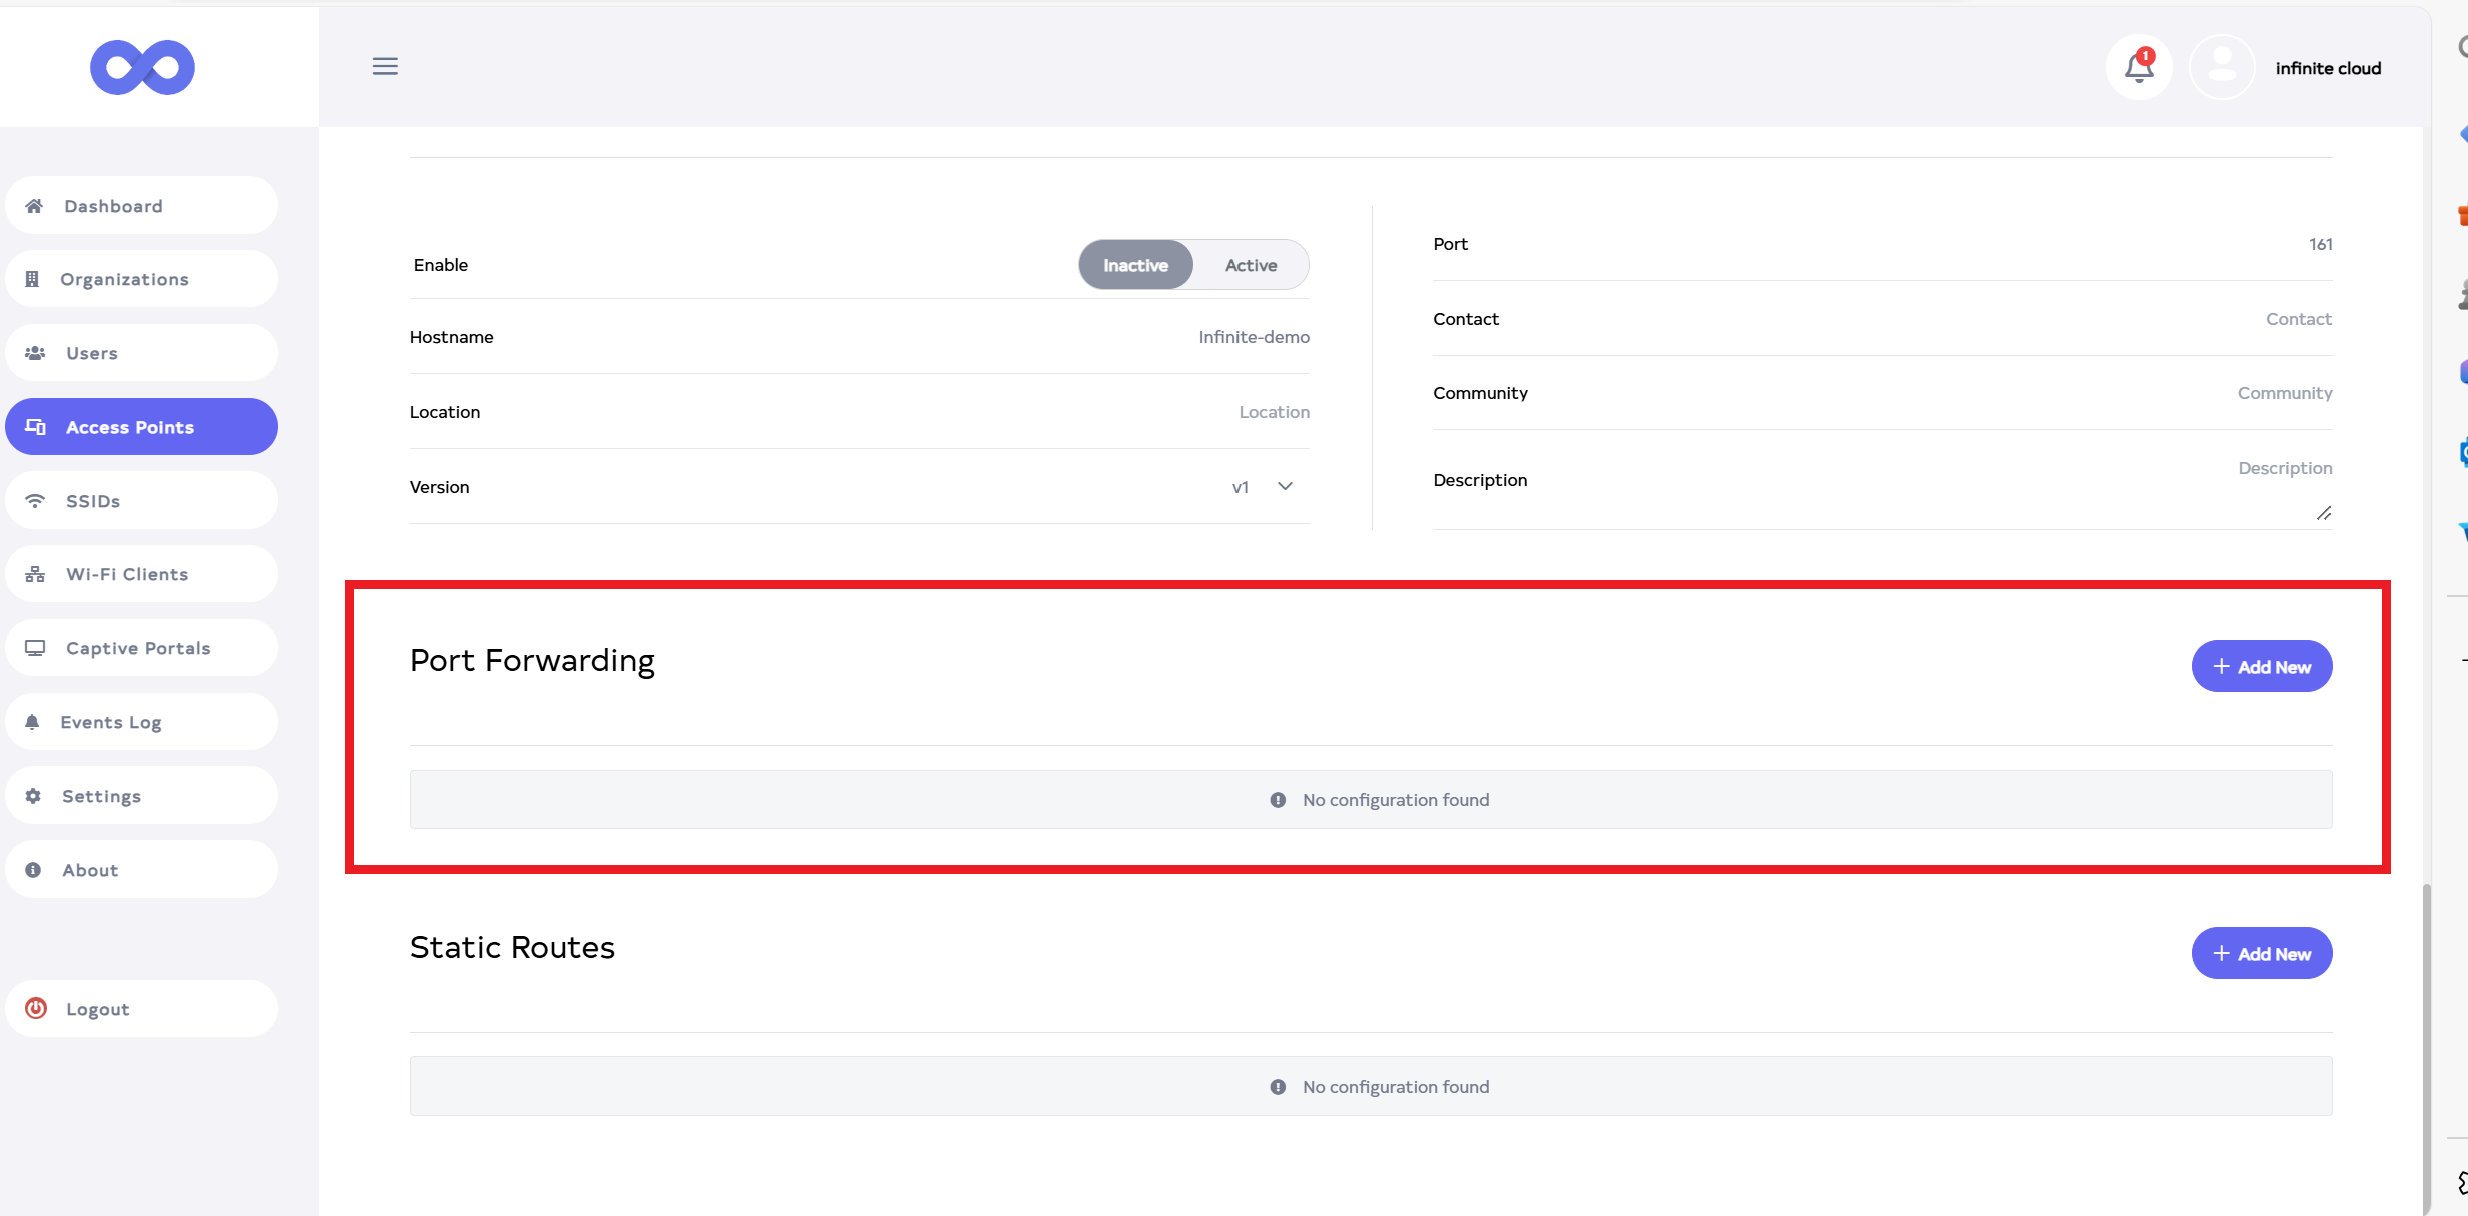
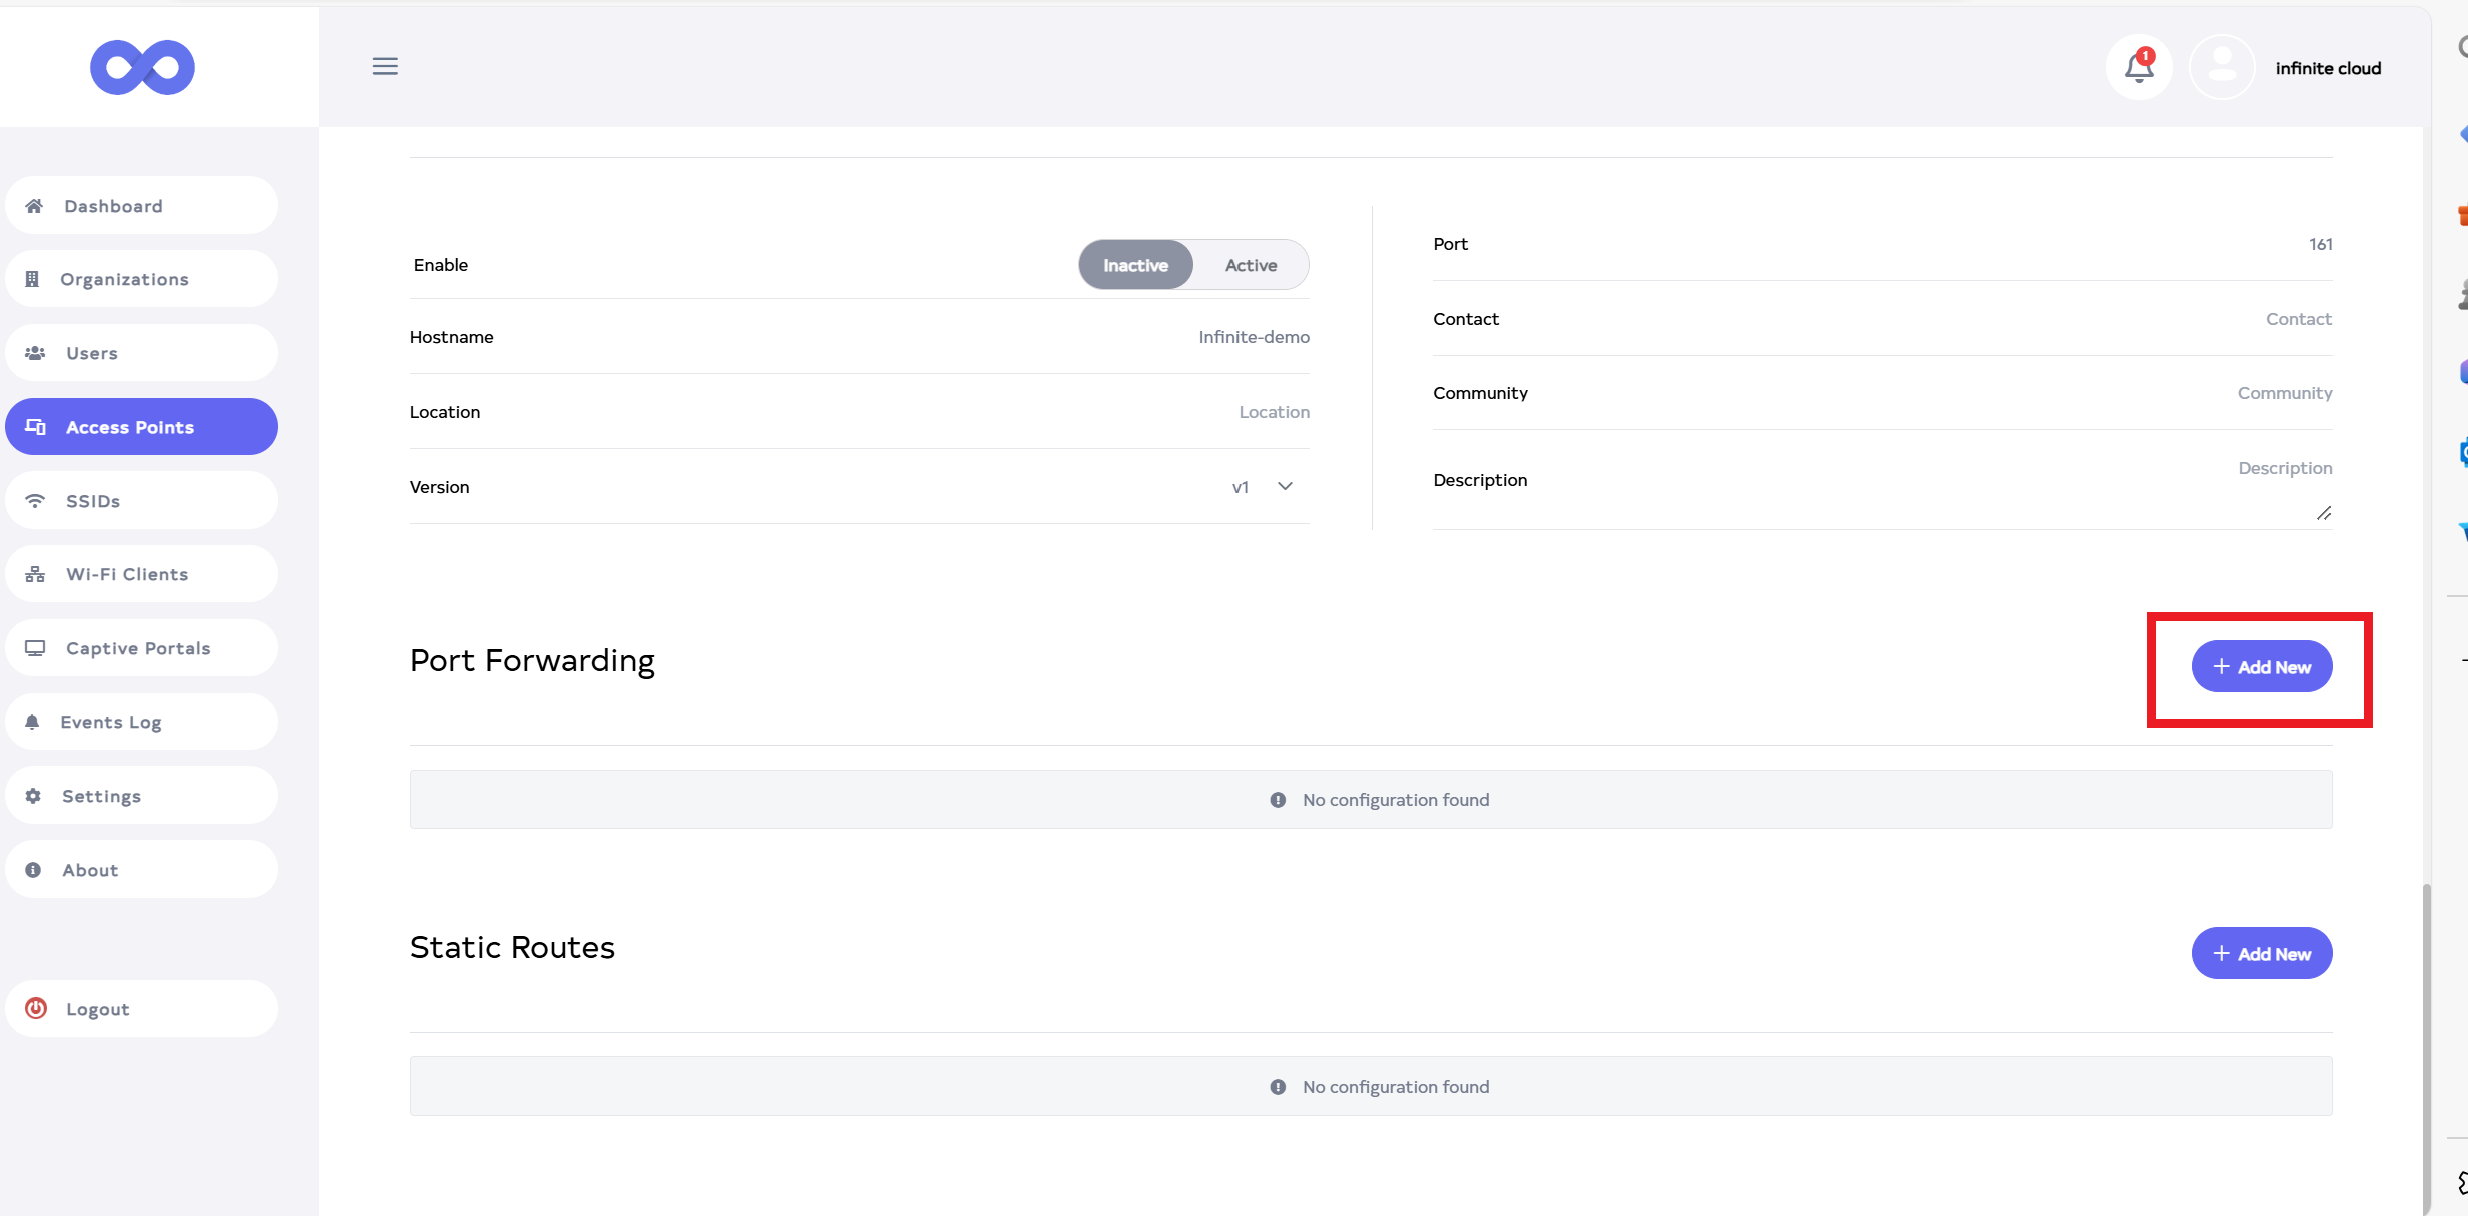
After clicking on edit button, scroll down a little and you will see Port Forwarding.
-
Click on the Add New button,located on the right side.
-
After Clicking the Add New button, a page will open.
-
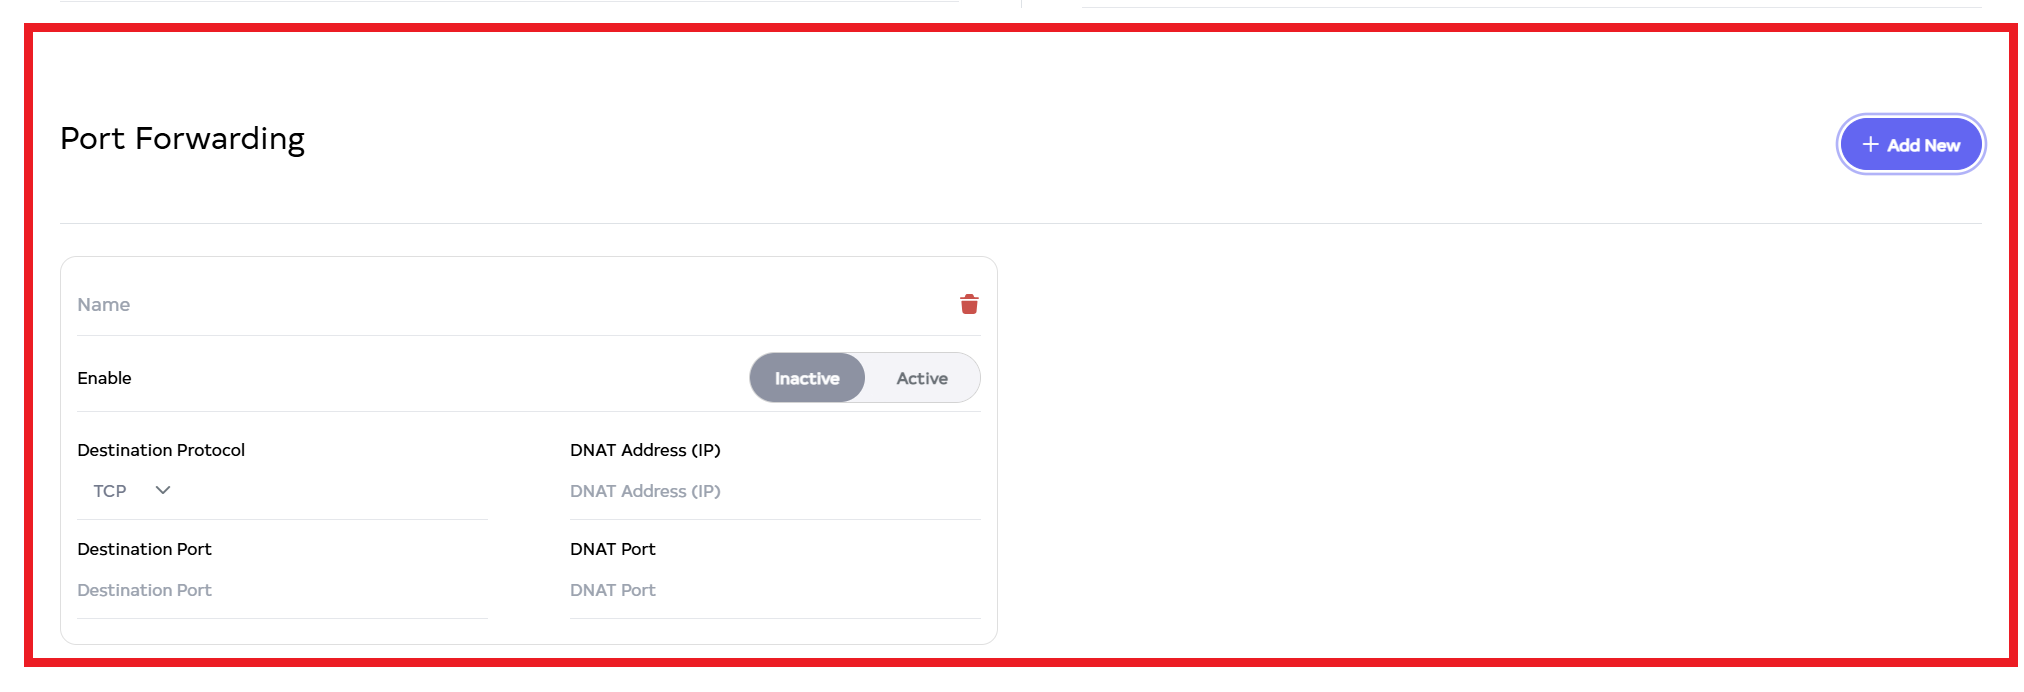
Fill the details
-
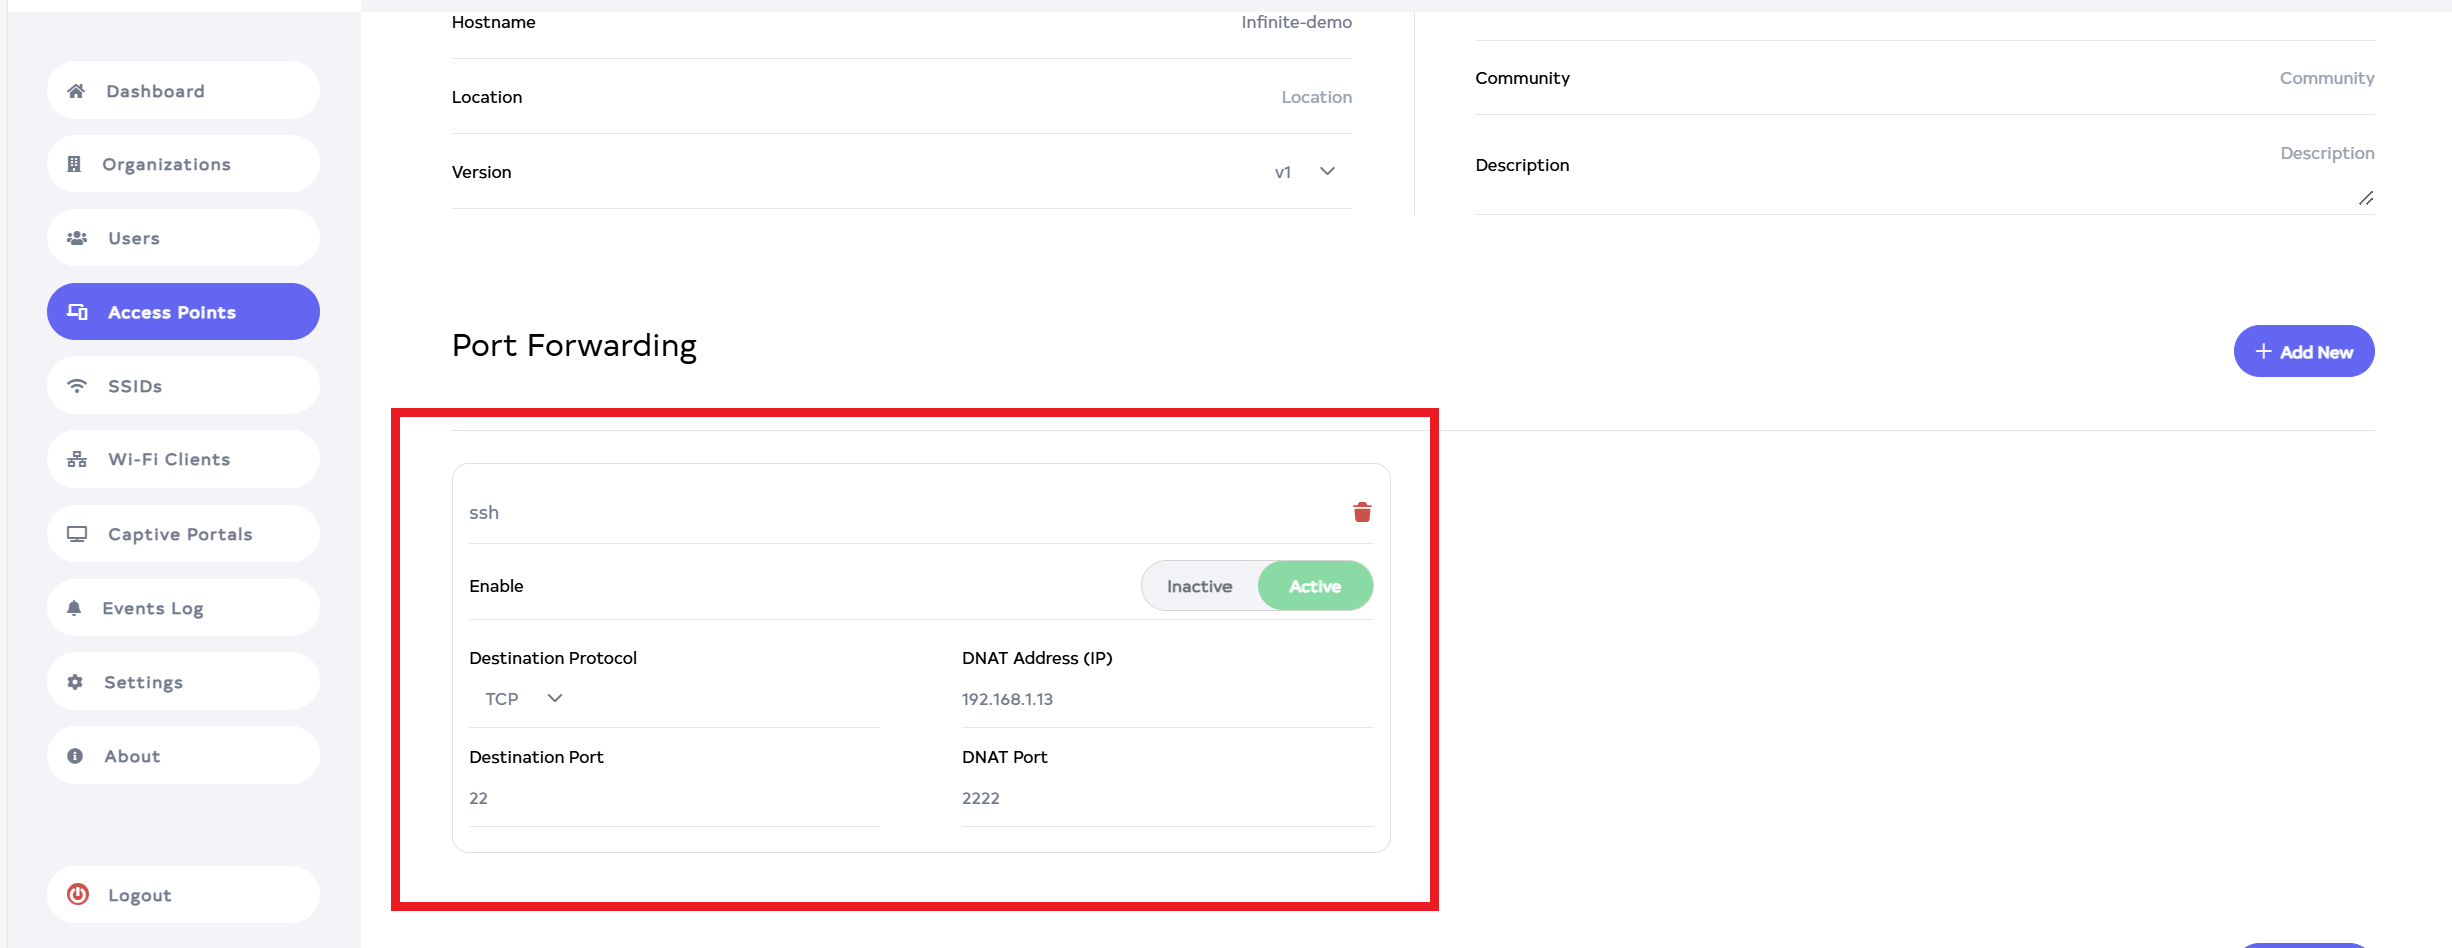
Name:- Enter the Name. For Example:- ssh.
-
Enable:- Select Inactive and Active. If you want to enable the Port Forwarding, click on Active and if you want to disable it, click on Inactive. For Example: Active.
-
Destination Protocol:- Select Destination Protocol. There are 3 types of protocols 1.TCP, 2.UDP and 3.TCP+UDP . For example I select: TCP.
-
DNAT Address (IP):- Enter the DNAT Address (IP). Enter your LAN IP here. For example: 192.168.1.13.
-
Destination Port:- Enter the Destination Port. For example: 22.
-
DNAT Port:- Enter the DNAT Port. For example: 2222.
 Info:
Info:If the user wants to add multiple then you can add by clicking on Add New button.
-
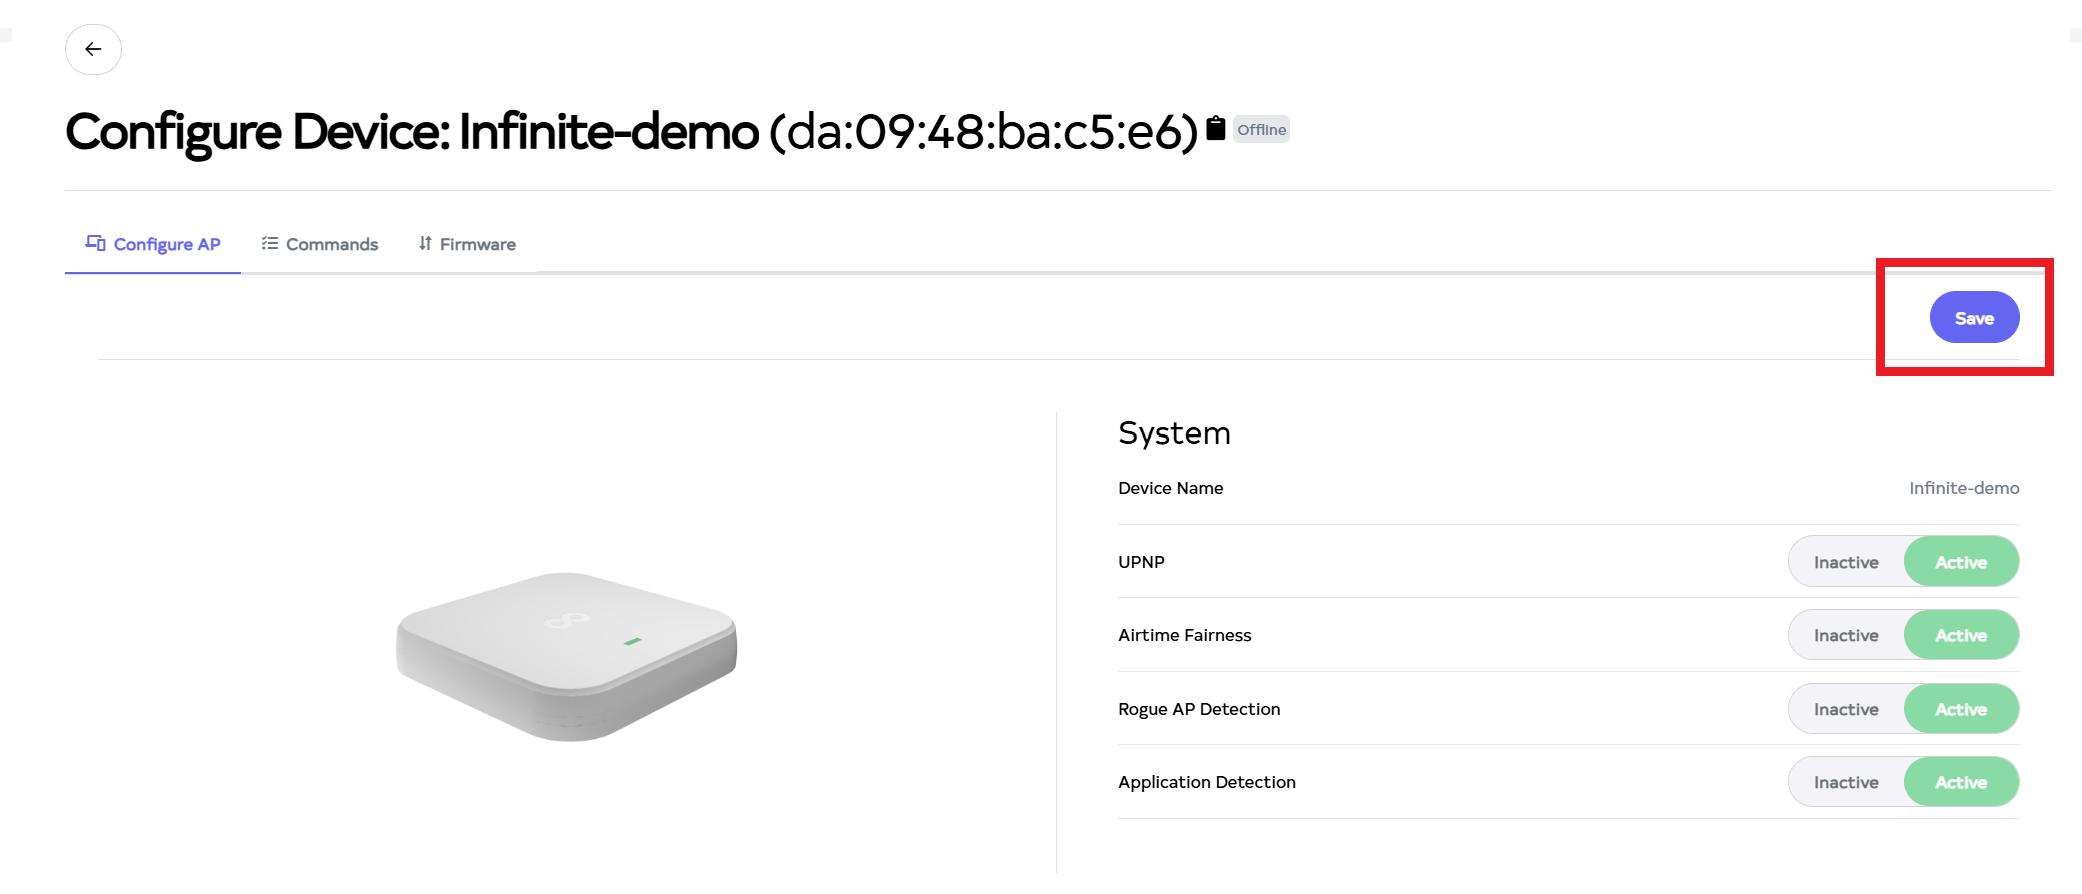
After clicking on the Save button, located right side on top.
-
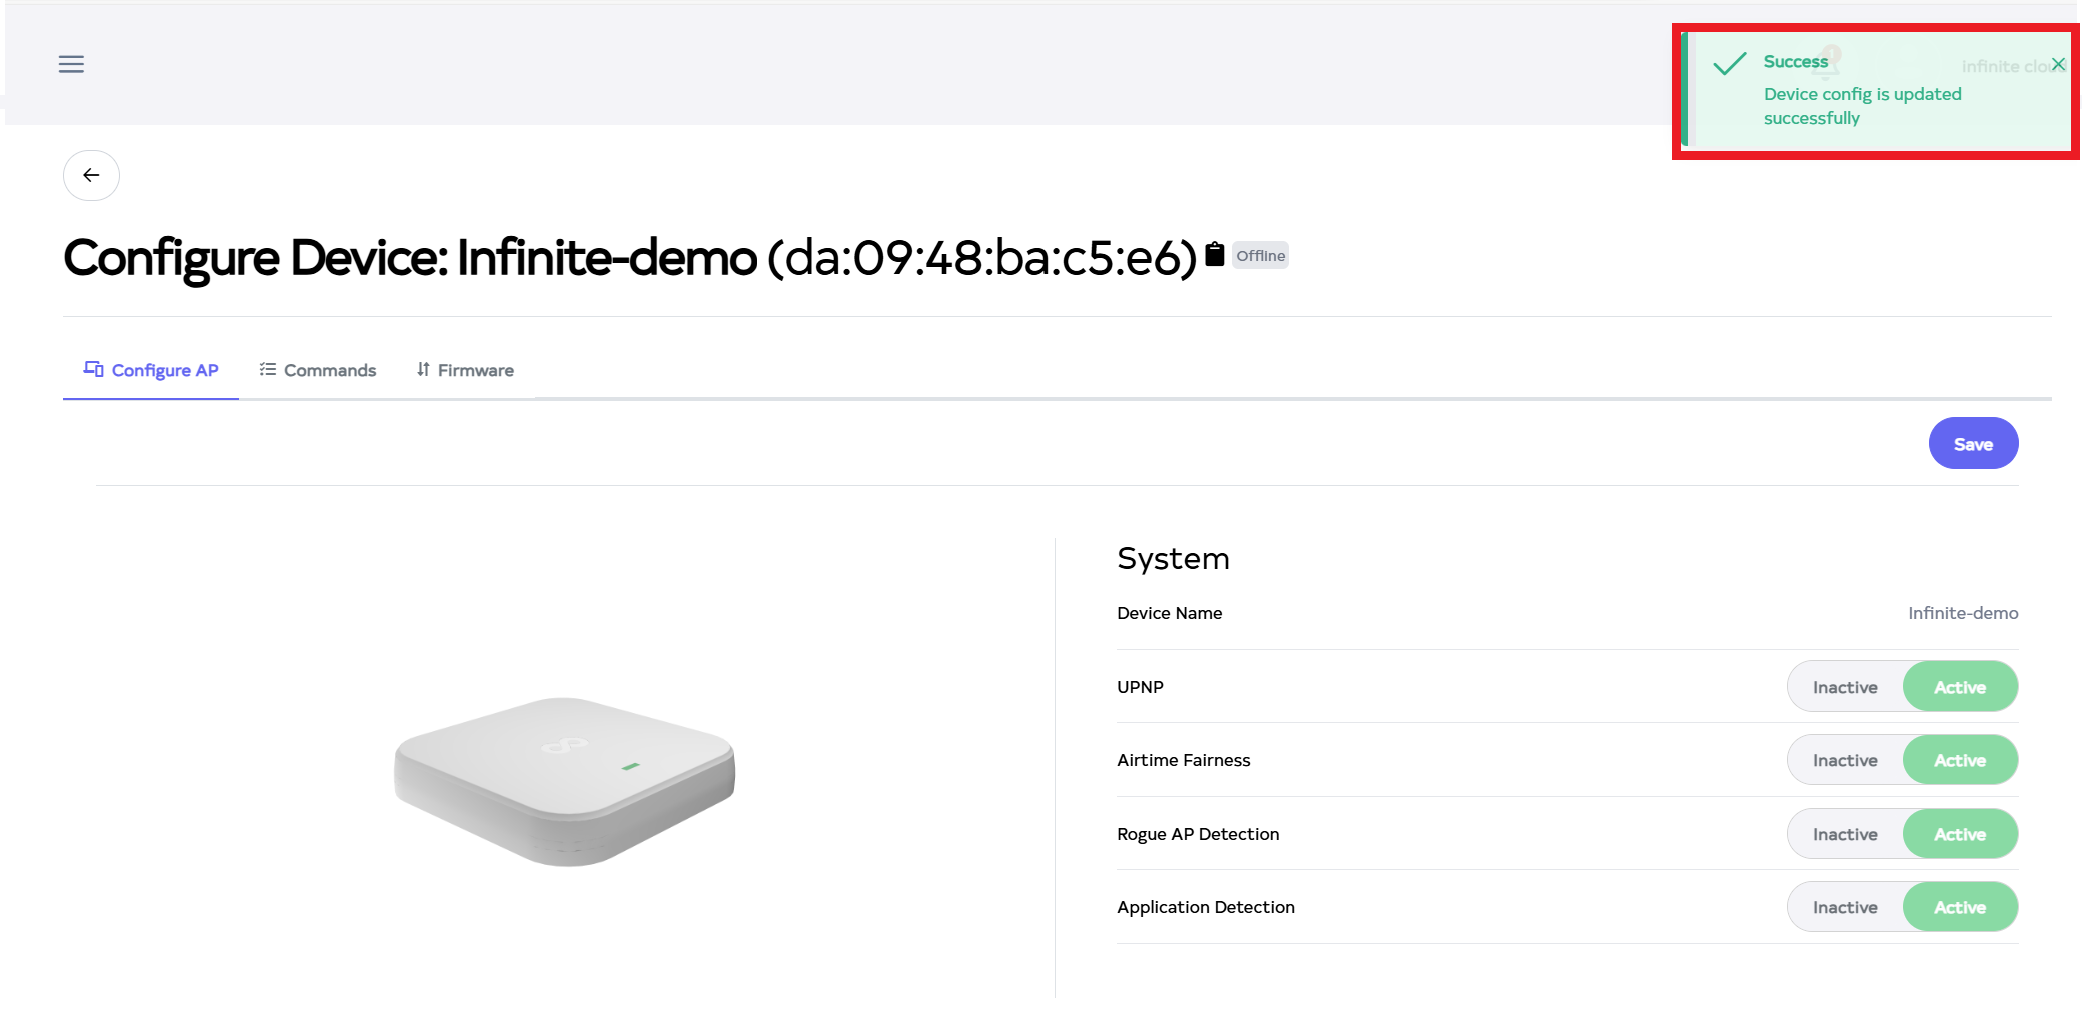
After the Port Forwarding Section is saved successfully, a success message will display Device config is update successfully.
Diagram