Advanced Setting
Advanced Setting Overview
An SSL certificate is a digital certificate that authenticates a website's identity, allowing an encrypted connection between the website and clients. The basic purpose of an SSL certificate for websites is to provide protection against unauthorized access to transferred data between the client and the server; therefore, sensitive information like login credentials, credit card details, and personal data must not get into the hands or eyes of cybercriminals. If a website is SSL-protected, it will start not with "http://," but "https://," and there will be a padlock icon in the address bar of the browser, indicating that the connection is secure.
Configuring an Advanced Setting
Step 1: Access Application Settings
-
Open the application and navigate to the Settings menu.
-
From the Settings menu, select the Advanced Setting tab to proceed with SSL certificate configuration.
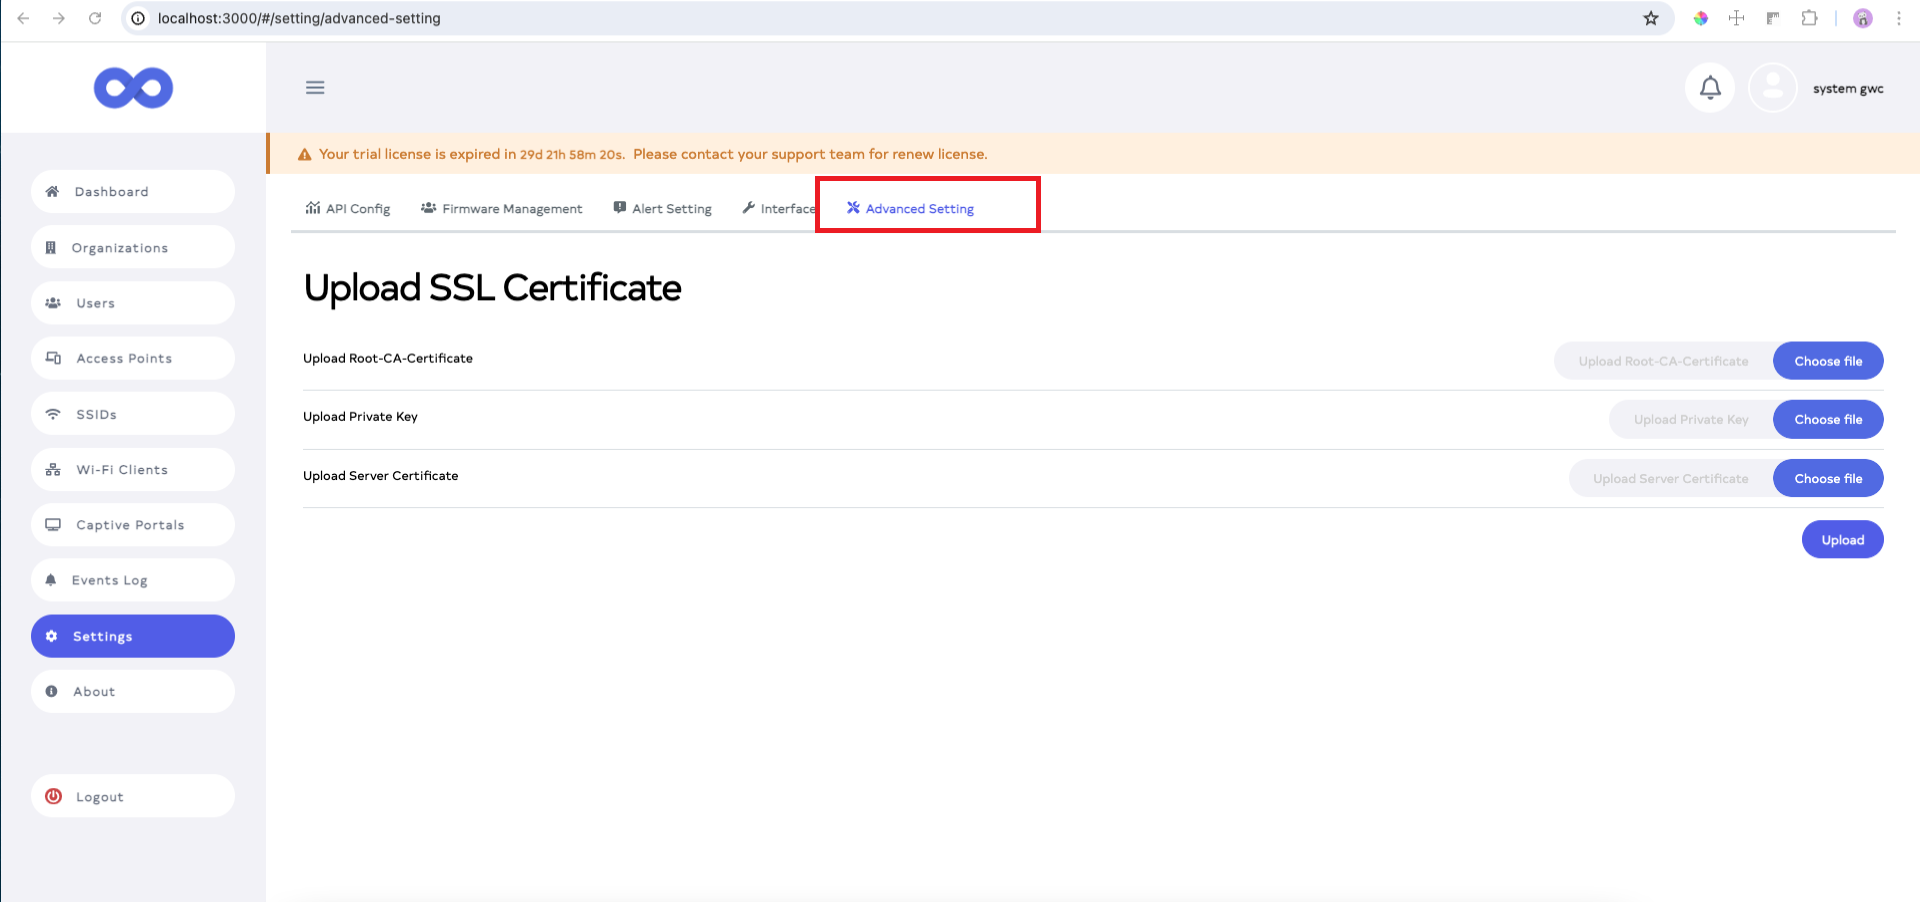
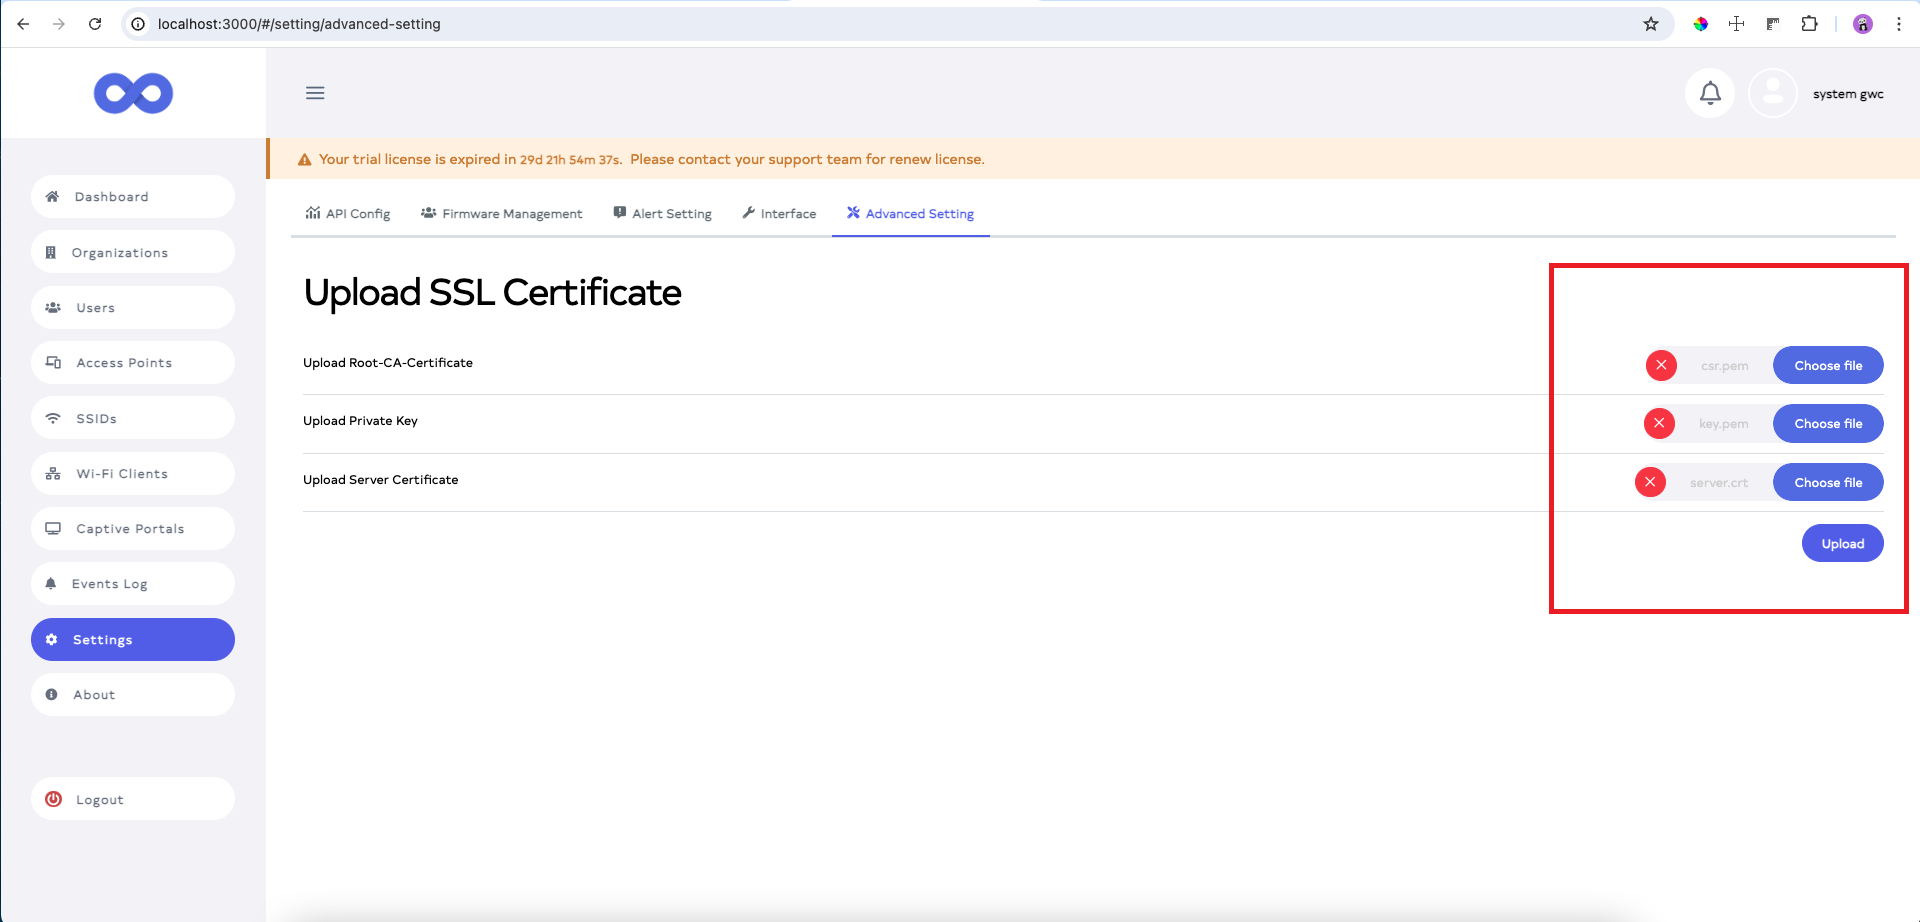
Step 2: Upload SSL Certificates
-
Upload required certificates including CA Certificate, Private Key and Server Certificate by clicking the Choose file button for each field.
-
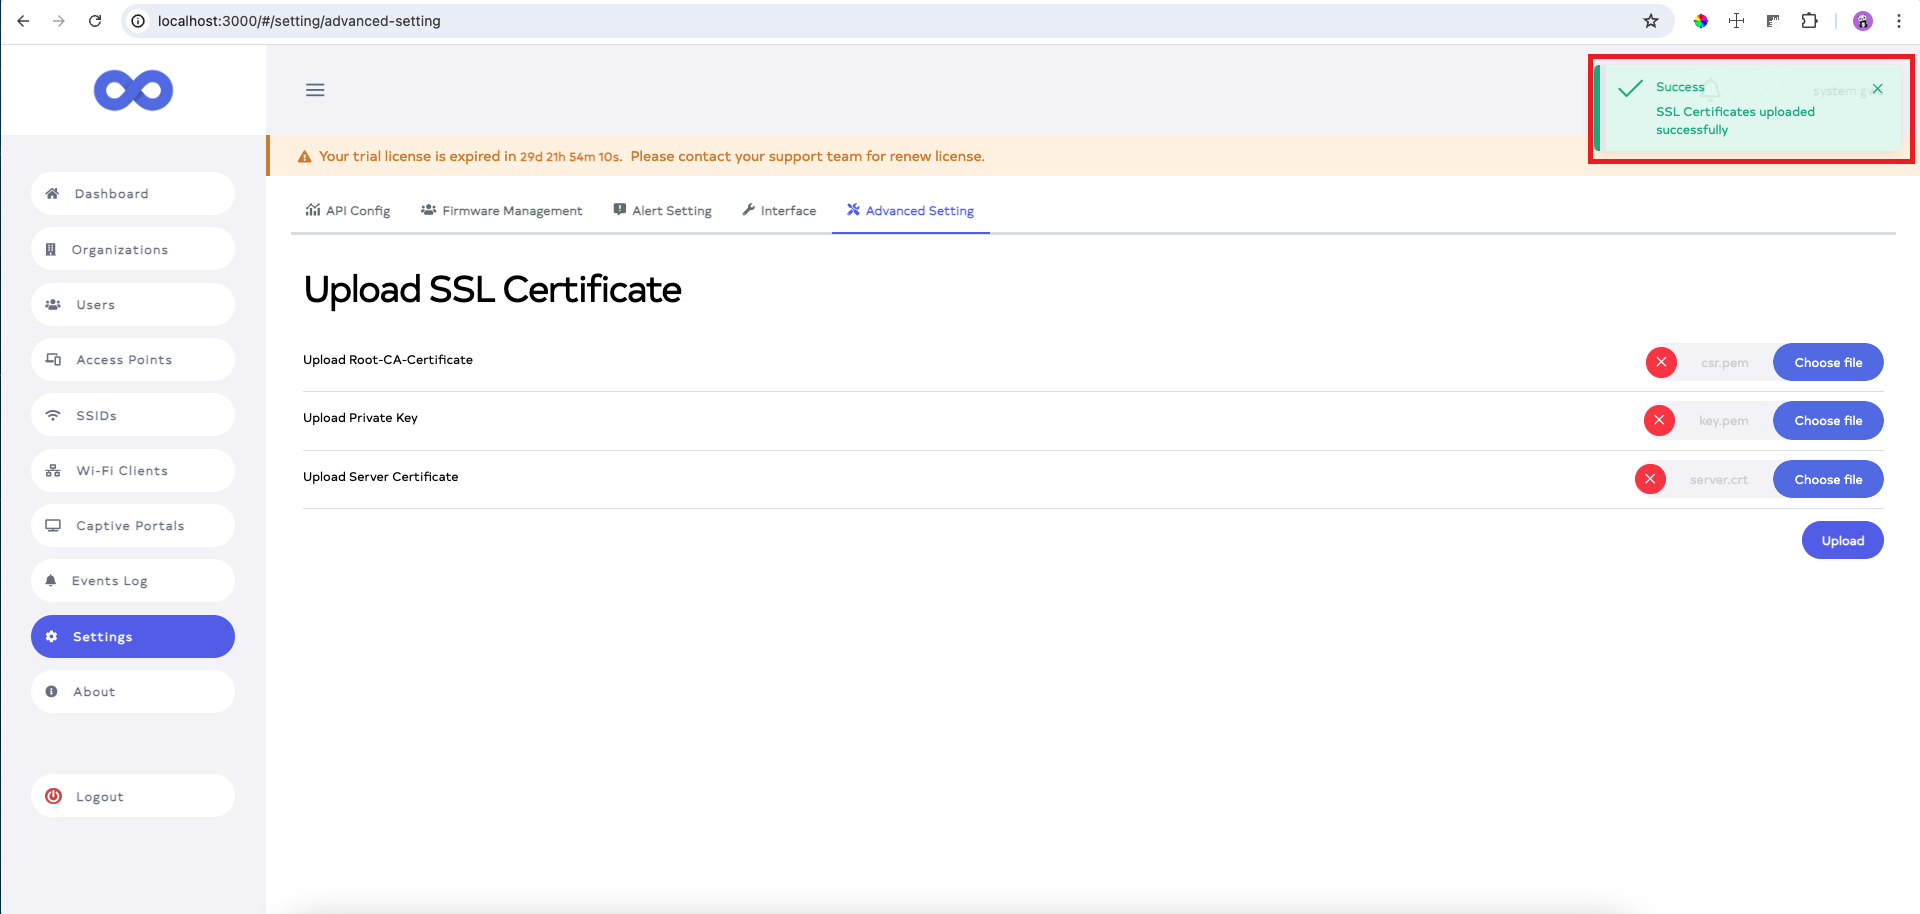
Once the files are selected, click the Upload button to upload the certificates.
-
Upon successfully uploading, a confirmation message will appear SSL Certificates uploaded successfully.
 restart-info
After uploading the SSL certificate, the application will automatically restart. The application will switch from HTTP to HTTPS for secure access.
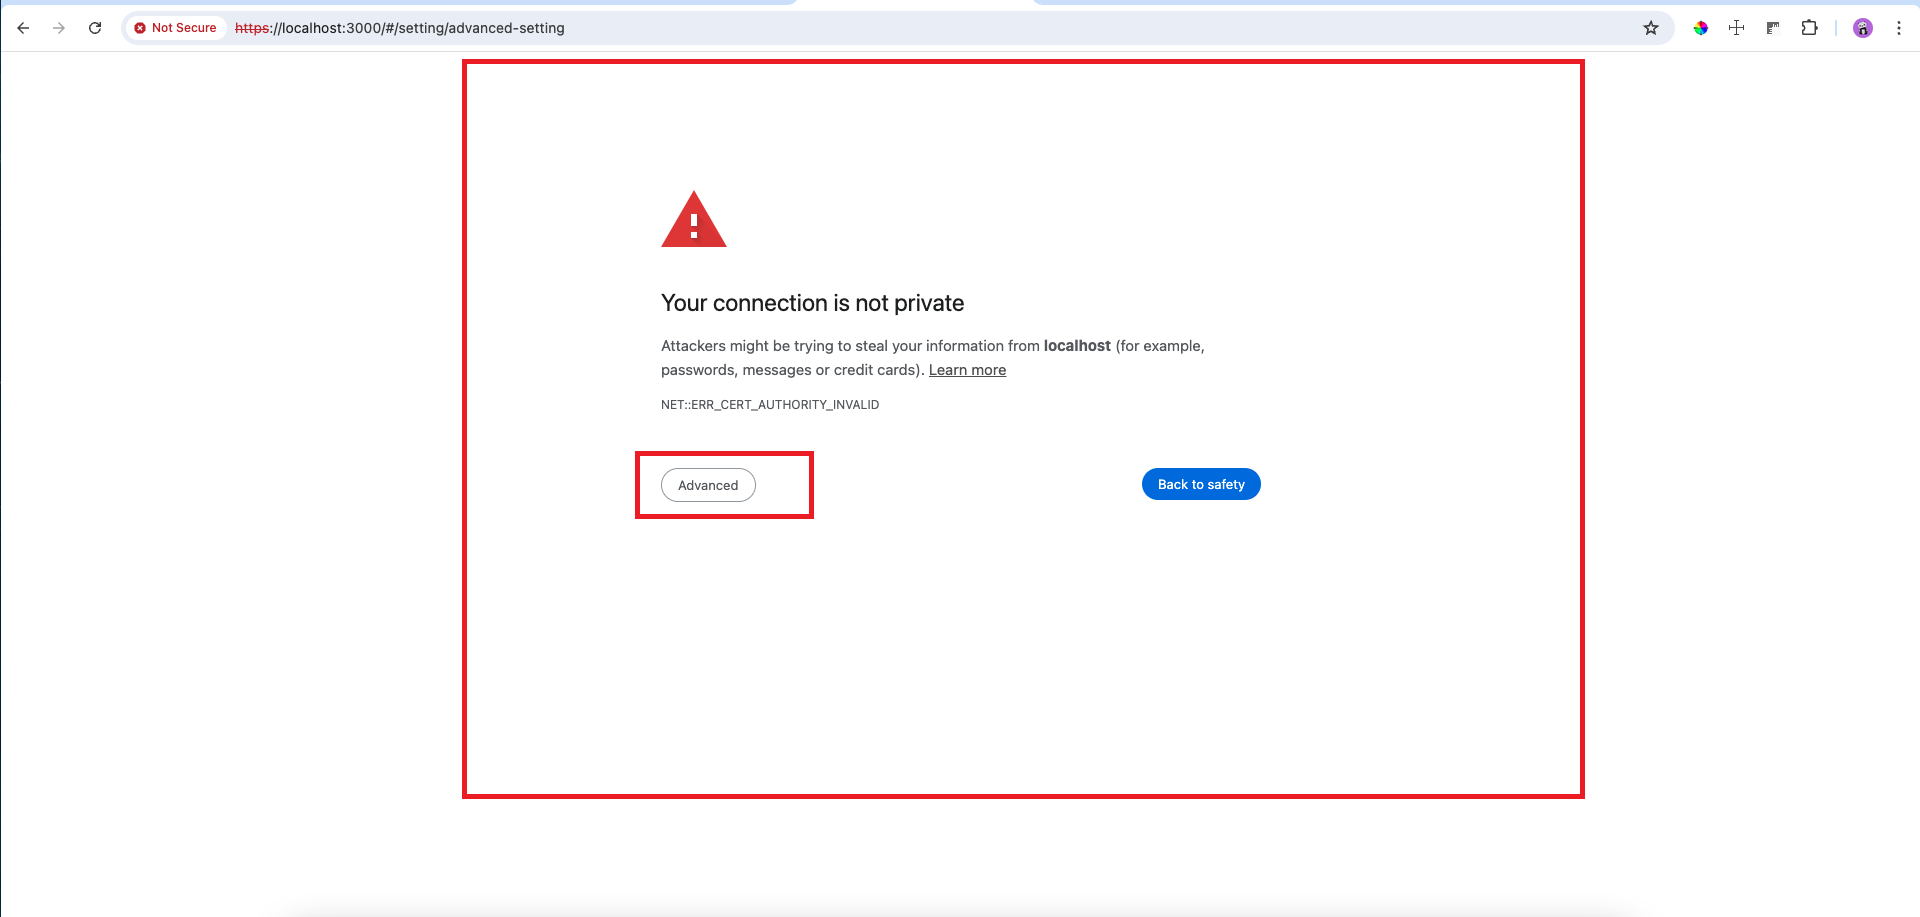
Step 3: Accessing the Application
-
After the restart, the application will be accessible via HTTPS. When opening the application, a security warning may appear. Click on Advanced to proceed.
-
In the advanced options, select Proceed to localhost (unsafe) to continue.

-
The login page will appear. Enter the username and password, then click on Login to access the application.

-
Upon login successfully, the application will operate over a secure HTTPS connection.
Step 4: Viewing the SSL Certificate
-
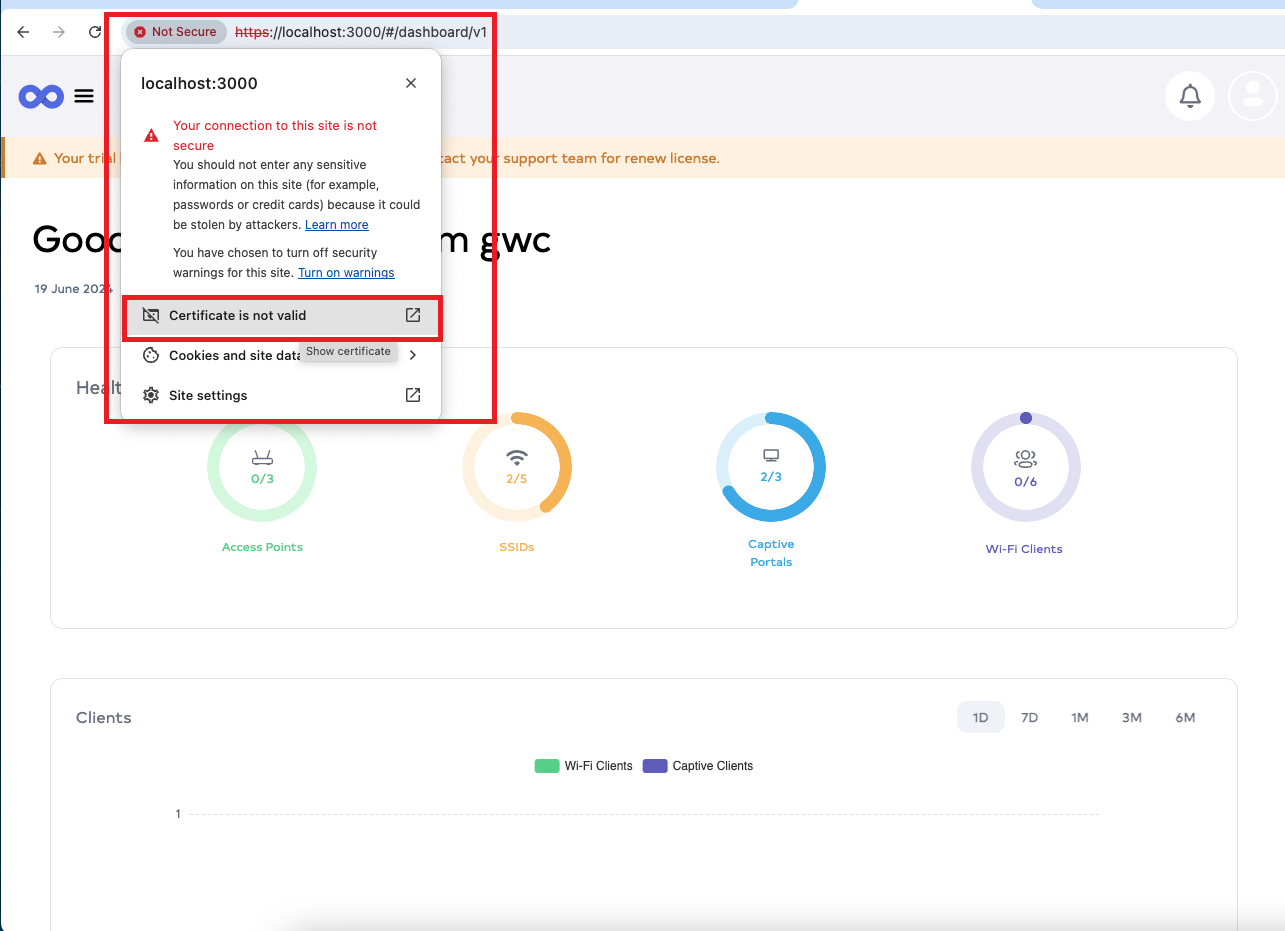
To view the SSL certificate, click the Not Secure message in the browser (if applicable), or click the padlock icon depending on the browser.
-
A pop-up window will appear, click on Certificate is not valid to inspect the certificate.
-
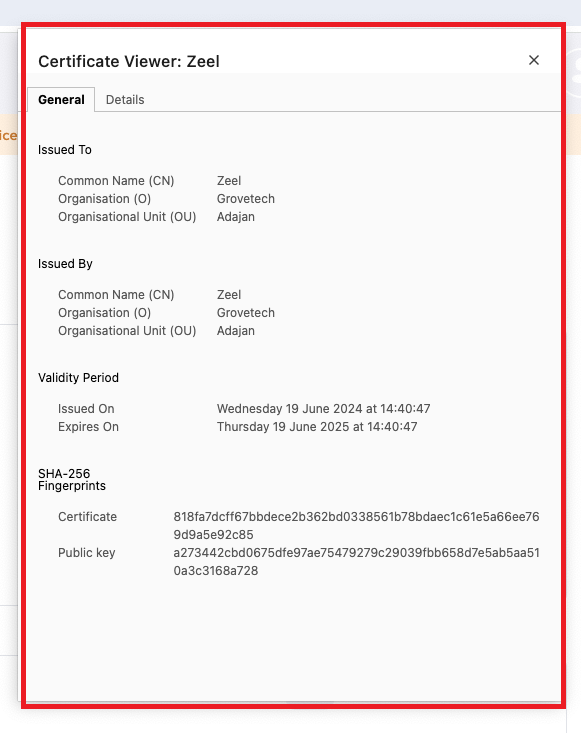
A new window will display the SSL certificate details, including the name of the certificate uploaded during the configuration.
 Info:
Info:If a new SSL certificate is uploaded, it will replace the existing certificate. The old certificate details will no longer be displayed.