Static Routes
Understanding static routes
Static routes are manually configured routes that determine the specific path data packets follow to reach a destination network. Configuring static routes can optimize network traffic flow and ensure reliable connectivity. Below are the steps to configure a static route.
How to create a Static Routes
-
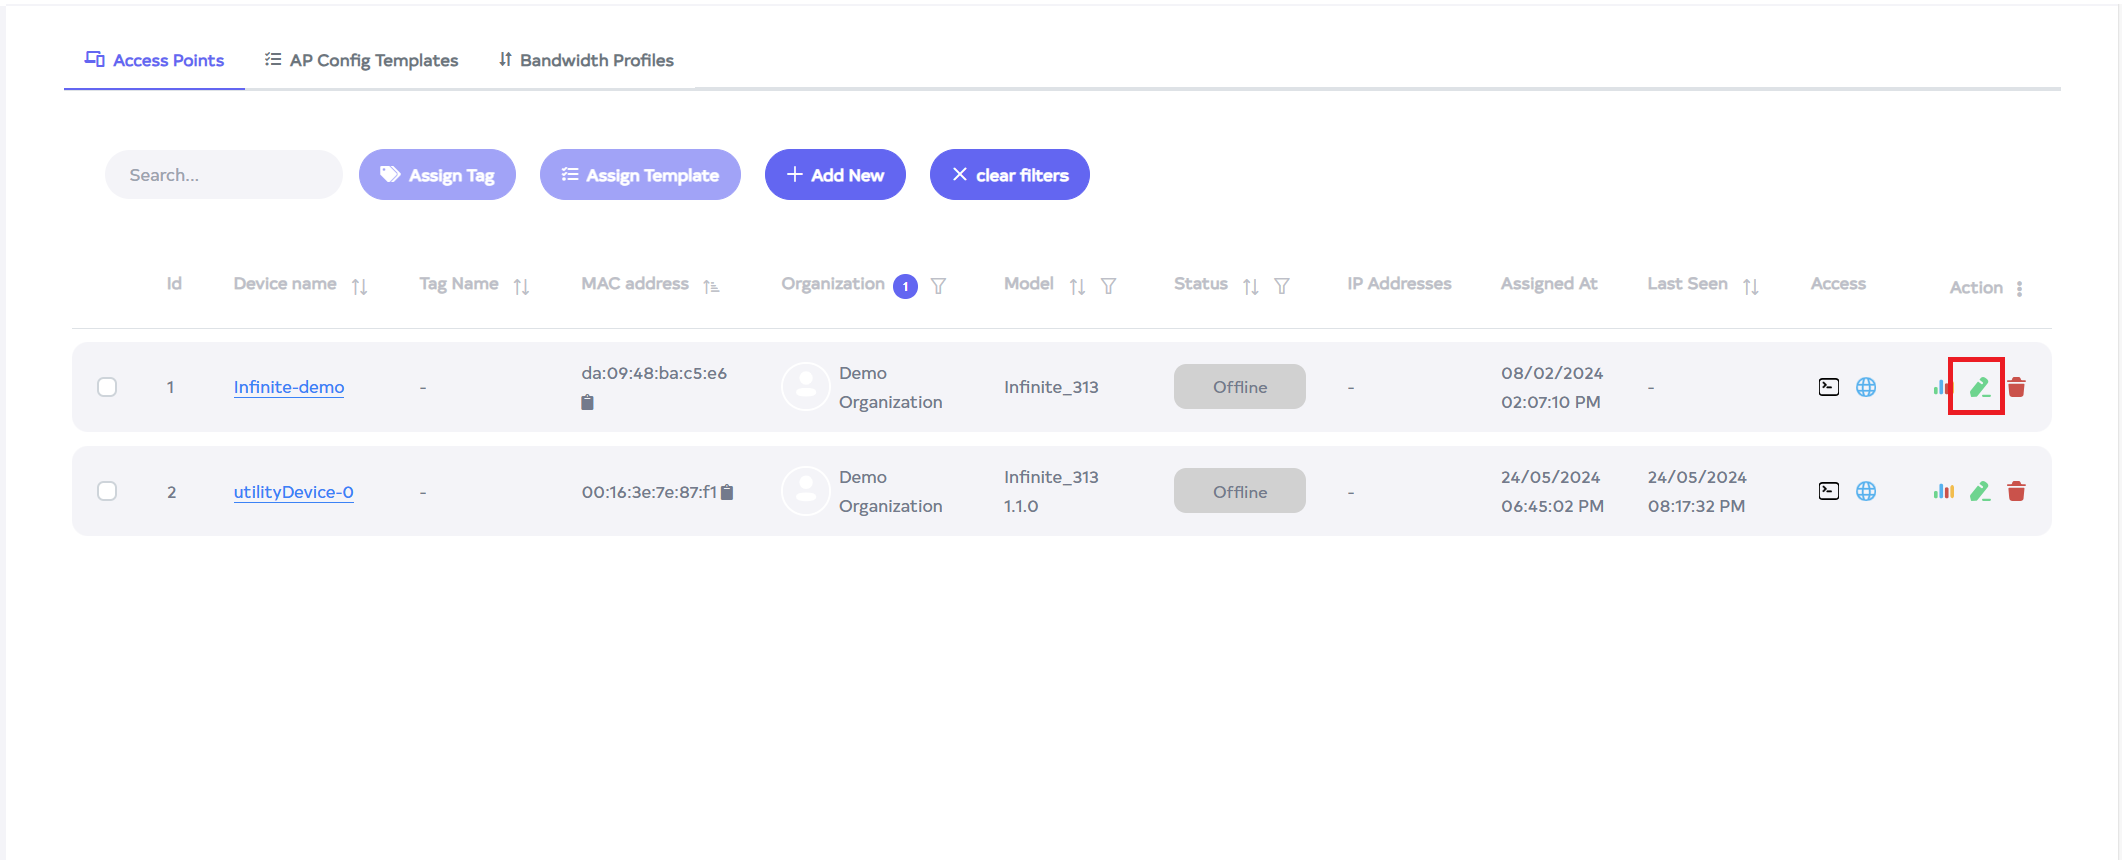
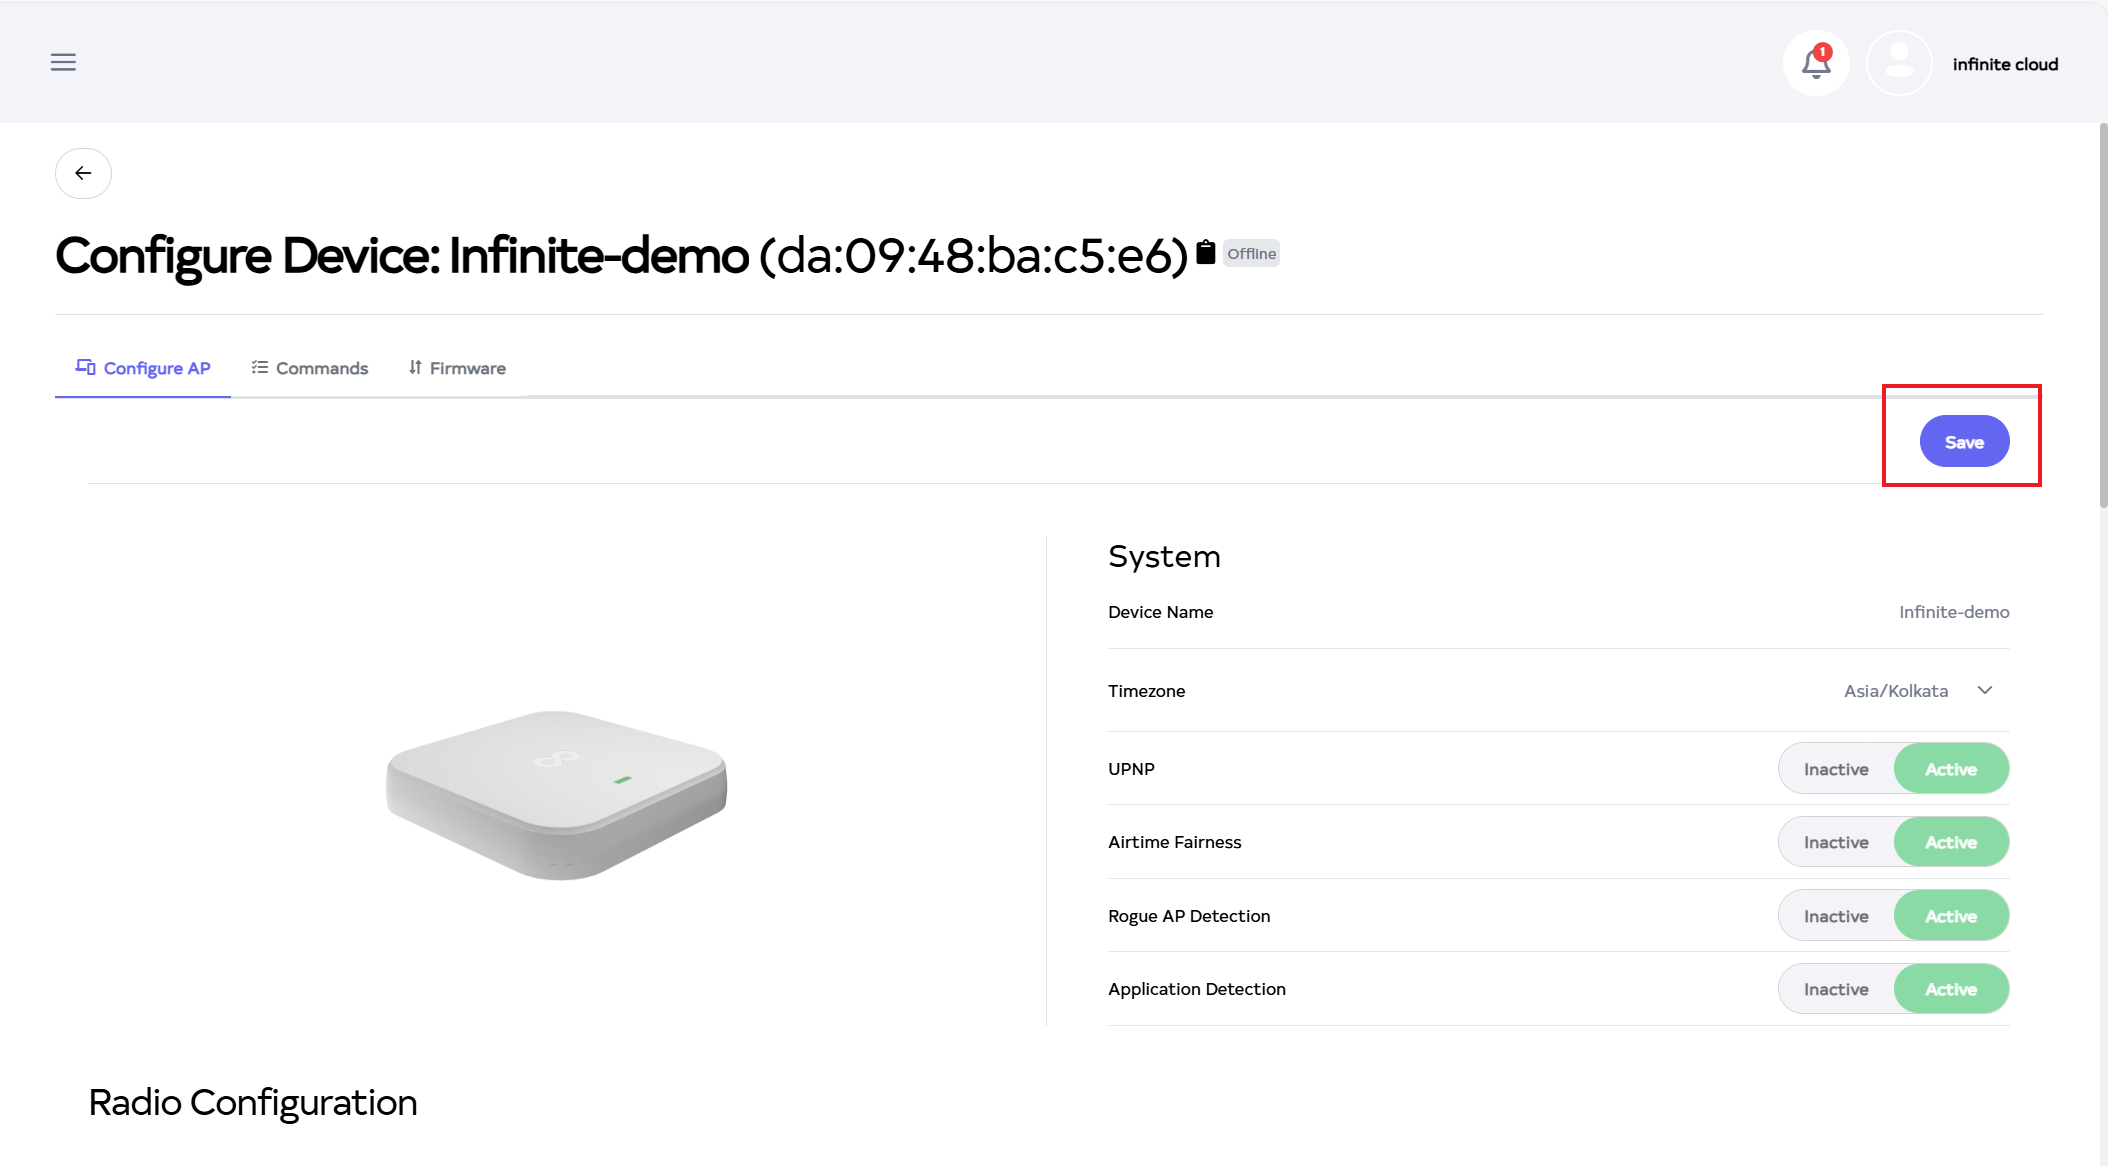
Go to the Login > Access Points menu > Access Point edit button.
-
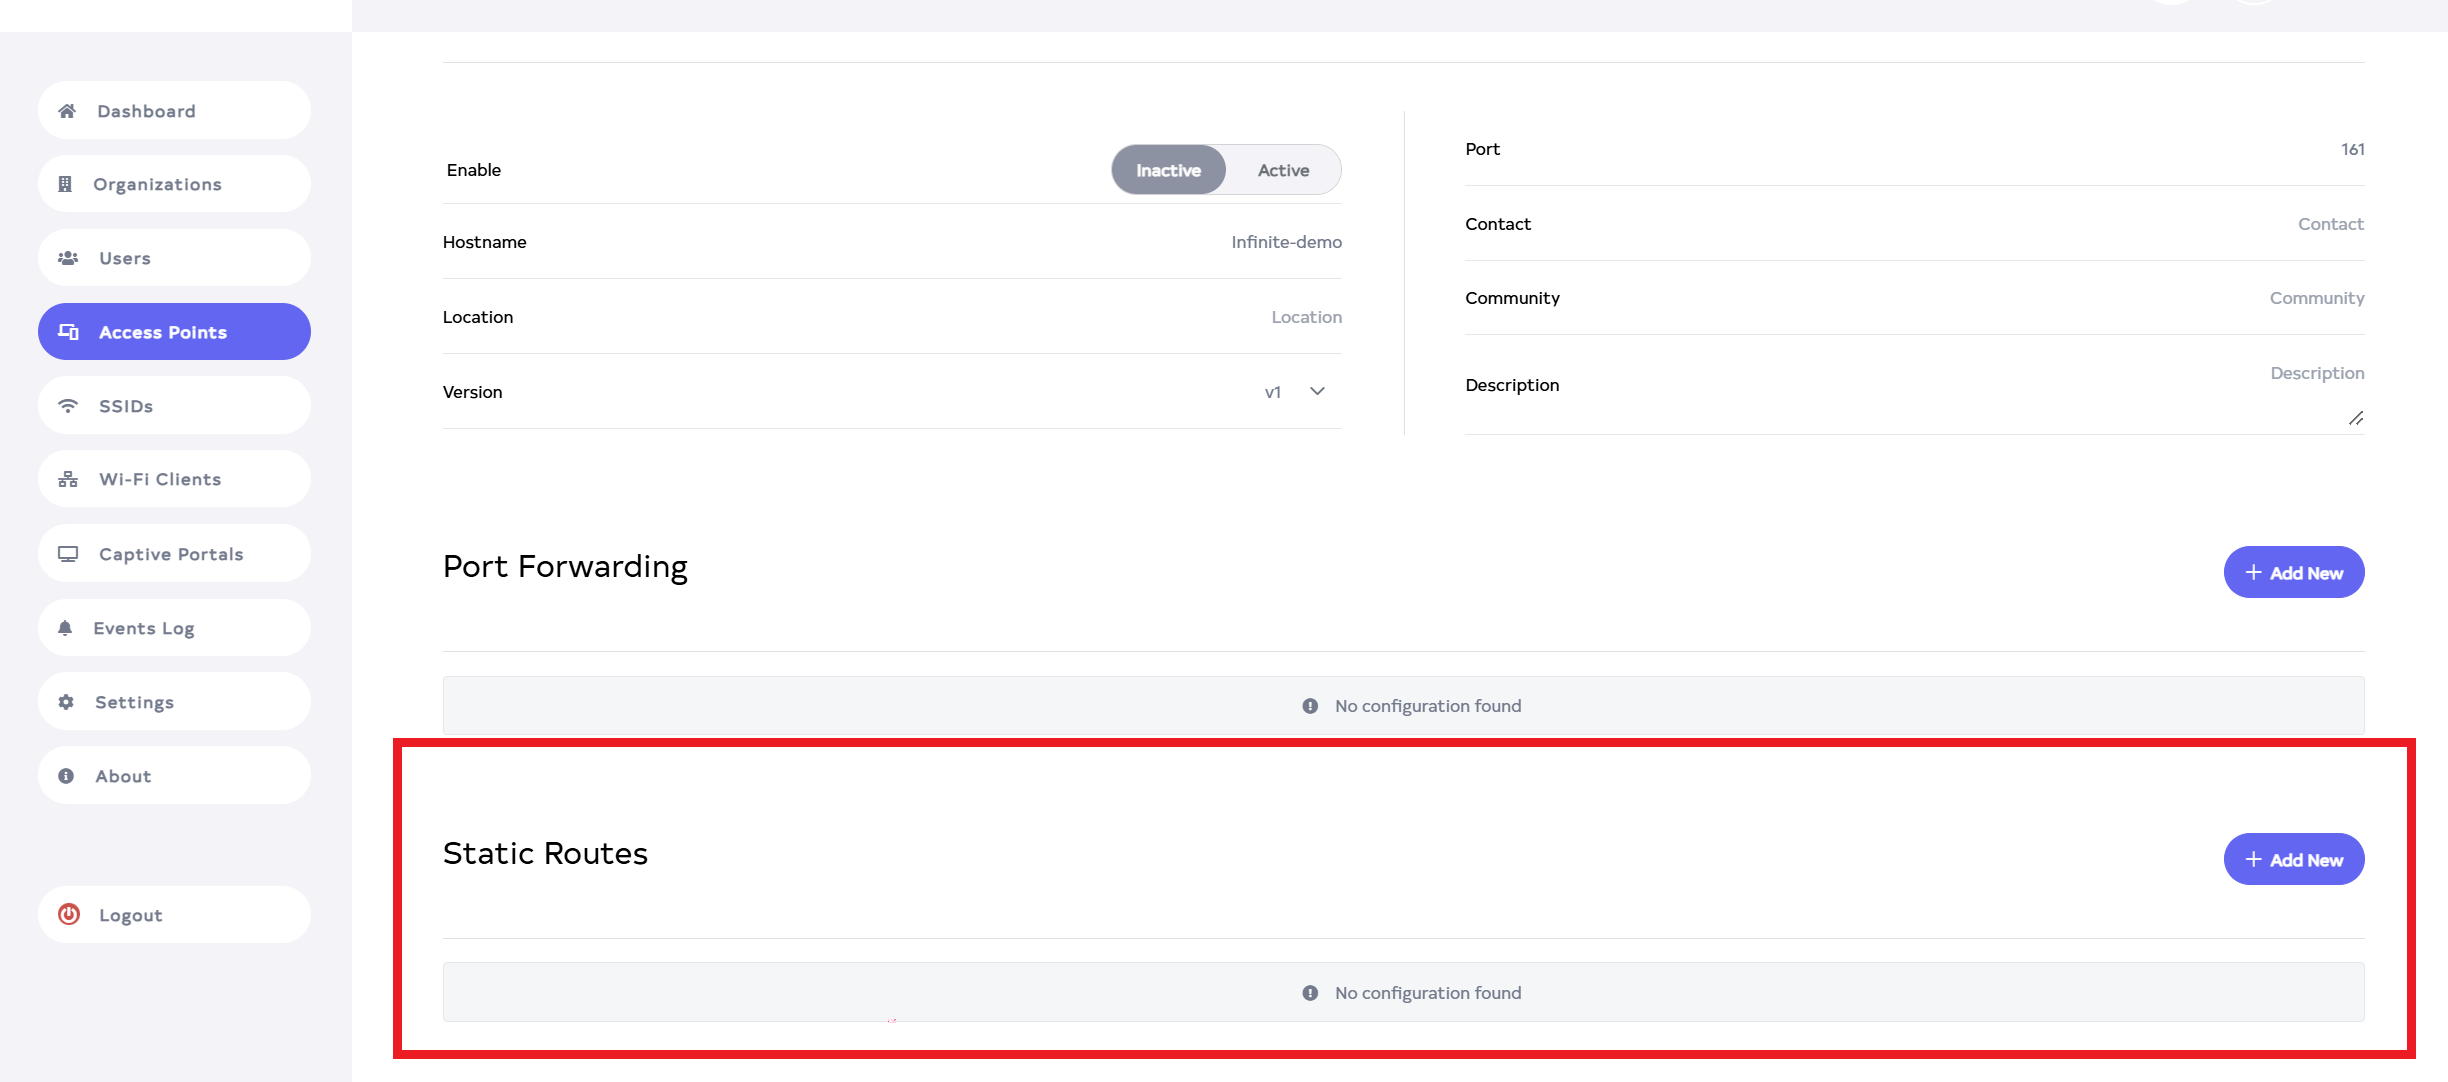
After clicking on edit button, scroll down to see the Static Routes.
-
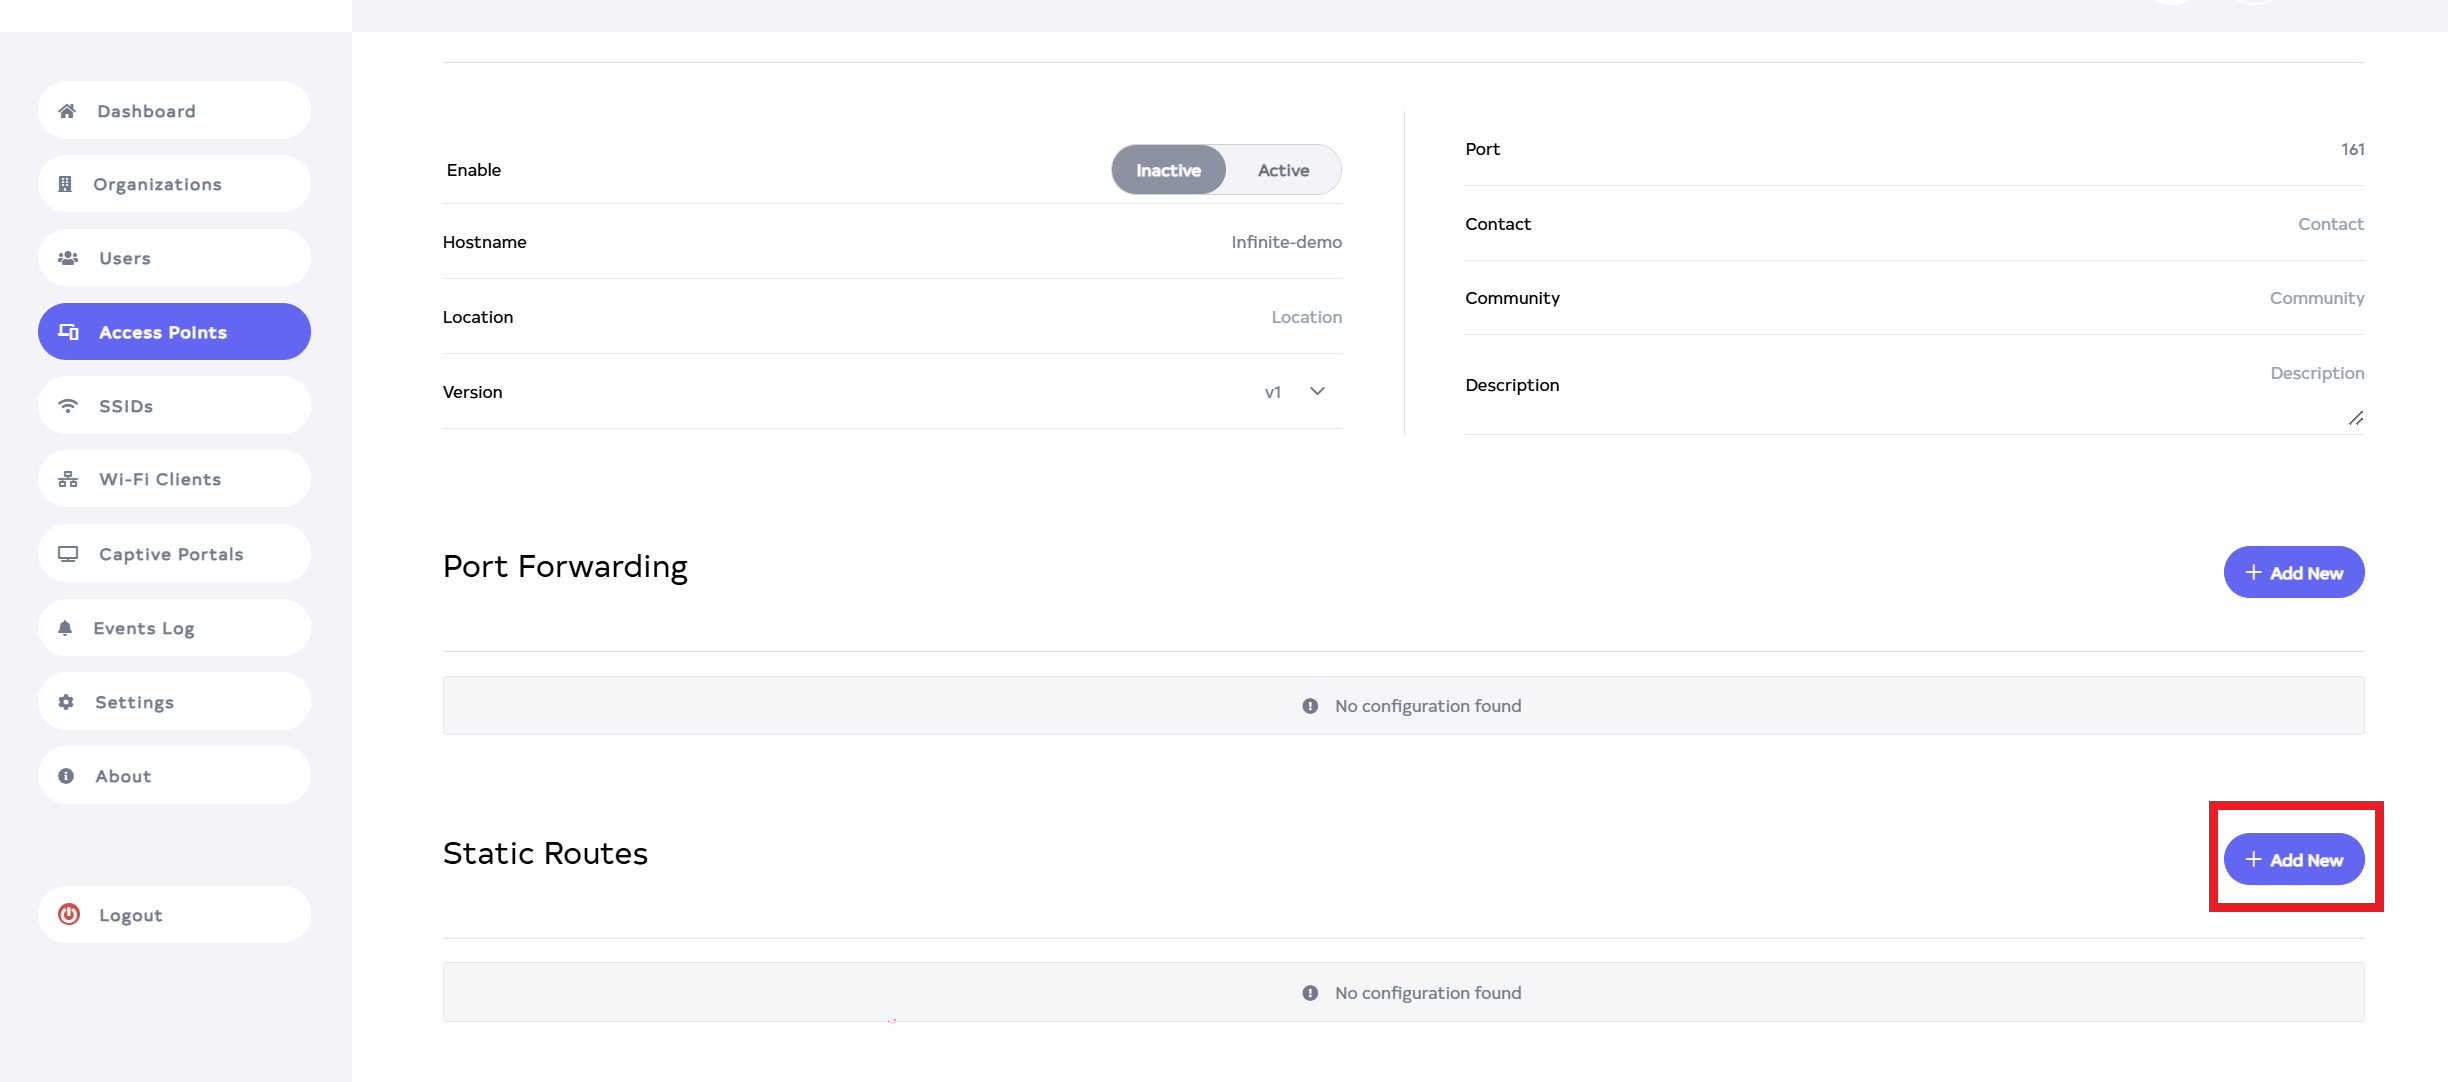
Click on Add New button,located on the right side.
-
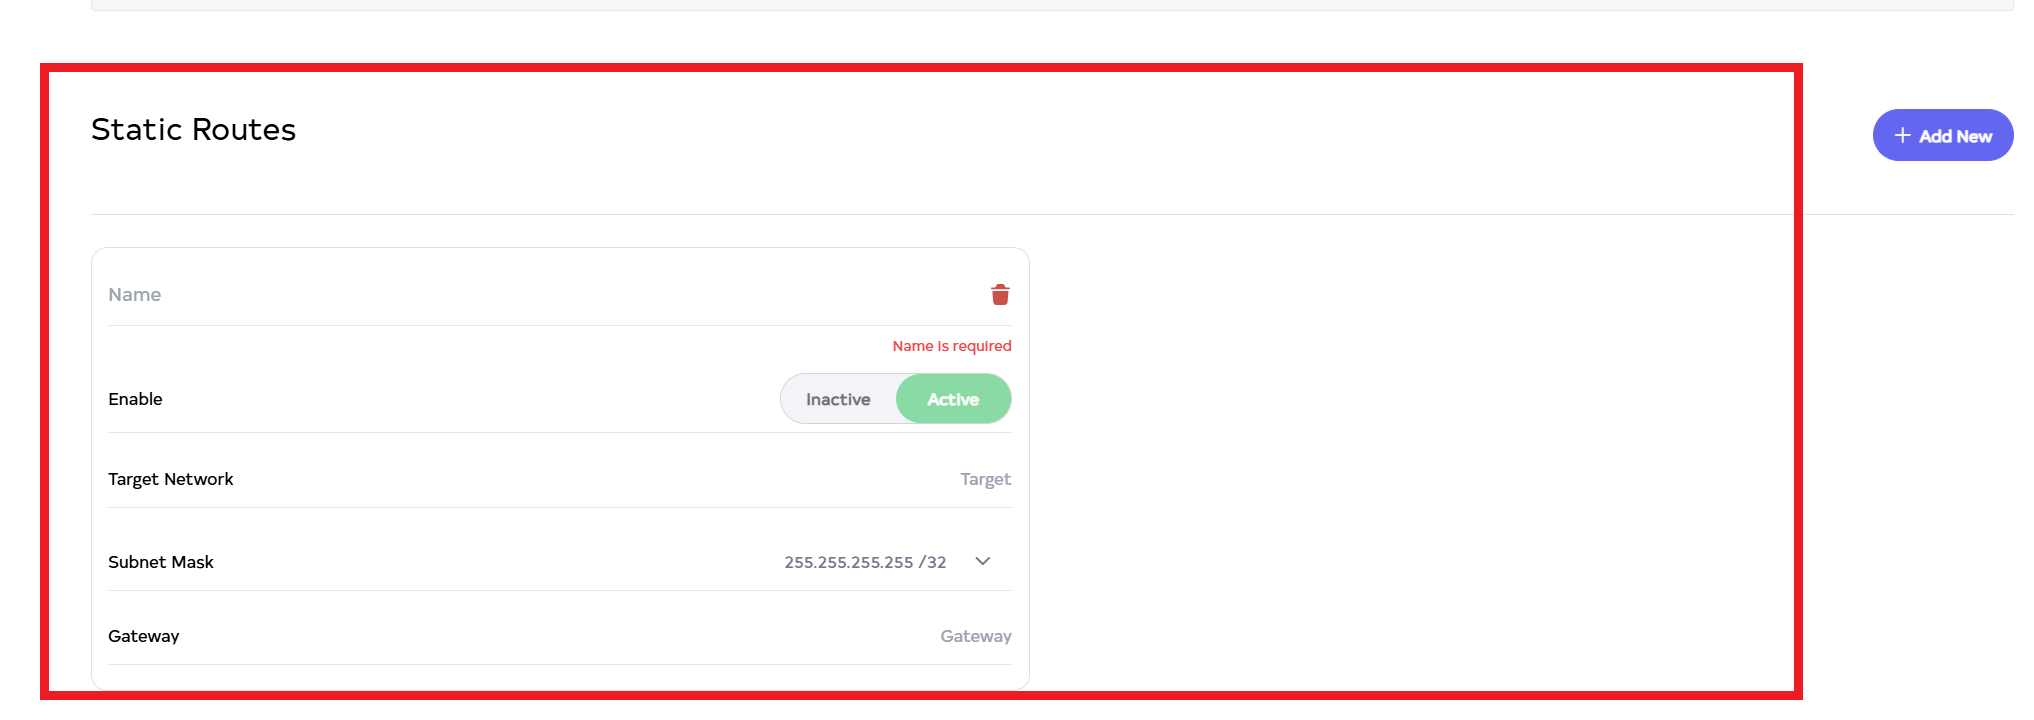
After Clicking the Add New button, a window will be displayed.
-
Fill the details
-
Name:- Enter the Name. For Example:- demo. The name allows only alphanumeric strings. Special characters are not accepted in input.
-
Enable:- Select Inactive and Active. If you want to enable the Static Routes, click on Active and if you want to disable it, click on Inactive. For Example Active.
-
Target:- Enter the Target Network. For Example:- 172.30.2.0.
-
Subnet Mask:- Select the Subnet Mask. The subnet mask should be in the match of your IP. For Example:- 255.255.255.0/24.
-
Gateway:- Enter the Gateway. Here the gateway IP of target network will come. For Example:- 192.168.31.51.
 Info:
Info:When selecting the subnet mask, ensure that the IP address entered falls within the subnet mask. The IP address must be in the subnet mask range. If the subnet is not within the mask, an error will appear as shown in the image while saving.

-
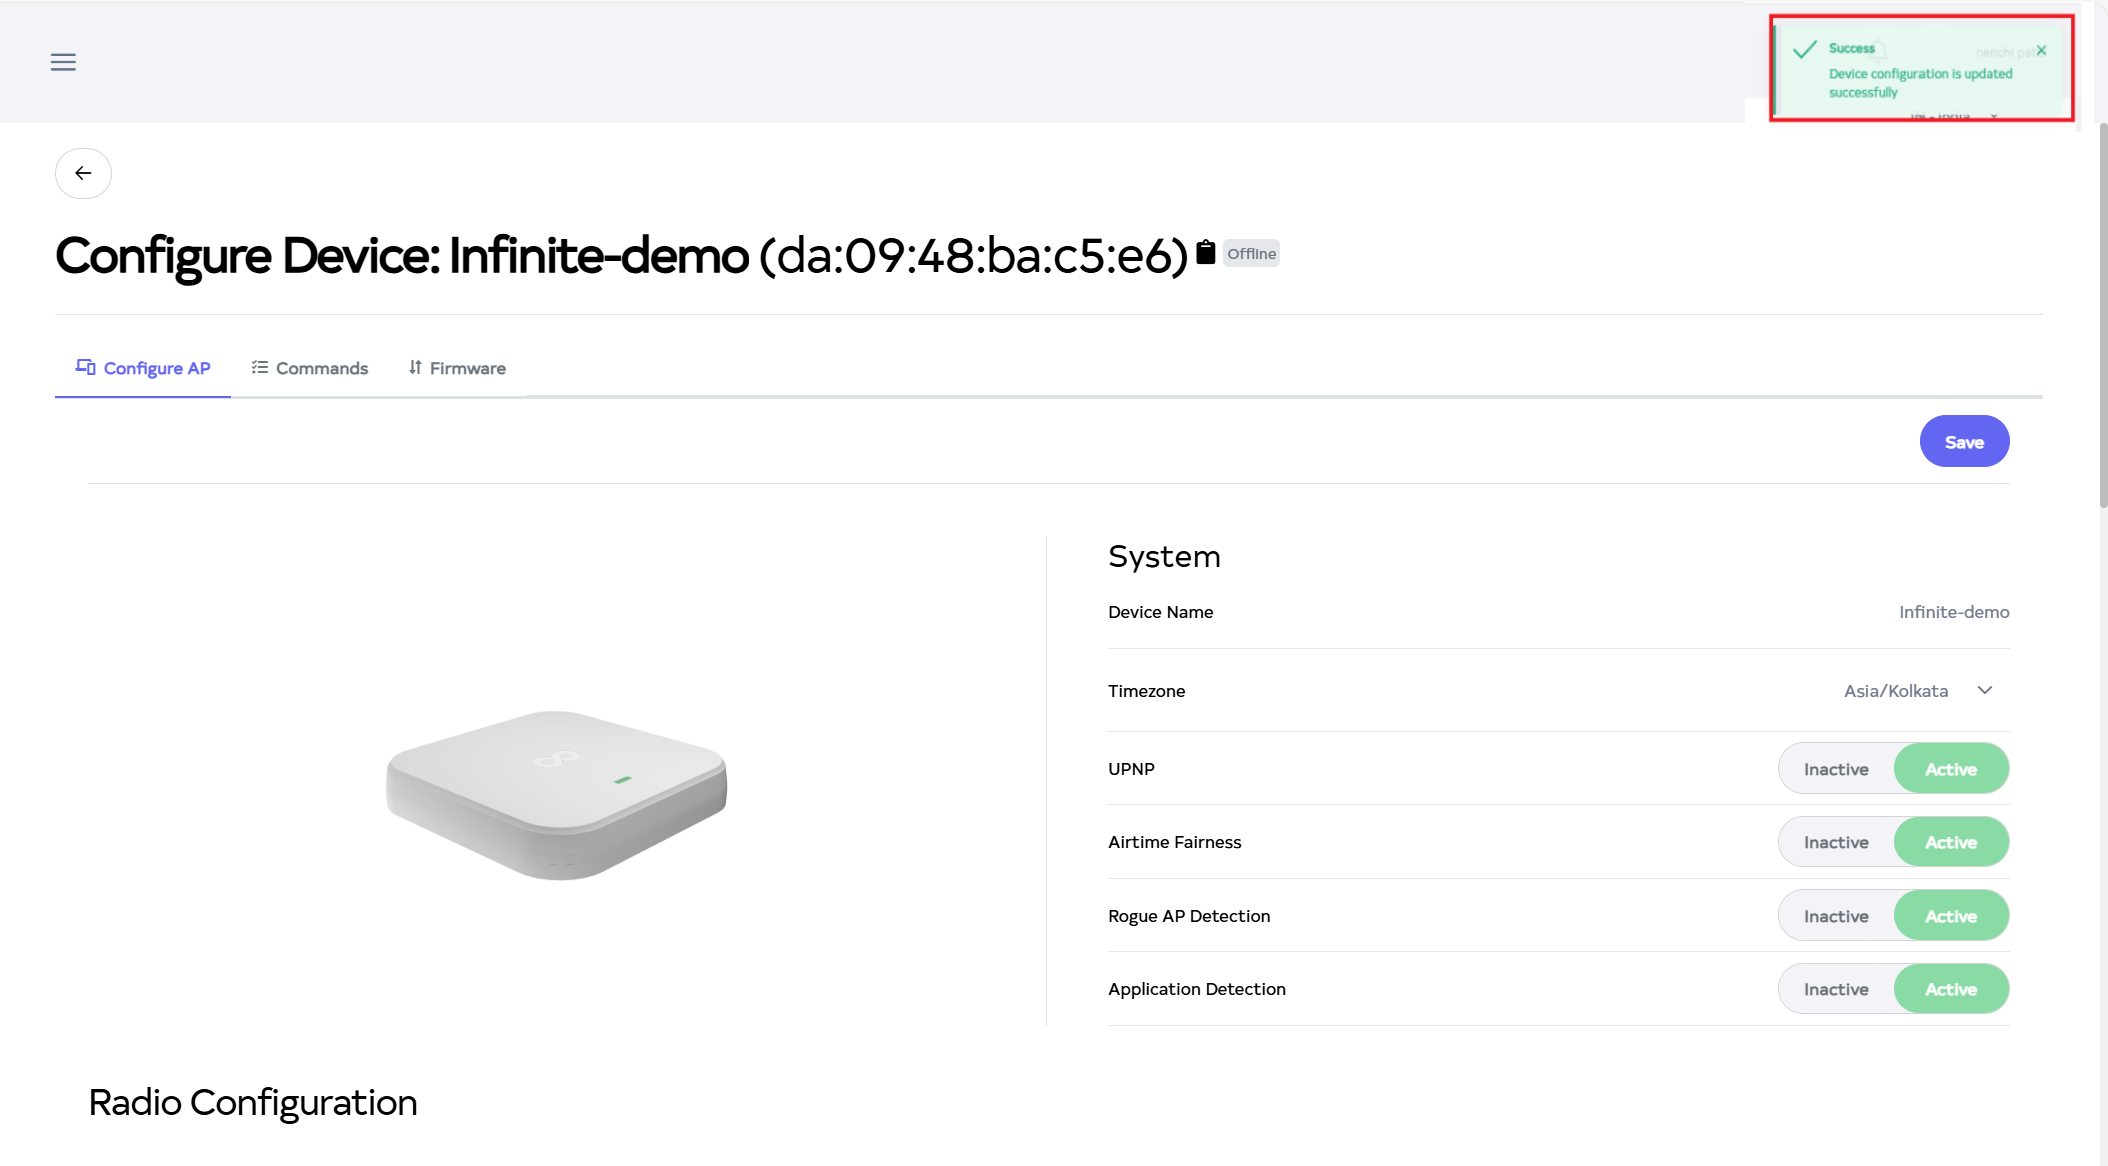
After click on Save button, located right side on top.
-
After the Static Routes Section is saved successfully, a success message will display Device config is update successfully.
After all these processes are done, the request of the access point will be received by the target point.